
After the user has set up the Linux environment, the first thing that is convenient for the user is being able to set up the keymap according to the user’s ease of access. Linux environment comes with a default key mapping which can be modified as per user’s ease.
To map the keys, the user can use the “xmodmap” command. With the help of this command, the user can remap specific keys on the keyboard, which is helpful for creating a customized and perfect keyboard layout instead of opting for the default Linux distribution.
This command can also be used for mapping certain functionalities to some keys that may not have been used otherwise like adding accent letters or map broken keys.
This article contains two methods to modify keymaps:
Let’s start with the basic method and learn to change keyboard mapping using xmodmap through a step-by-step guide.
Contents
How to change keyboard mapping using xmodmap?
The “xmodmap” is a command line utility used for modifying and mapping keys in Xorg.
How to get the Default(Current) keymap table?
The user can have a look at the current keymap using the following command:
The keymap table will show up as:
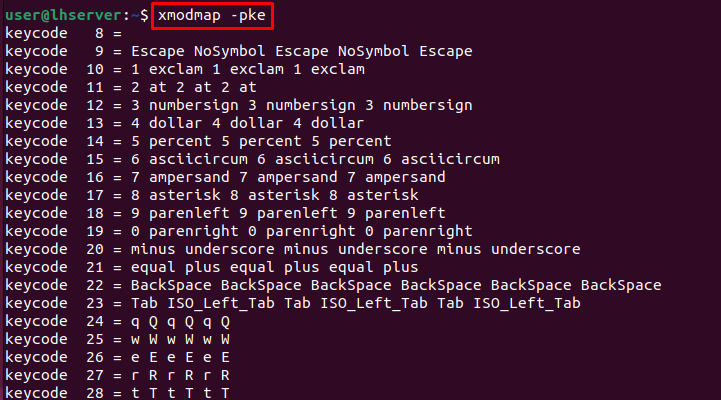
This table shows the key mapping and all possible combinations for every keyboard key functionality. Let’s understand what each row corresponds to and how can we alter these keymaps.
KeyCode and Key Mapping Explained
Each keycode corresponds to a keysym it is mapped to. In the above key mapping, take an example of keycode 25 being mapped to lowercase w, while uppercase W is mapped to keycode 25 plus shift.
Each column corresponds to a set of combinations:
- Key
- Shift+key
- Mode_shift+key
- Mode_shift+Shift+key
- ISO_Level3_Shift+key
- ISO_Level3_Shift+Shift+key
Alright, once understood clearly, let’s move forward and jump straight to the practical work of altering keymaps using xmodmap.
How to Modify keymap using xmodmap?
To modify the keymap use the “~/.Xmodmap” command. Follow the steps below for modifying the keymap.
Step 1: Copy of current mappings
Copy the current mappings to the file named “.Xmodmap” in the HOME directory:
xmodmap -pke > ~/.Xmodmap
Step 2: Edit “~/.Xmodmap” file
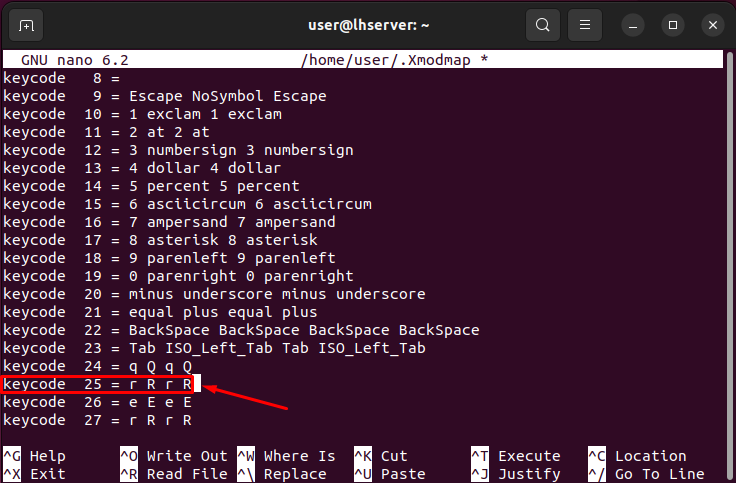
Once it is copied, open up the file in the “nano” editor using the command:
The “~/.Xmodmap” file will be opened and contains default mapping:

Step 3: Change the key mapping of the desired key
The user can change the default key mapping and map out the keys according to their aptitude. For example, in the below screen, the key mapping for keycode 25 has been changed from ‘w W w W’ to ‘r R r R’:
Step 4: Save the changes
To ensure the changes, execute the following command to load the configuration into “xmodmap”.
Step 5: Update the “~/.bashrc” file
In order to keep the configuration changes whenever the terminal/shell is started, append the above-executed command at the end of the “~/.bashrc” file using the command:
echo xmodmap ~/.Xmodmap >> ~/.bashrc
Step 6: Verify Keymapping
To witness the changes made again run the command:
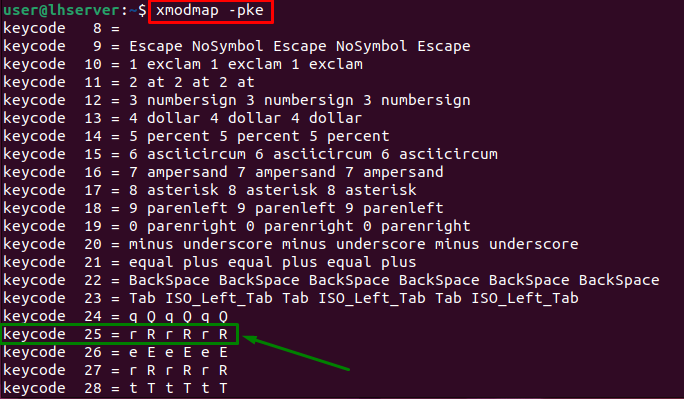
It can be seen in the above screen that key mapping for keycode 25 has been changed effectively.
This is all to modify the keymap using the xmodmap. Let’s dive into learning how to change keymapping using xkeycaps.
How to change keyboard mapping using xkeycaps?
The “xkeycaps” is a graphical interface for changing the keymapping of the keyboard(aka graphical front-end to xmodmap). This package doesn’t come pre-installed; so, we need to install it first.
Prerequisite: Installation of xkeycaps in Linux
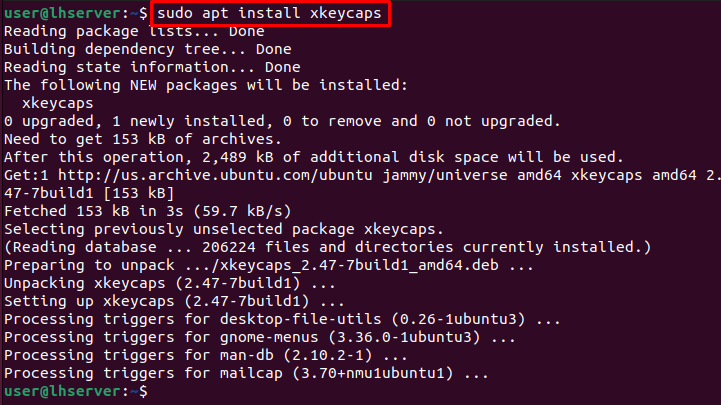
To install “xkeycaps” execute the command typed below:
sudo apt install xkeycaps
Step 1: Search and Open xkeycaps
After installation, Search for the “xkeycaps” and open the application.

The first interface would look like this.
Step 2: Select Keyboard and Layout
You can choose the Keyboard and layout as per your need:
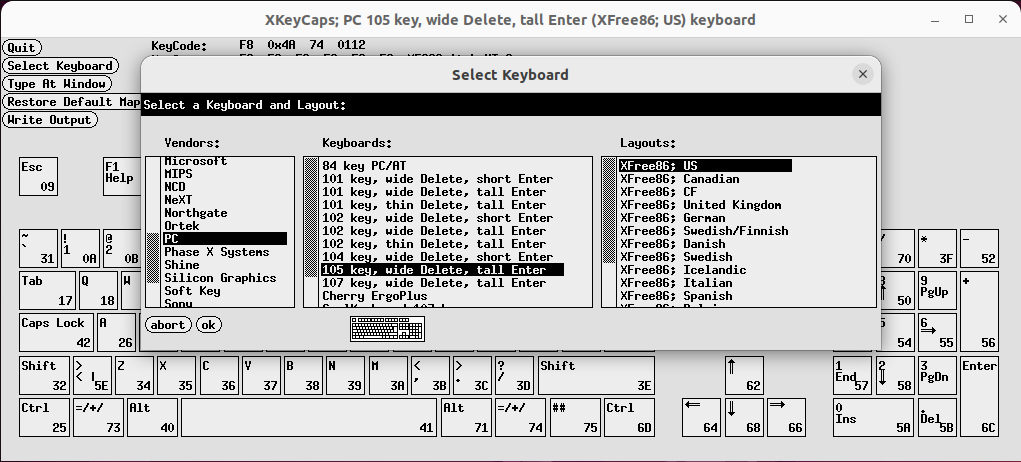
and select “ok”.
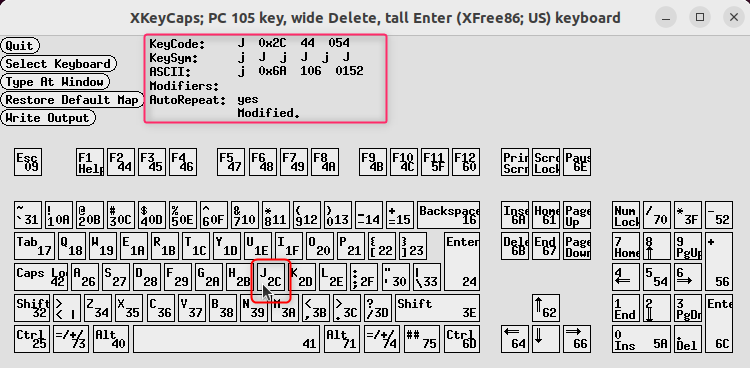
You will notice that by hovering over the key; KeyCode, KeySym, and ASCII code are displayed in detail(as highlighted in the above screenshot).
Step 3: Edit KeySym of the Key
To change/modify any KeySym, keep holding “right-click” on that specific key, and a context menu will appear.
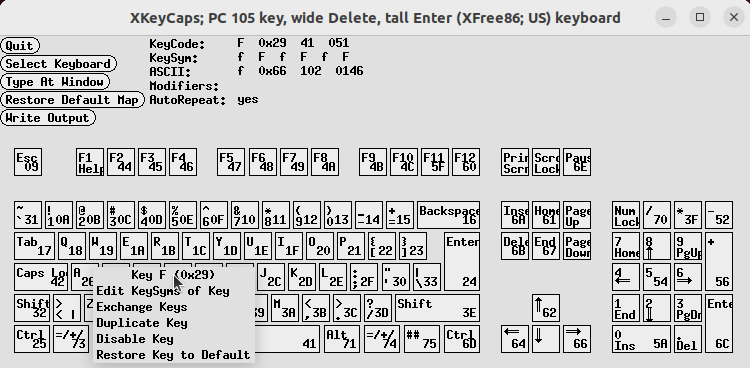
From the displayed menu, you can perform several tasks like Edit, Exchange, Duplicate, Disable, and restore keys.
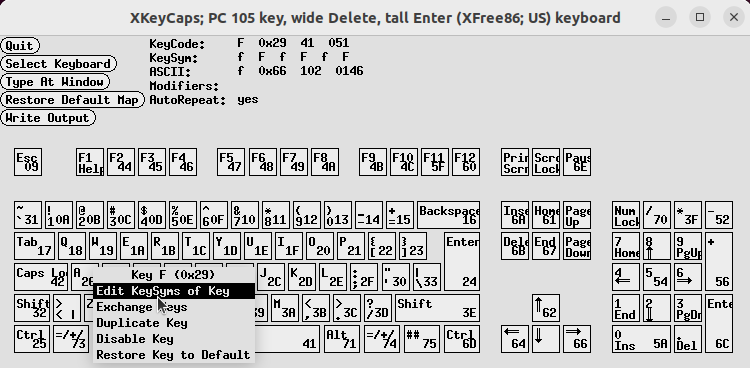
Now, move down to the menu(do not release right-click) and select “Edit KeySyms of Key” by releasing the “right-click” button of your mouse.
Step 4: Select Character Set and KeySym of Selected KeyCode
A new pop-up window will appear from where you can choose the character set and KeySym of the selected KeyCode, as demonstrated in the GIF below:
Once all is done, select “ok” to save changes.
That’s all about changing the keymaps using xkeycaps(graphical interface to xmodmap).
Conclusion
Customizing your Linux keymap using the xmodmap command offers a personalized and user-friendly keyboard layout. The step-by-step procedure can help set up the desired keymap as per user choice. This article explains the complete procedure to modify key mapping. It has also highlighted the use of the “$HOME/.bashrc” command that ensures a consistent experience across all terminals in a Linux environment.