Linux comes with a CIFS-Utils package, which is used to mount and manage cross-platform files and printers over the local network using CIFS protocols. The mount.cifs is a part of the Linux CIFS-Utils package.
In this tutorial, I will be exploring how to use the Linux mount.cifs utility to mount the shared folder on Linux.
Note: The CIFS protocol has been replaced with the latest and more secure SMB2 and SMB3 protocols. On Windows, it is disabled by default; however, it can be enabled from the Turn Windows features on or off option.
Contents
Installing CIFS Utilities Package on Linux
To use the mount.cifs on Linux, first, its utilities package needs to be installed.
To install it on Ubuntu, its flavors, and Debian-based distributions.
sudo apt install cifs-utils
On CentOS and Fedora distributions, the dnf package manager will be used.
sudo dnf install cifs-utils
Run the below command to install cifs-utils on Red Hat (RHEL) and Red Had-based distributions.
sudo yum install cifs-utils
Note: The cifs-utils package is available for all Linux distributions. But for the instructions in this guide, I am using Ubuntu 22.04. Commands used in this guide would work without any error, irrespective of the distribution.
Moreover, in the following example, a shared folder is mounted from Mac to Linux using the mount.cifs utility, however, the processes of mounting from Linux and Windows are the same.
Mounting a shared folder from a remote machine to Linux involves 2 steps.
1. Creating a Mount Point
The mount point refers to a directory on which the shared folder from a remote machine will be mounted and accessed. It can be created anywhere on the client’s system with any name. I am creating a mount point in the /mnt directory, which is a generic mount point to temporarily mount the file system on Linux.
I am creating another directory /ShareMac as the mount point in the /mnt using mkdir command with sudo privileges.
The mount point is created; the next step is mounting the shared folder from the remote machine to this mount point.
To mount a shared folder from macOS to Linux, the mount command is used with -t cifs option.
sudo mount -t cifs //<remote-IP>/<folder> /mnt/<folder> -o username=<username>
In the above command:
- -t cifs option is used to mount the shared folder using CIFS protocol
- <remote-IP> is the IP address of the remote machine (Mac)
- <folder> is the shared folder created on the remote machine (Mac)
- /mnt/<folder> is the mount point on the client machine (Linux) [It can be any directory]
- <username> is the username of the remote system
Let’s mount the MyFolder folder from the remote machine to the Linux mount point /mnt/ShareMac.
sudo mount -t cifs //192.168.18.133/MyFolder /mnt/ShareMac -o username=sam
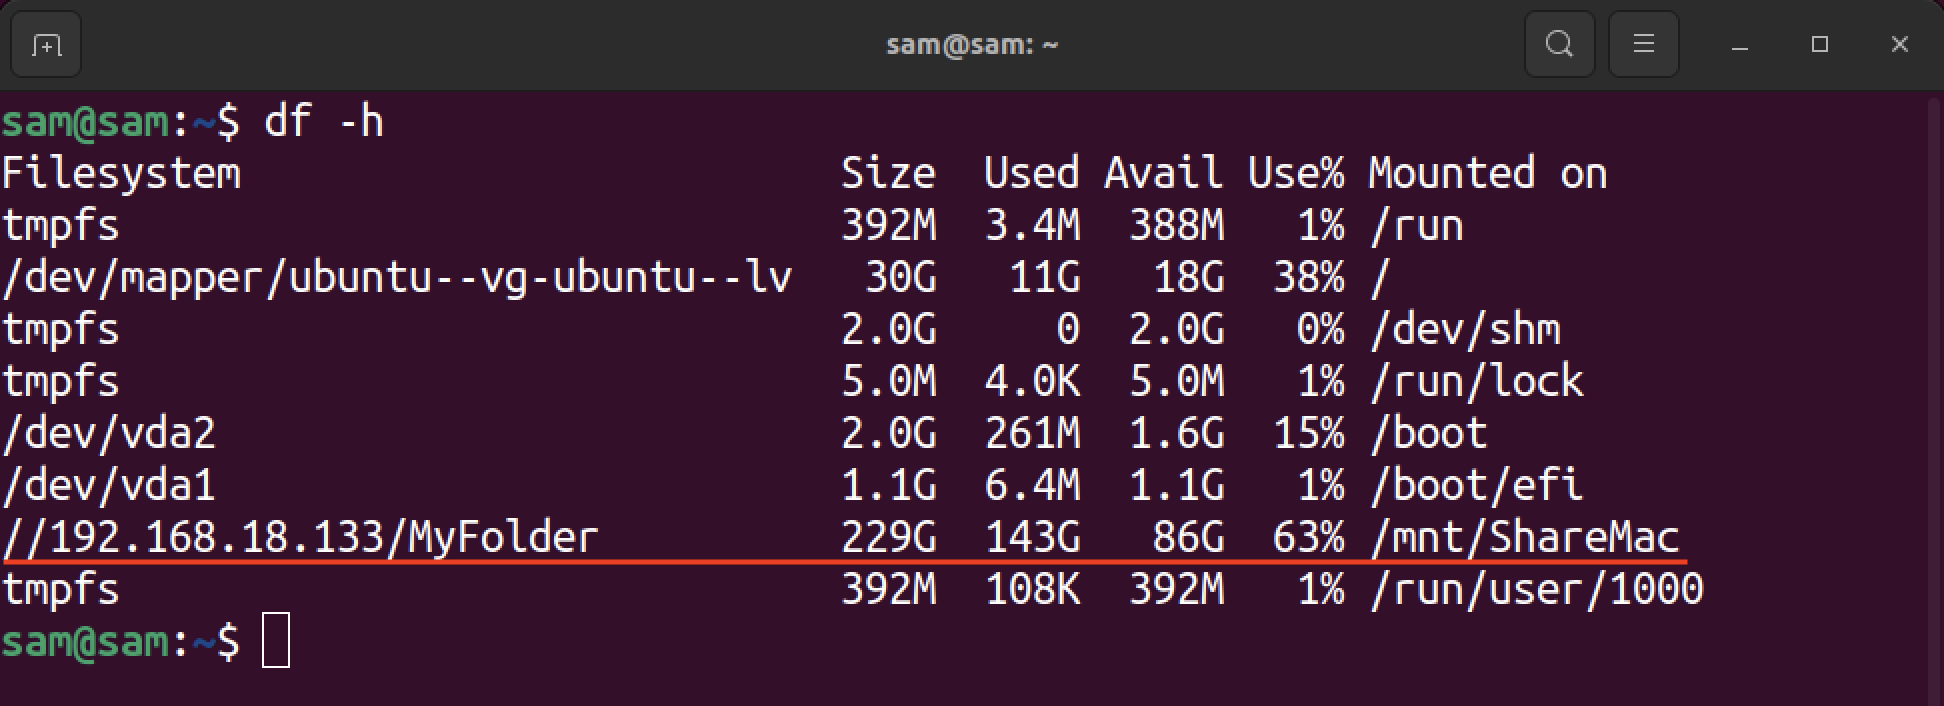
The password for the user sam will be asked for when you execute the above command. The shared folder MyFolder will be mounted on the /mnt/ShareMac mounting point on Linux. However, you will not get any output saying that the mounting has successfully been done. Use df -h to check the mounted folder.
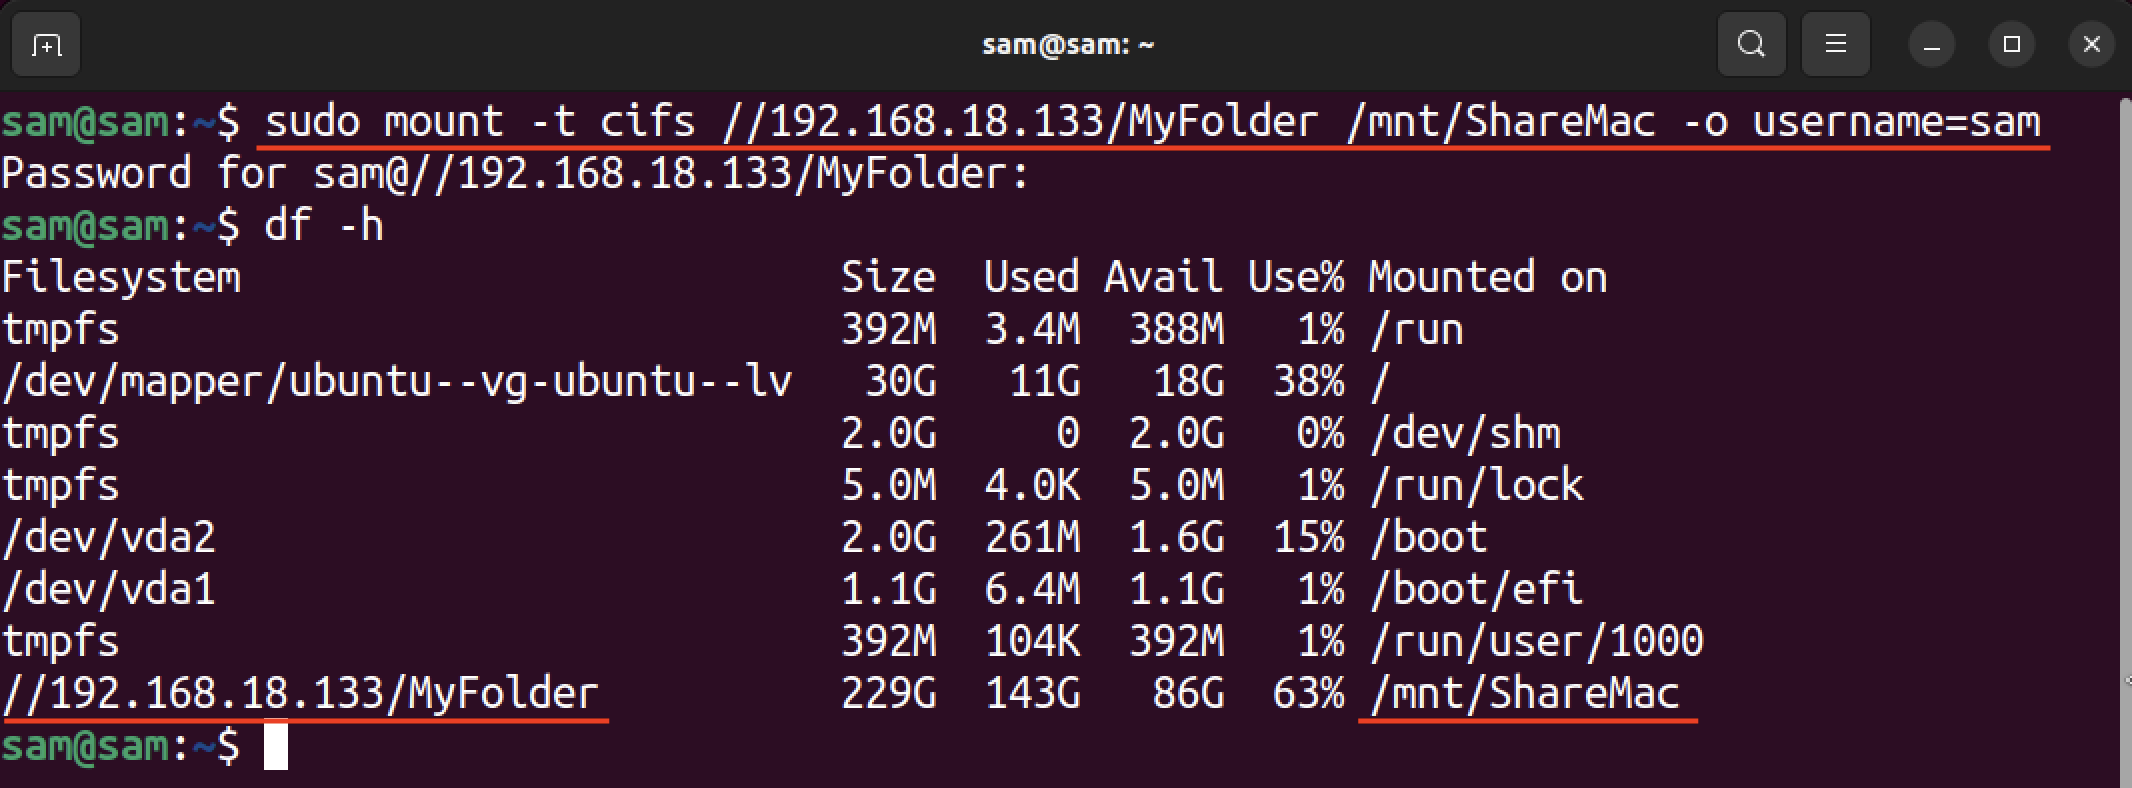
The folder (MyFolder) has been successfully mounted on Linux. Note that the instructions mentioned to create a shared folder on Mac must be followed as given in the section Creating a Shared Folder on Mac below.
Using the credentials option of the mount.cifs utility is a secure way to mount the shared folder. In this method, you can save the login credentials in a file which can be passed through the command using the credentials option.
Firstly, create a file that stores the remote machine credentials in the /etc directory. The file can have any name, I’m giving it the credentials-file name.
sudo nano /etc/credentials-file
Insert the credentials:
password=<password>

Now, use the credentials option after -o with the file path.
sudo mount -t cifs //192.168.18.133/MyFolder /mnt/ShareMac -o credentials=/etc/credentials-file
On rebooting, the mounted folder will be unmounted, and you have to manually mount it again. If you want to automatically mount the shared folder even on boot, then follow the steps given below.
Alert: The following method assumes that the remote machine/server has a static IP.
To ensure that the shared file system is automatically mounted when the system boots, the fstab file on Linux will be modified.
Place the following line in the file.
//<remote-IP>/share-name /mnt/<folder> cifs credentials=/etc/credentials-file 0 0
Taking the example, given above the file will be modified in the following way.
//192.168.18.133/MyFolder /mnt/ShareMac cifs credentials=/etc/credentials-file 0 0
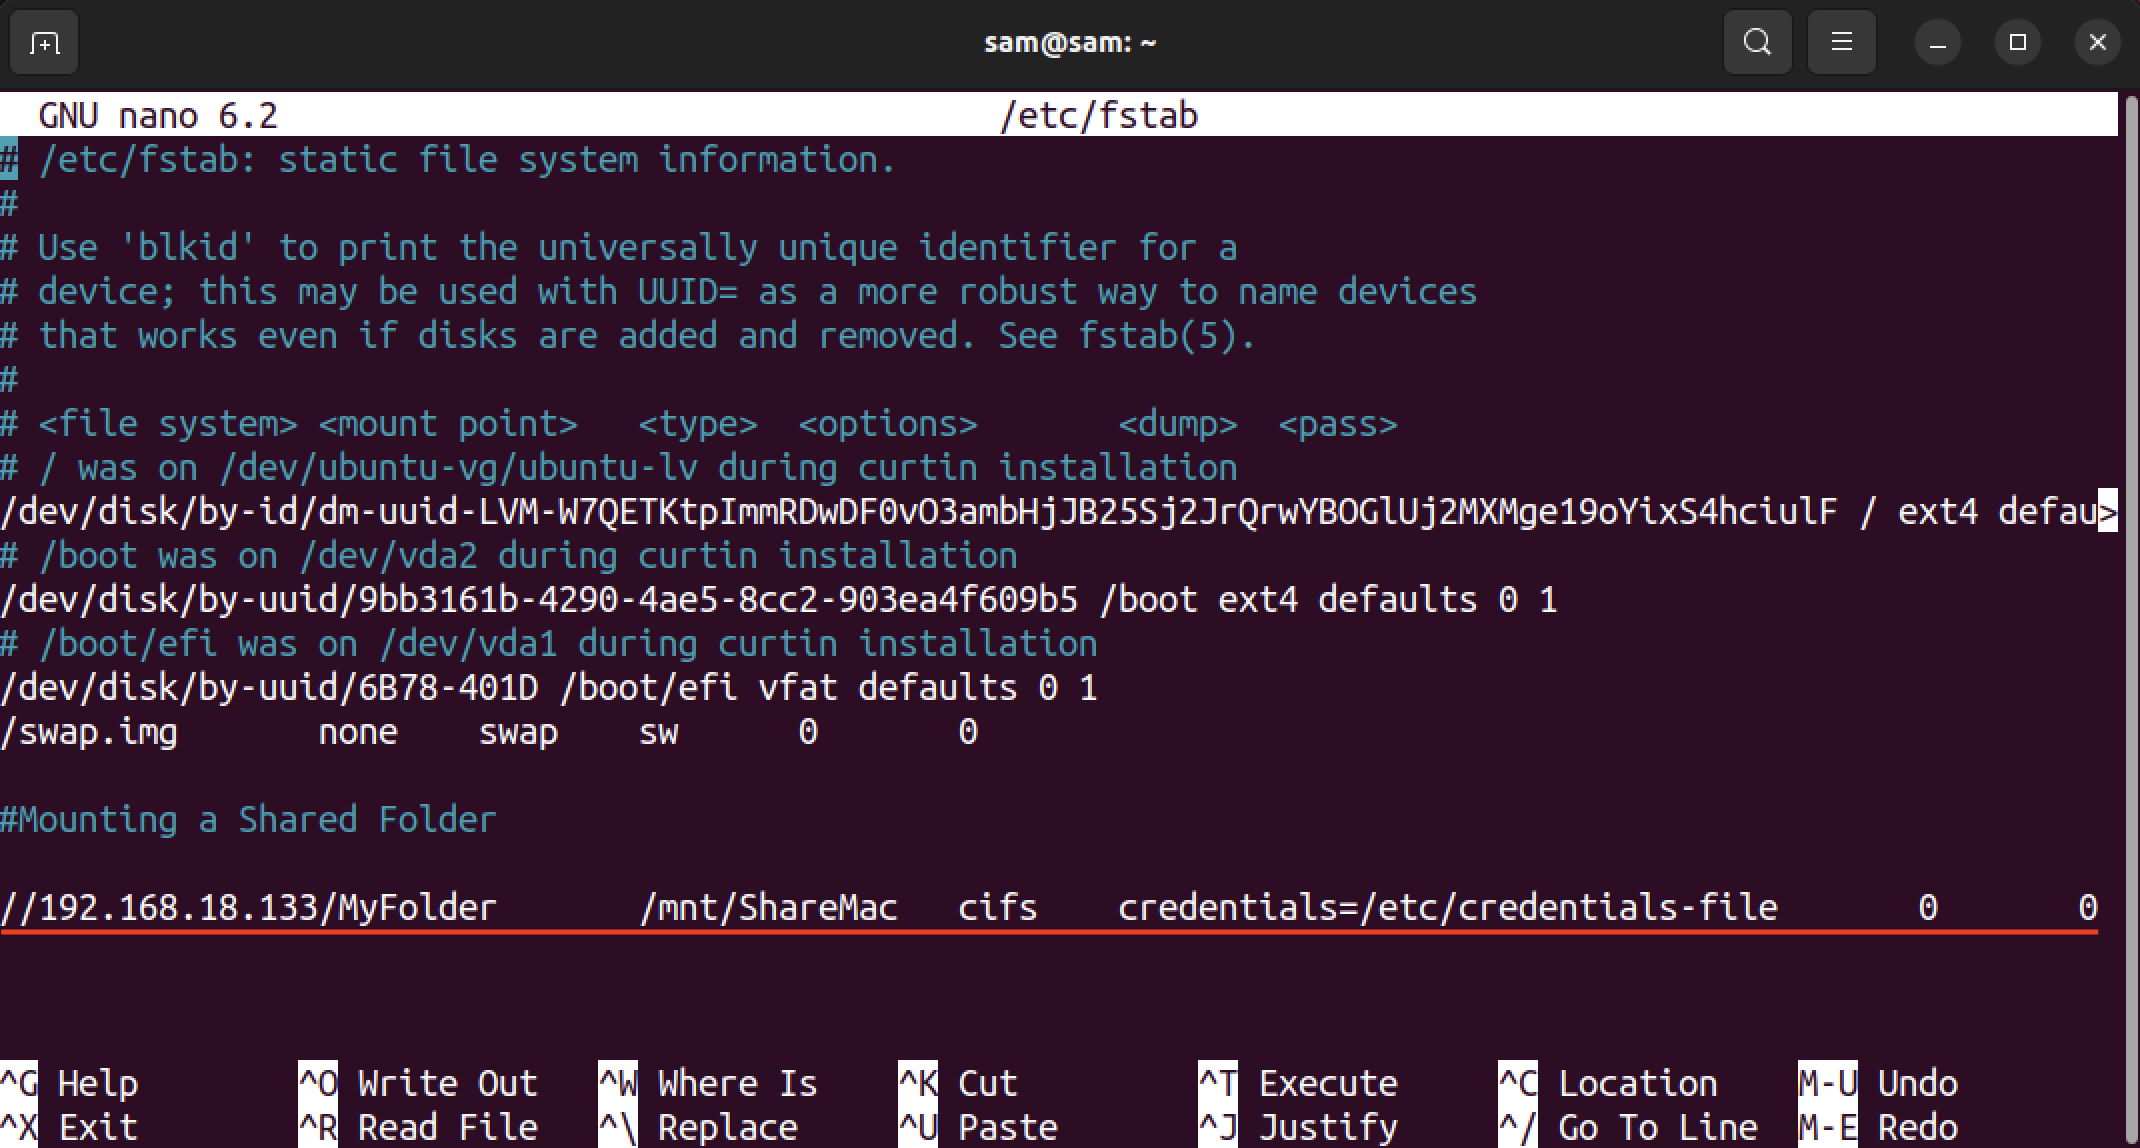
Note that on inserting the above instruction in the fstab file, separate each field using a tab instead of a space.
Now, close and save the fstab file by pressing ctrl+x.
To verify that mounting is error-free, use mount -a command.

If there is no error, it indicates that the shared folder has successfully been mounted.
After rebooting, the shared folder from the remote machine will automatically be mounted.
To unmount the shared folder, the umount command is used with the mount point.
sudo umount <mount-point>
In the above example, the mount point was /mnt/ShareMac, simply replace the <mount-point> with /mnt/ShareMac.
sudo umount /mnt/ShareMac
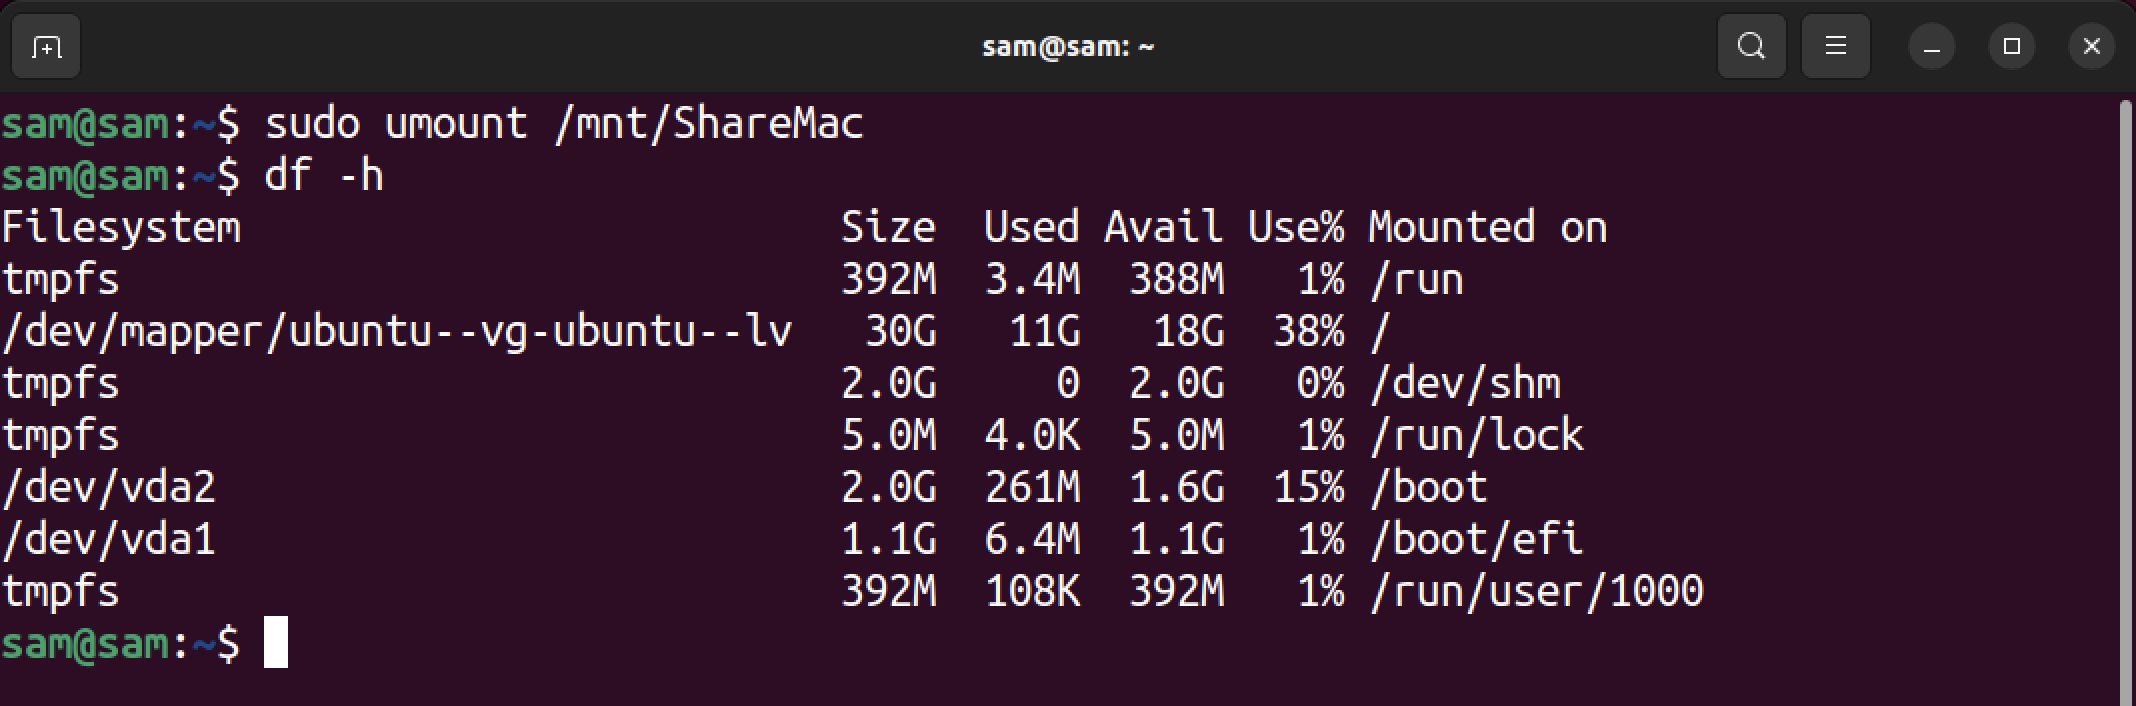
The above screenshot shows that the mounted file system has been unmounted.
To create a shared folder on Mac, there are several options to be enabled.
First, create a folder in any directory on your Mac.
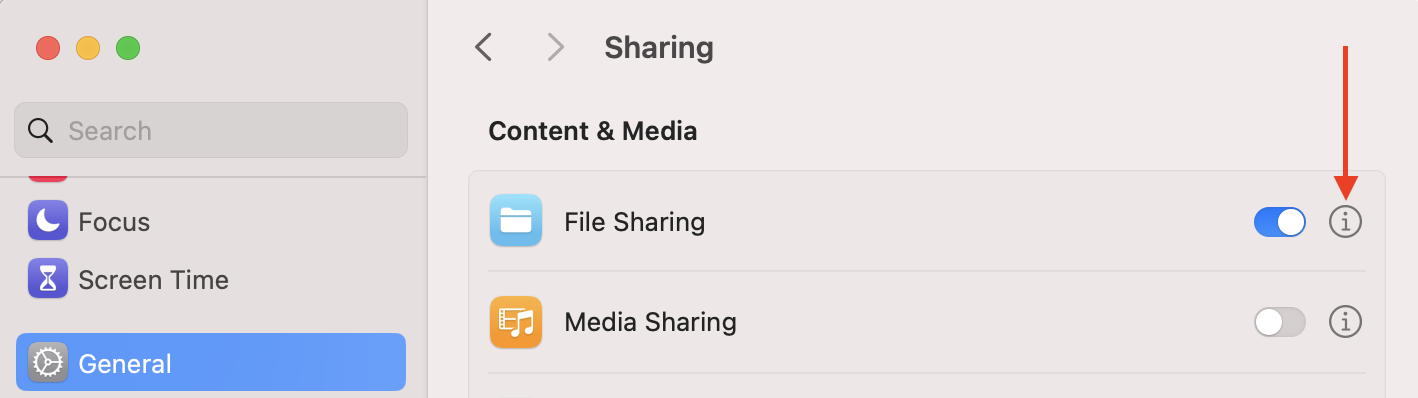
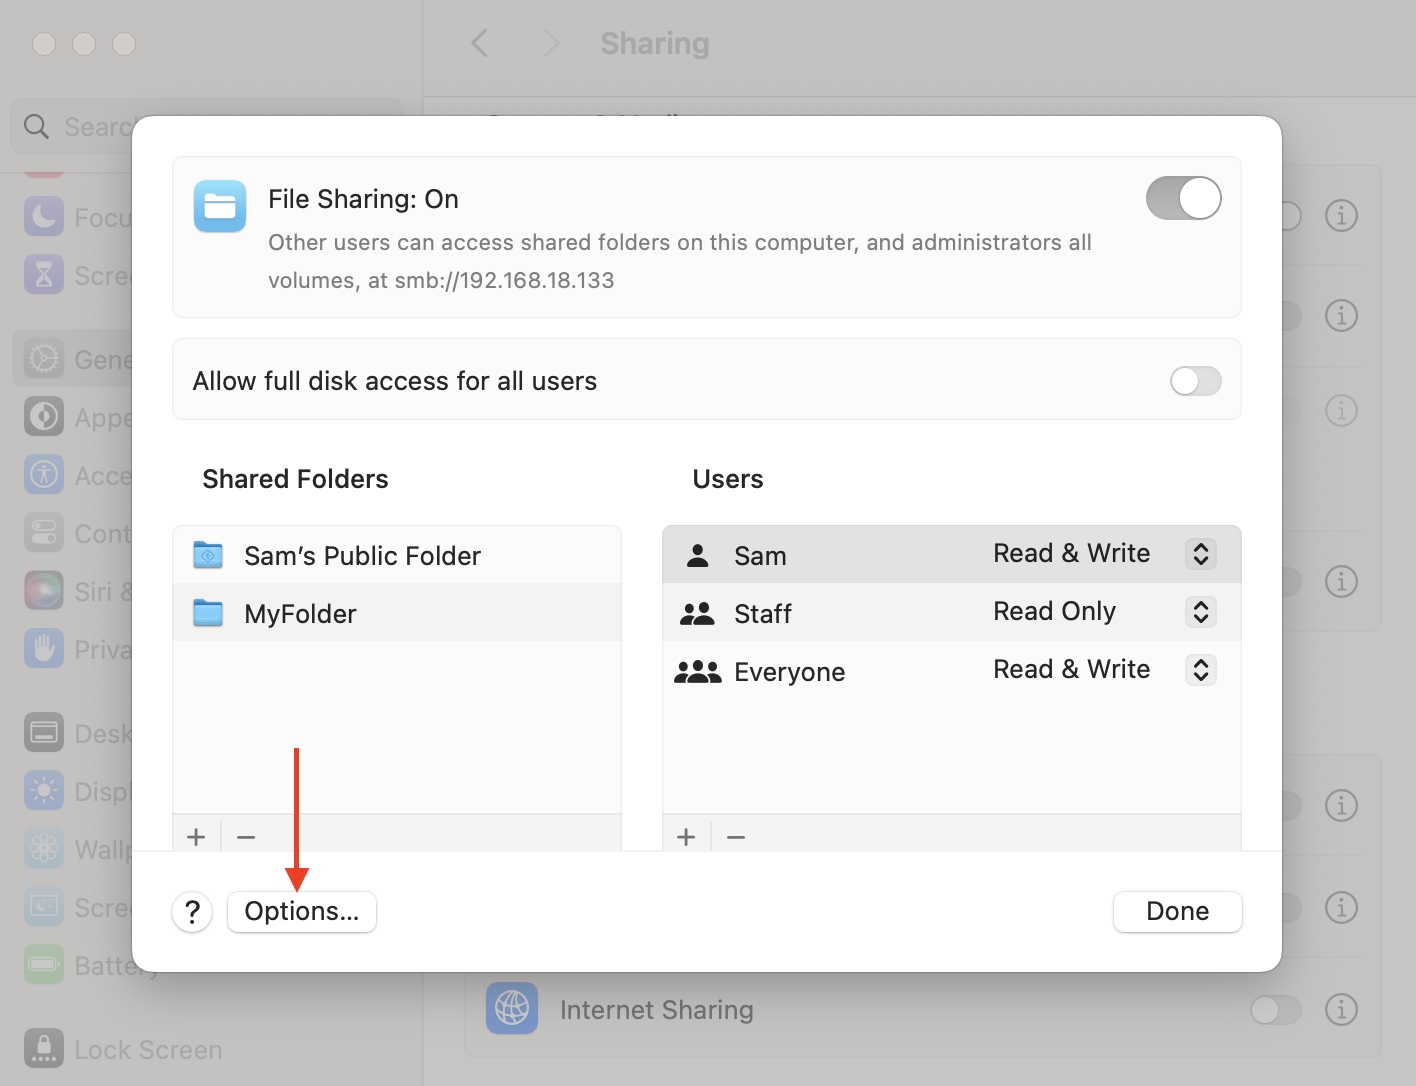
Then from System Settings, open Sharing in General. Enable the File Sharing by clicking on the toggle button.
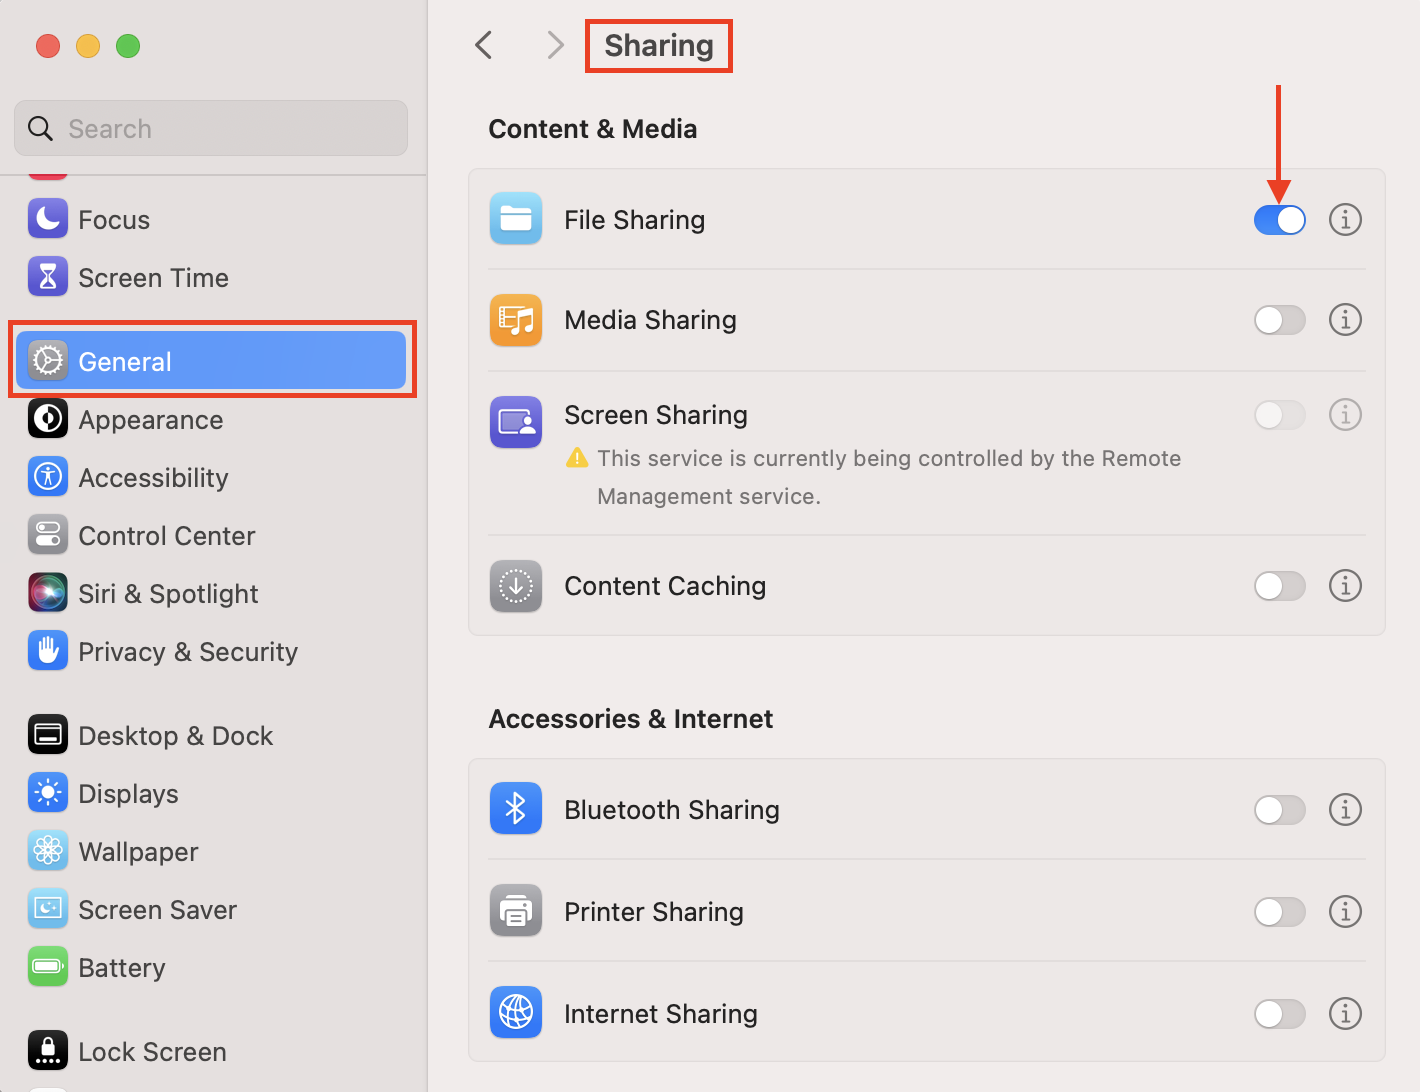
Click on the i icon beside the toggle button of File Sharing.
In the Shared Folder Section, click on the + icon to add a folder for sharing.
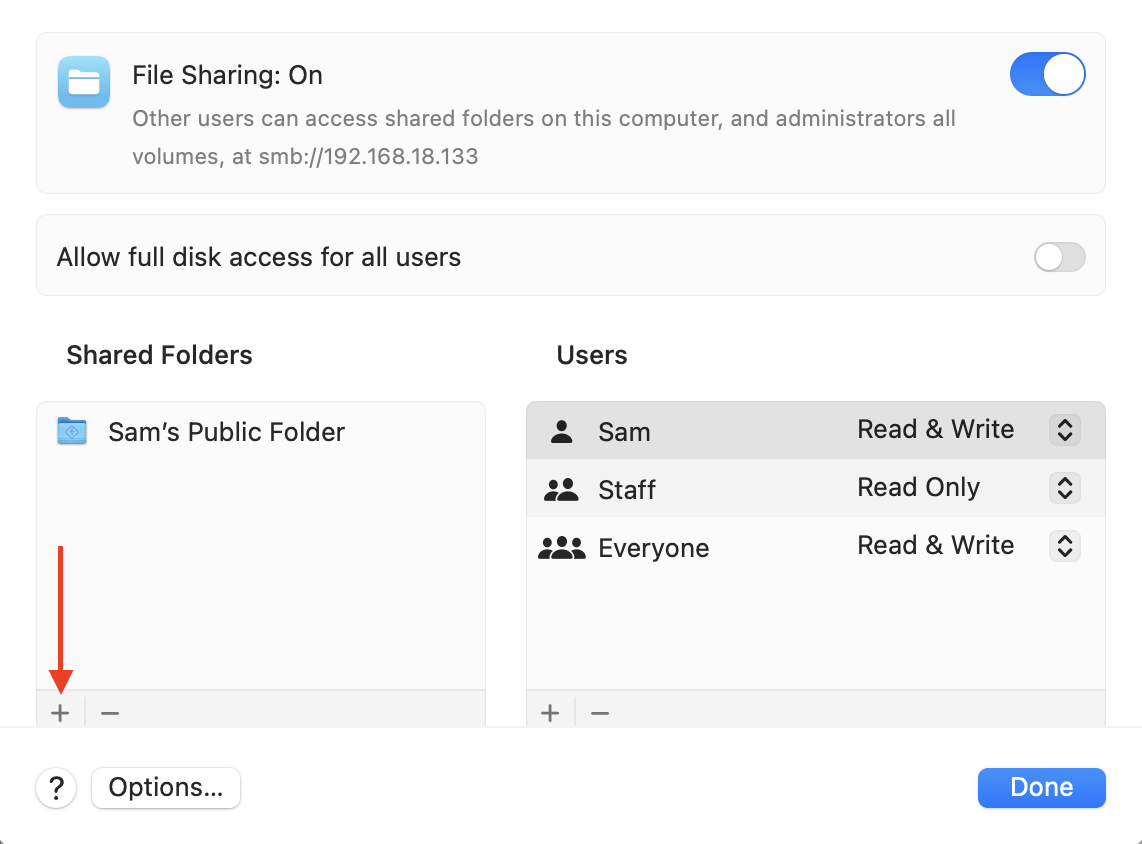
I have added the folder MyFolder I created in the Documents directory; however, it can be created anywhere on the system. Click on Options, another window will open.
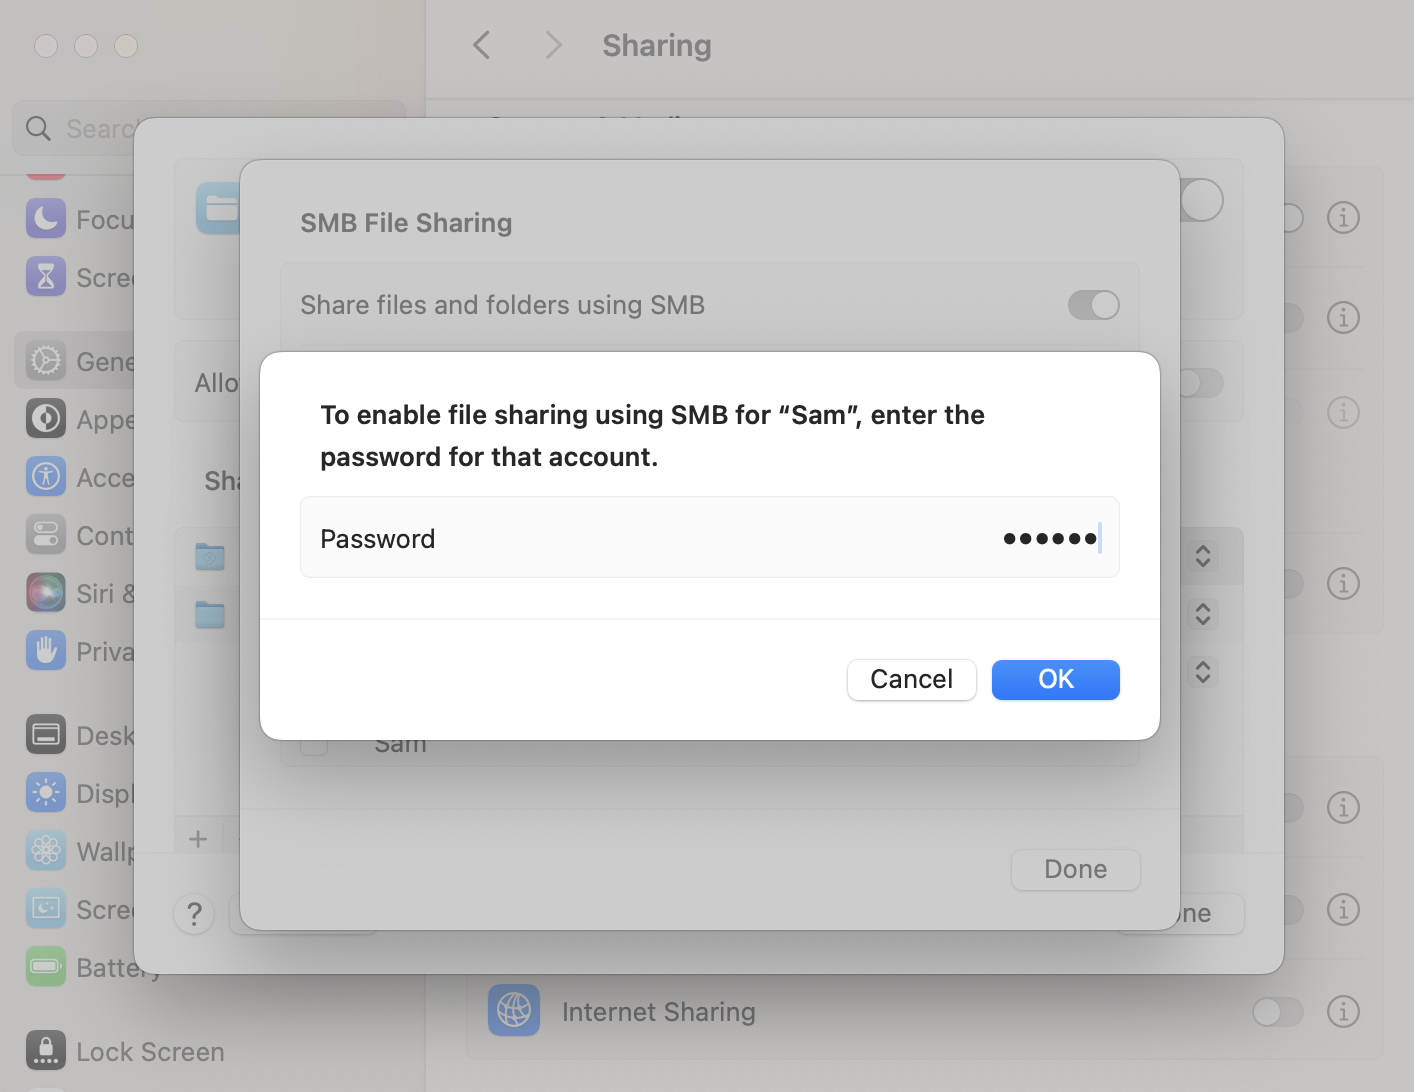
Enable Share files and folders using SMB, and also in the Windows File Sharing section enable the account by entering the password for the username.
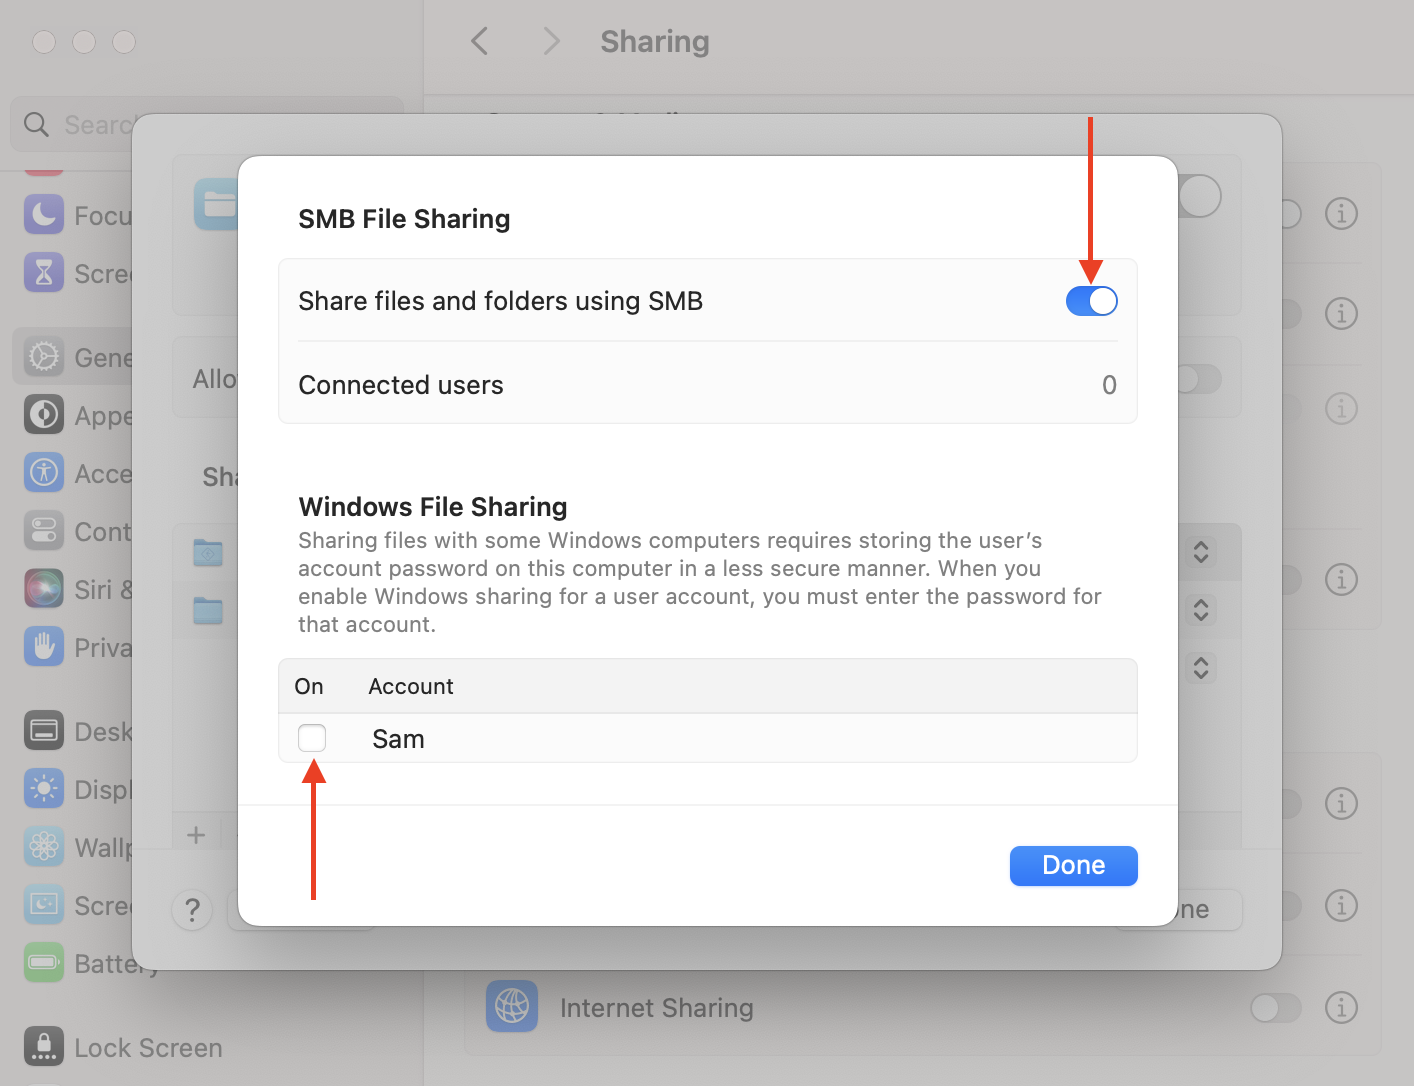
In my case, the user is sam and I will type the system password for user sam.
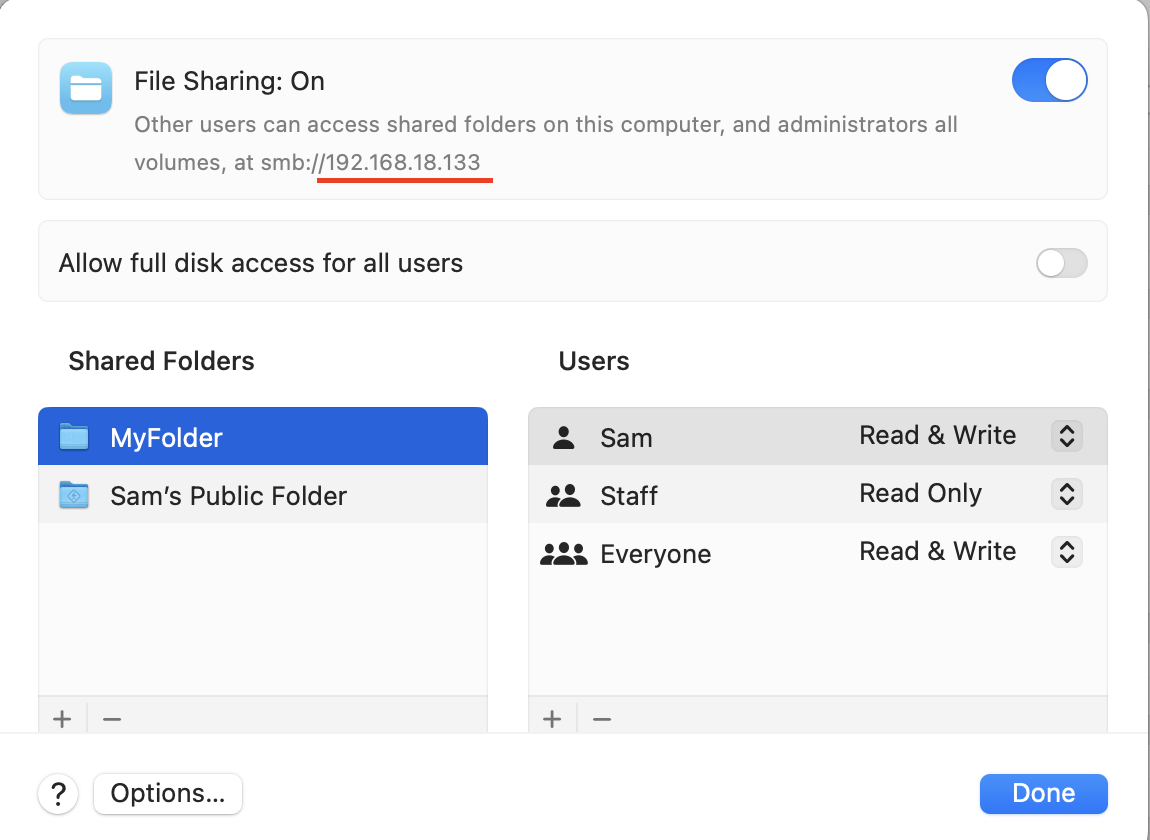
The folder is ready to share over the internet using the IP as shown in the image below.
Conclusion
The mount.cifs utility is used to mount the remote shared directory on the client side. To mount the shared directory, a mount directory must be created on the remote machine. The server administrator can make any directory shareable. To mount a shared folder from a remote machine to Linux involves two steps: creating a mount point on it and then mounting the shared folder. The mount command is used with the -t cifs option to mount a shared folder using CIFS.
It is important to note that the CIFS protocol is no longer acceptable due to security reasons and on all modern operating systems this protocol has been replaced with a more secure and efficient SMB3 protocol.