
However, there is a way that you can set it to show all commands and their timestamps. That way, if you are investigating a given case, you will quickly know which command is executed and at what time. Read on!
Contents
What Is the History Command
Linux is all about commands when you are working with the command line. Sometimes, you may want to view all your recent commands for whatever reason. Luckily, you can quickly access them using the “history” command.
Execute the following command on your terminal:
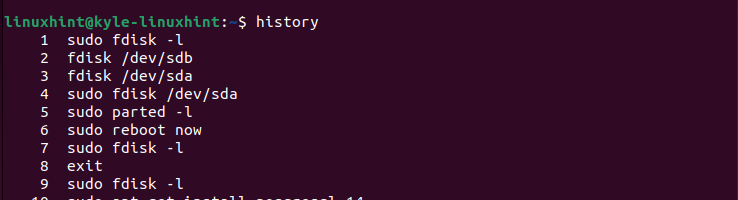
You will get an output showing all the recent commands that you executed on your system. Whether you execute a correct or incorrect command, you will see it listed in your output as shown in the following:
How to Use the Linux History Command with Timestamp
We’ve seen what the “history” command does. However, you might notice that based on the output that you get, there is no way you can know when a given command is executed. The default nature of the “history” command is that it lists all the recent commands but without a timestamp.
To get the timestamp for each command, you must modify the “history” command by exporting the HISTTIMEFORMAT environment variable. There are two ways in which you can go about it. First, you can export the variable to get the timestamp when using the “history” command temporarily. Alternatively, you can modify the “bashrc” file to permanently set the “history” command to give an output with a timestamp. Take a look!
Method 1: Temporarily Show the History Timestamp
When you want to quickly use the Linux “history” command and get the timestamp for the recent commands, you can temporarily export the HISTTIMEFORMAT environment variable. The changes you make are temporary and won’t persist when you reboot your system.
There are different timestamp formats that you can use to specify how you want the output to be. For instance, to show the date in YYYY-MM-DD format, add the %F and the %T to show the time in HH:MM:SS format.
For that, run the export command as follows:
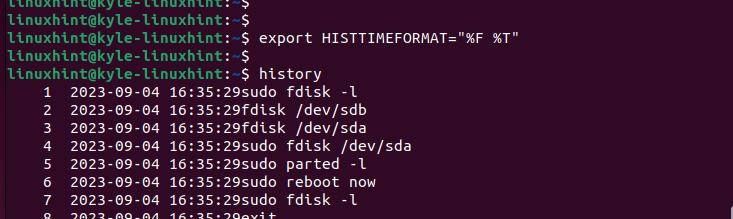
$ export HISTTIMEFORMAT=”%F %T”
When you run the “history” command again, you will notice that the output now has a timestamp next to each command. This way, monitoring your system becomes easier and more effective.
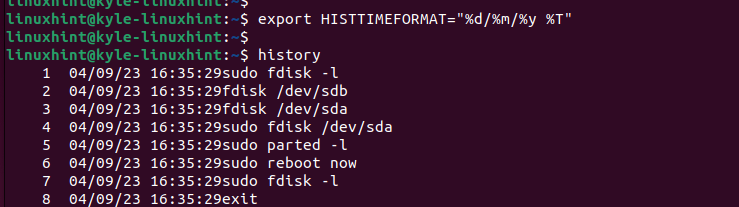
Suppose you want a different timestamp format. You can specify the format in your “export” command. For instance, if we want to get the DD/MM/YY format, our new command is as follows:
$ export HISTTIMEFORMAT=”%F %T”
When you rerun the “history” command, note how we managed to change the format of the timestamp in the output.
It’s that simple. However, remember that this modification is only temporary. If you want the “history” command to always give the timestamp, you must export the environment variable in the “.bashrc” file.
Method 2: Permanently Show the History Timestamp
Modifications made in the “.bashrc” file are permanent. So, if we want to make the “history” command print the timestamp in its output, the process is simple.
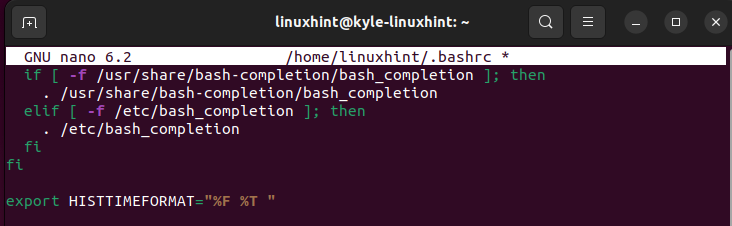
First, use a text editor and access the “.bashrc” file. We use the nano text editor for this case.
Once the file opens, scroll down to the bottom of the file and add the export command that you used earlier. Also, be sure to specify which timestamp format you want to use for the output. For our case, we have our “export” command as shown in the following image:
Ensure that you save and exit the file. To implement the changes, run the following command:
That’s it. Every time you run the “history” command, it shows the timestamp for each output.
Conclusion
The “history” command doesn’t show the timestamp by default. However, you can export the HISTTIMEFORMAT environment variable to get the timestamp for each output. We’ve seen the two methods that you can use. Have fun!