
In this article, we will show you how to install Alpine Linux on a VMware Workstation 17 Pro virtual machine. We will also show you how to enable the community package repository on Alpine Linux. We will show you how to enable sudo on Alpine Linux as well. Finally, we will show you how to install the VMware tools on Alpine Linux and enable the VMware Tools OpenRC service.
- Downloading the Alpine Linux ISO Image
- Creating a VMware Workstation 17 Pro Virtual Machine for Alpine Linux
- Attaching the Alpine Linux ISO Image to VMware Workstation Pro Virtual Machine
- Booting the Alpine Linux VMware Workstation Pro Virtual Machine
- Default Login Username of Alpine Linux Installer Image
- Installing Alpine Linux on the VMware Workstation Pro Virtual Machine
- Removing the CD/DVD Device from the Alpine VMware Workstation Virtual Machine
- First Look at Alpine Linux Running on VMware Workstation Pro Virtual Machine
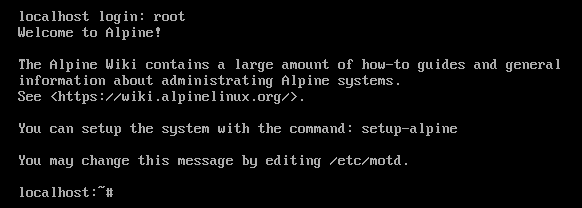
- Login into Apline Linux as Root
- Enabling the Community Package Repository on Alpine Linux
- Updating the Alpine Linux Package Repository Cache
- Enabling Sudo in Alpine Linux
- Installing the VMware Tools and VMware Video Drivers on Alpine Linux Virtual Machine
- Adding the Open-vm-tools Service to the System Startup of Alpine Linux
- Conclusion
- References
Contents
- 1 Downloading the Alpine Linux ISO Image
- 2 Creating a VMware Workstation 17 Pro Virtual Machine for Alpine Linux
- 3 Attaching the Alpine Linux ISO Image to VMware Workstation Pro Virtual Machine
- 4 Booting the Alpine Linux VMware Workstation Pro Virtual Machine
- 5 Default Login Username of Alpine Linux Installer Image
- 6 Installing Alpine Linux on the VMware Workstation Pro Virtual Machine
- 7 Removing the CD/DVD Device from the Alpine VMware Workstation Virtual Machine
- 8 First Look at Alpine Linux Running on VMware Workstation Pro Virtual Machine
- 9 Login into Apline Linux as Root
- 10 Enabling the Community Package Repository on Alpine Linux
- 11 Updating the Alpine Linux Package Repository Cache
- 12 Enabling Sudo in Alpine Linux
- 13 Installing the VMware Tools and VMware Video Drivers on Alpine Linux Virtual Machine
- 14 Adding the Open-vm-tools Service to the System Startup of Alpine Linux
- 15 Conclusion
- 16 References:
Downloading the Alpine Linux ISO Image
To download the ISO image of Alpine Linux, open the official Alpine Linux downloads page with your favorite web browser.
Once the page loads, click on x86_64 from the STANDARD section as marked in the following screenshot:

Your browser should start downloading the Alpine Linux Standard ISO image. It takes a while to complete.
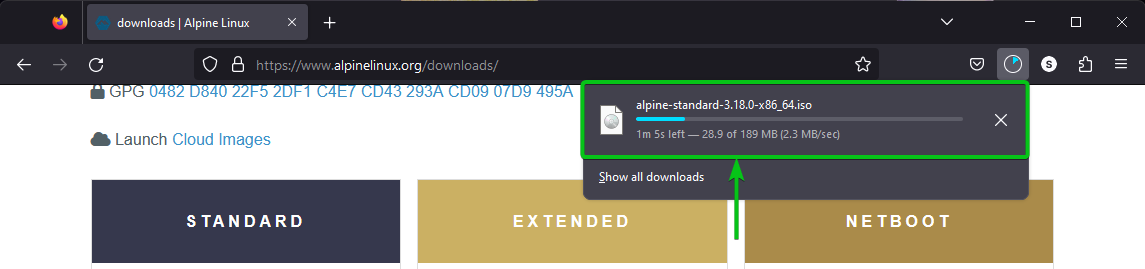
At this point, the Alpine Linux Standard ISO image should be downloaded.

Creating a VMware Workstation 17 Pro Virtual Machine for Alpine Linux
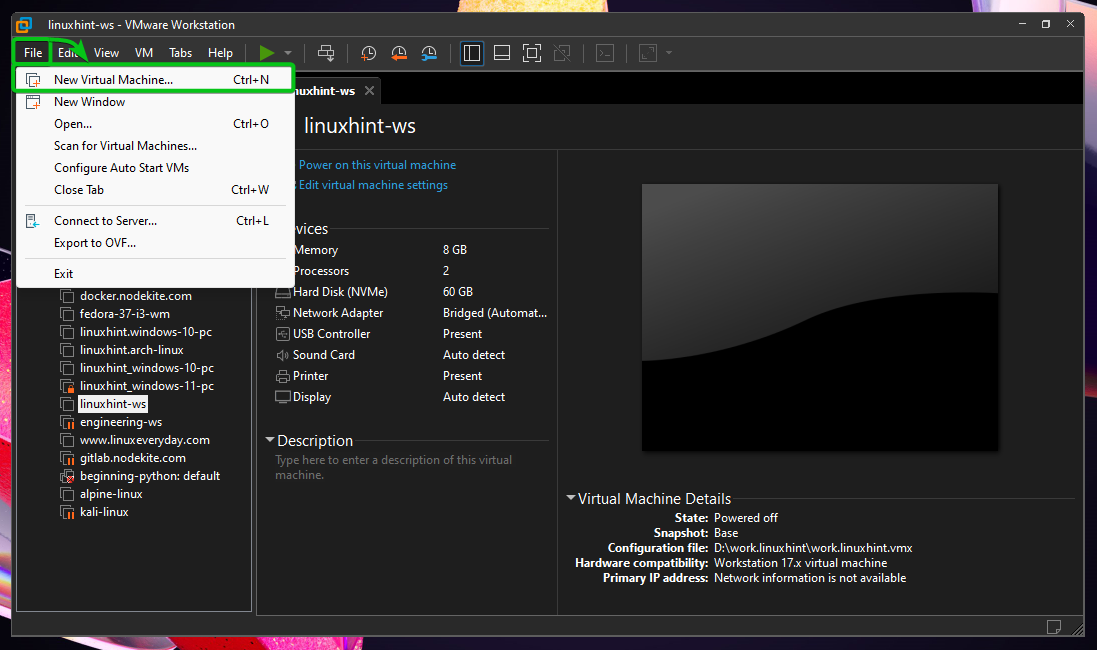
To create a new Alpine Linux VMware Workstation virtual machine, open the VMware Workstation 17 Pro and click on File > New Virtual Machine…
Click on “Next”.

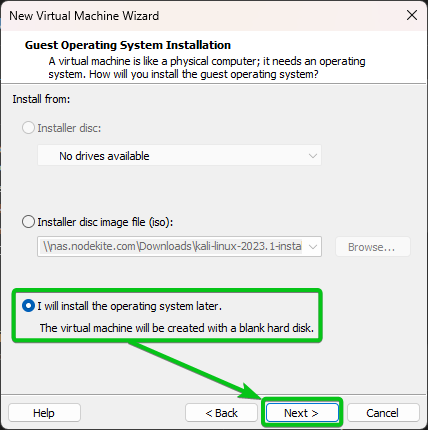
Select “I will install the operating system later” and click on “Next”.
Select “Linux” from the “Guest operating system” section[1] and “Other Linux 5.x kernel 64-bit” from the “Version” dropdown menu[2]. Once you’re done, click on “Next[3]”.

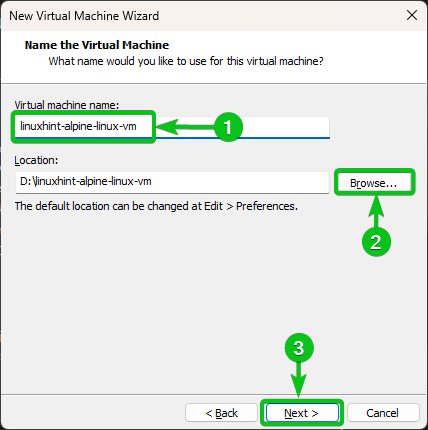
Type in a name for the Alpine Linux virtual machine[1].
The virtual machine will be stored in the default VMware Workstation 17 Pro virtual machine directory. If you want to store it somewhere else, click on “Browse…” and select the directory where you want to store the Alpine Linux virtual machine[2].
Once you’re done, click on “Next[3]”.
Type in the amount of disk space (in GB units) that you want to allocate to the Alpine Linux virtual machine in the “Maximum disk size (GB)” section[1].
You can store the virtual disk as a single file or split the virtual disk into multiple files[2]. The default one is okay most of the time.
Once you’re done, click on “Next[3]”.

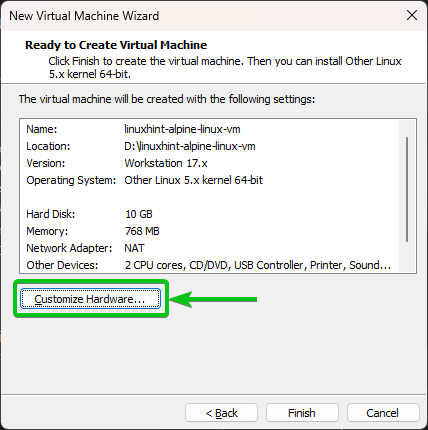
Click on “Customize Hardware…”
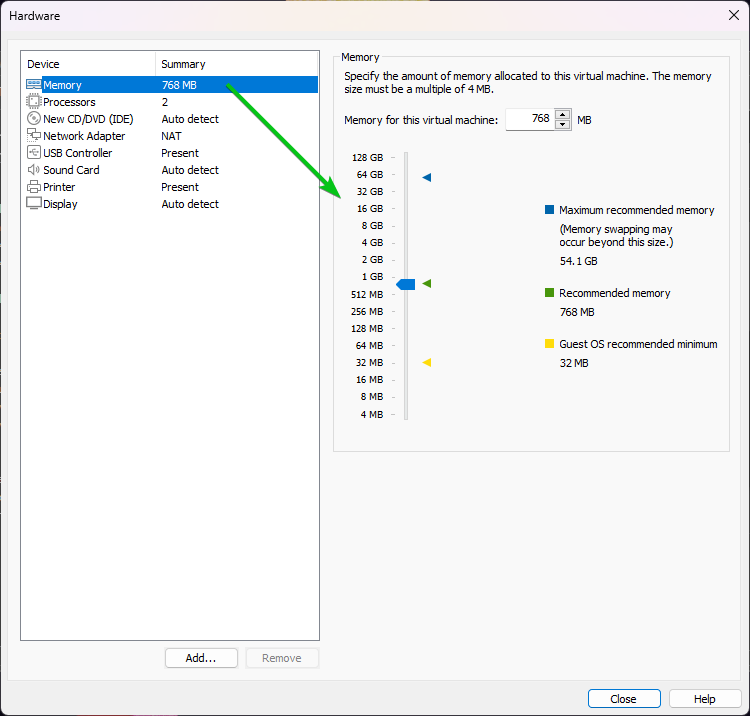
From the “Memory” section, you can specify the amount of memory that you want to allocate for the Alpine Linux virtual machine.
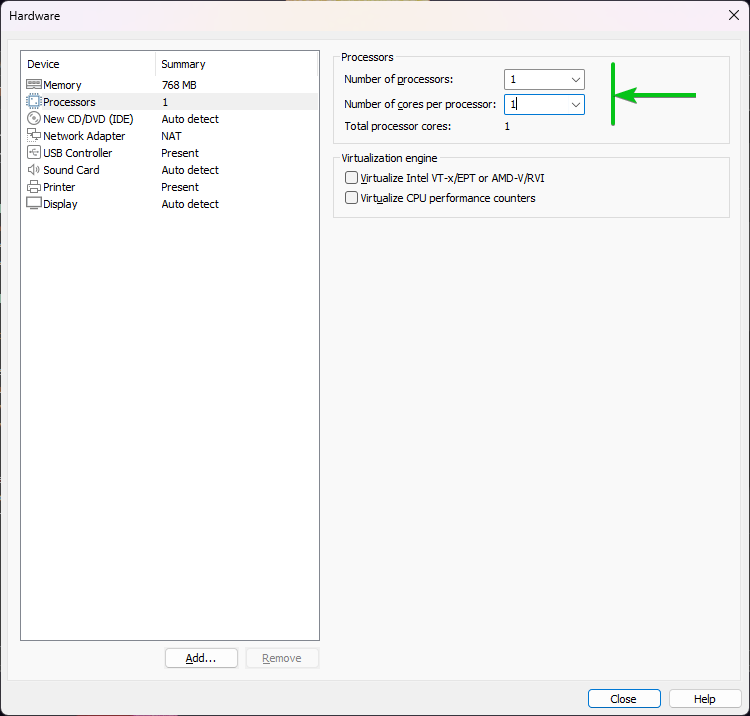
From the “Processors” section, you can select the number of processors (of your computer) that you want to allocate to the Alpine Linux virtual machine.
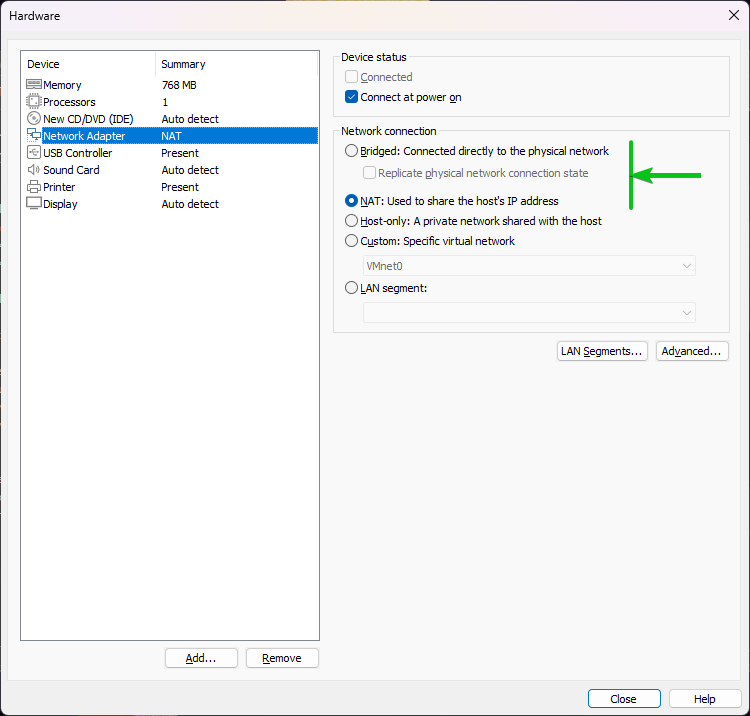
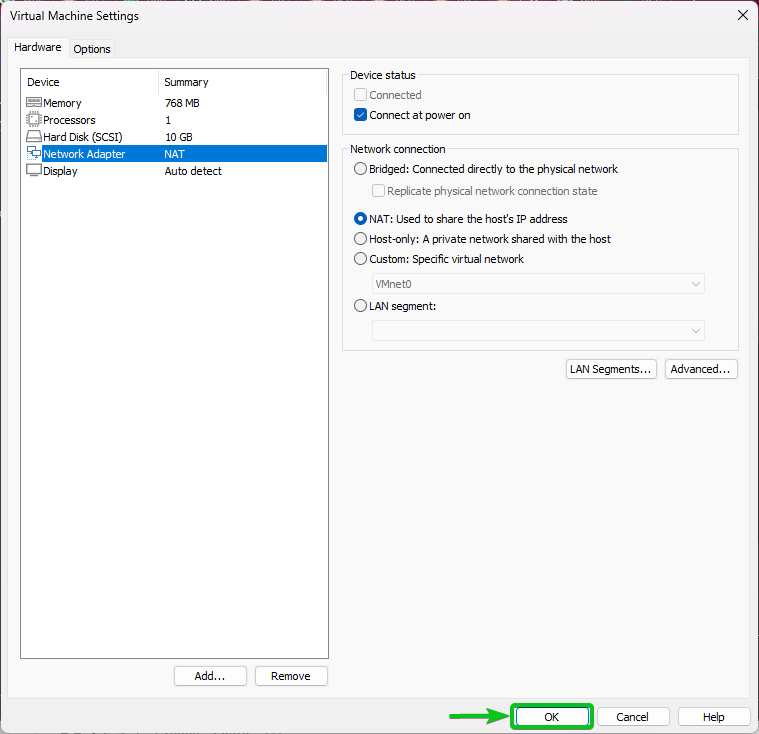
From the “Network Adapter” section, you can select between NAT (default) or Bridged network for the Alpine Linux virtual machine. You can also do advanced networking. Advanced networking on VMware Workstation 17 Pro is out of the scope of this article.
Most probably, you might decide to use Alpine Linux because it’s lightweight and want to keep it that way. So, removing unnecessary hardware from the Alpine Linux virtual machine might be something that you prefer.
You can remove the USB Controller, Sound Card, Printer, and the CD/DVD (once Alpine Linux is installed) hardware from the Alpine Linux virtual machine. This is optional.
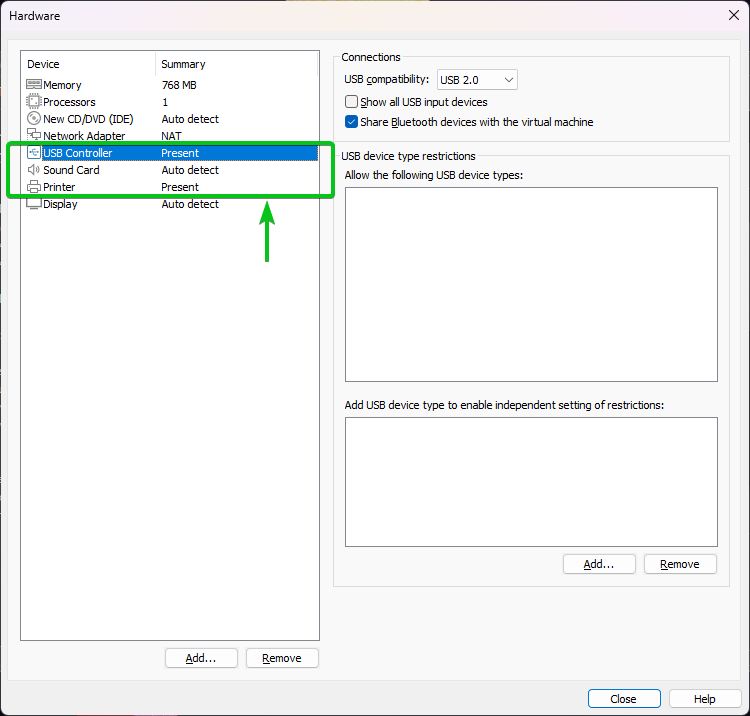
To remove a hardware from the Alpine Linux virtual machine, select it and click on “Remove” as marked in the following screenshot:

We removed the USB Controller, Sound Card, and Printer hardware from the Alpine Linux virtual machine for now.
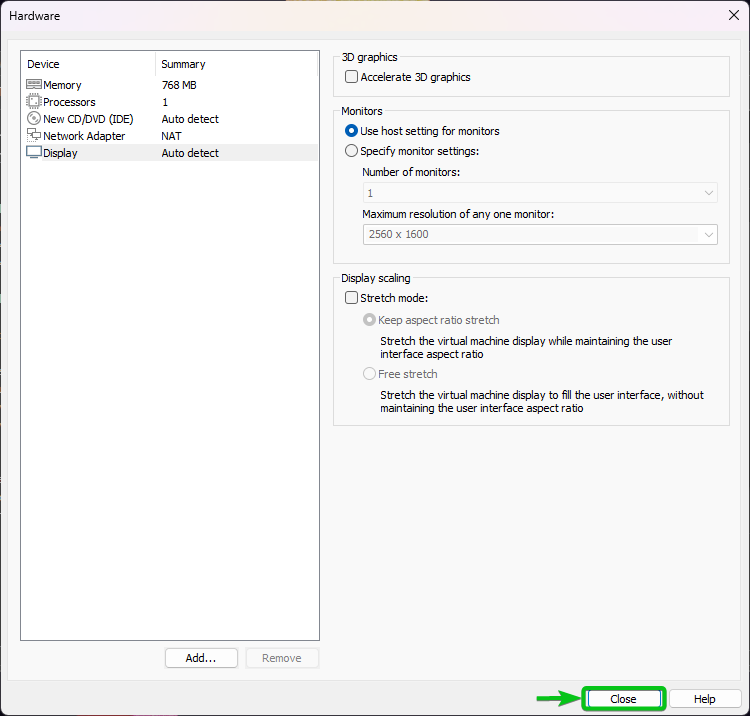
Once you’re done with these steps, click on “Close”.
Click on “Finish”.
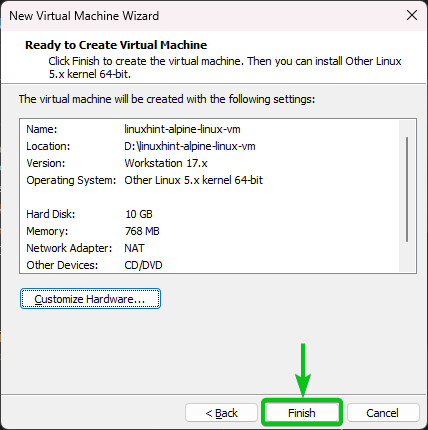
An Alpine Linux virtual machine should be created.
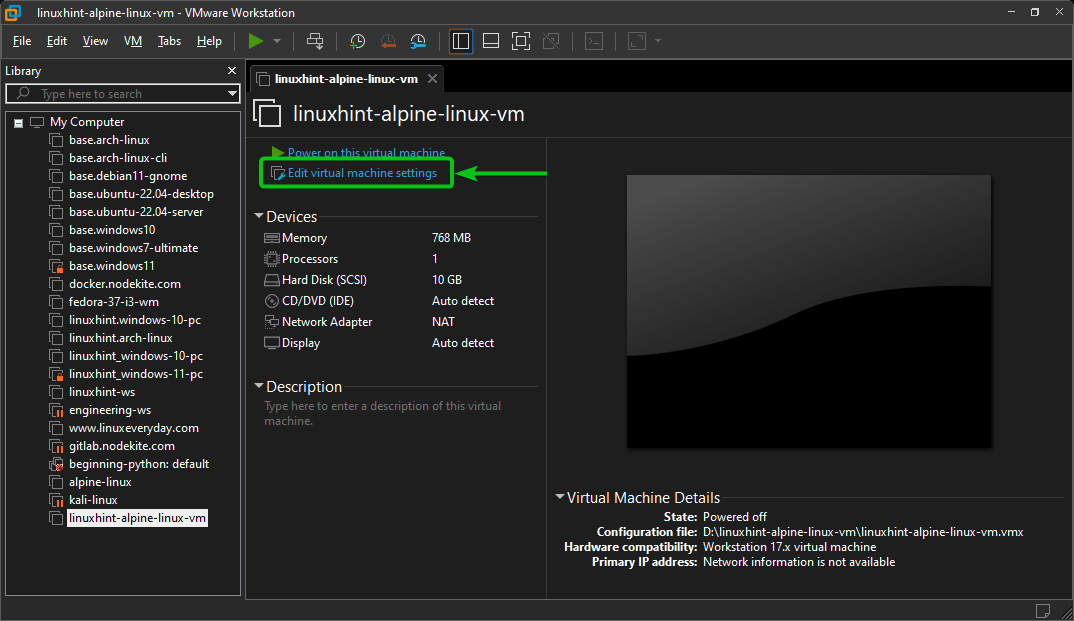
Attaching the Alpine Linux ISO Image to VMware Workstation Pro Virtual Machine
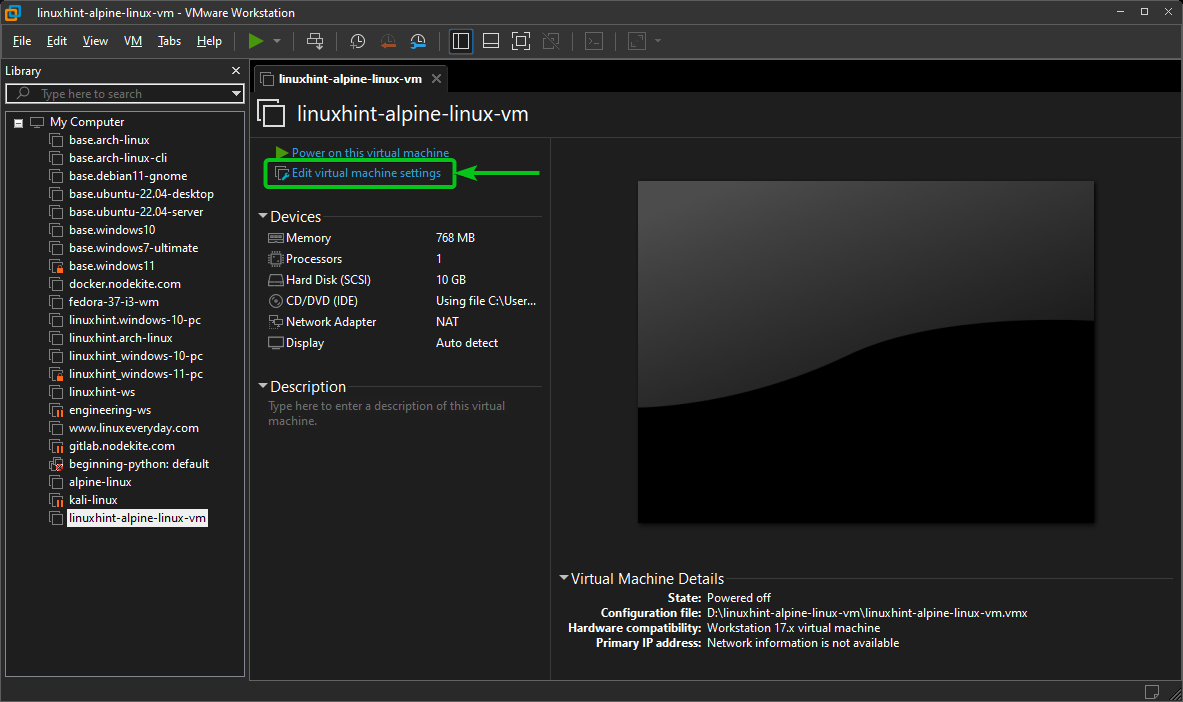
To attach the Alpine Linux ISO image that you just downloaded to the Alpine Linux VMware Workstation Pro virtual machine, open the Alpine Linux virtual machine on VMware Workstation Pro and click on “Edit virtual machine settings” as marked in the following screenshot:
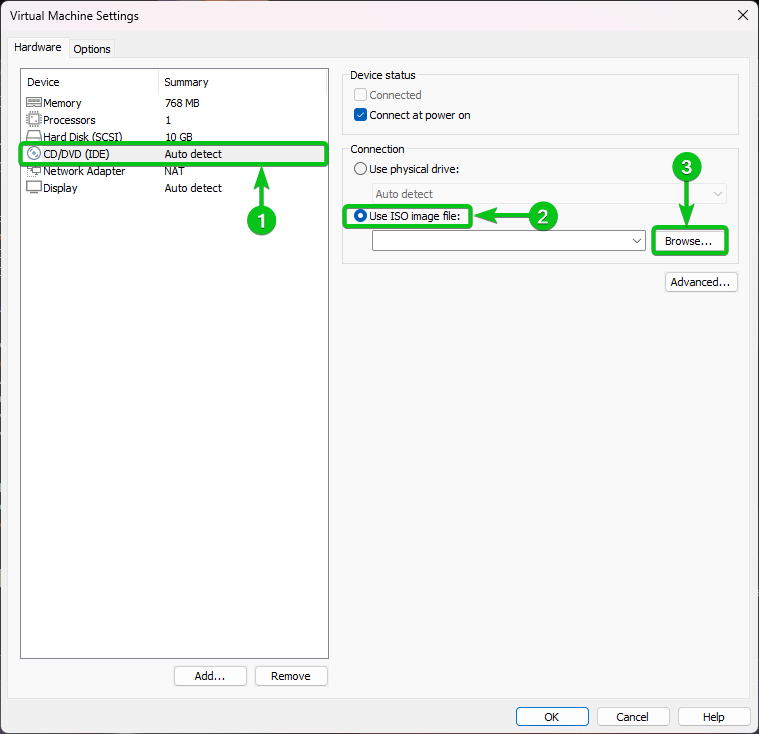
From the CD/DVD (IDE) hardware section[1], select “Use ISO image file[1]” and click on “Browse…[3]”
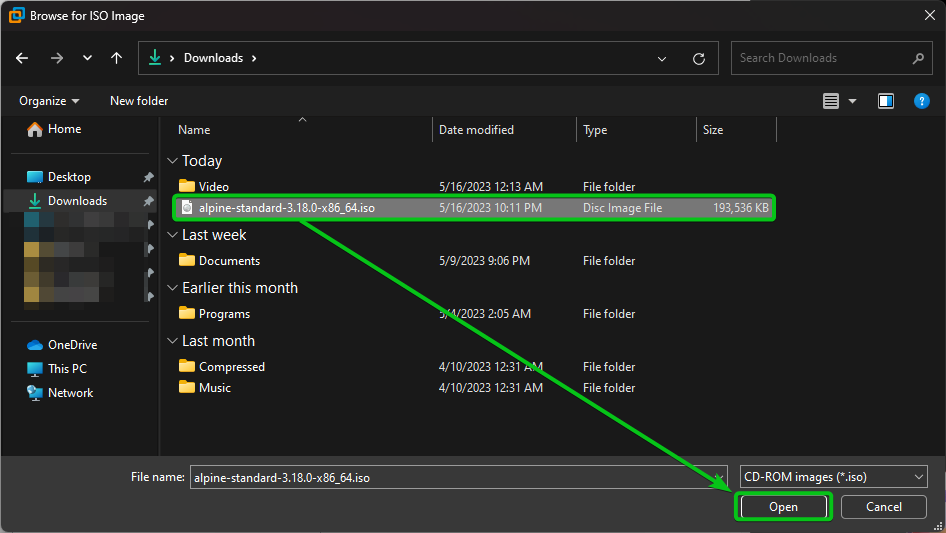
Select the Alpine Linux Standard ISO image file that you downloaded and click on “Open”.
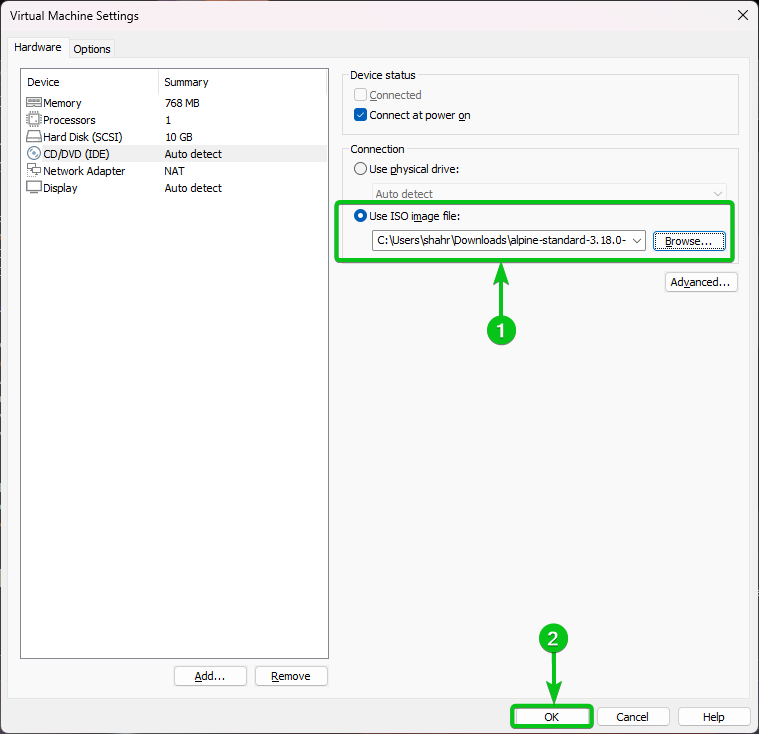
The Alpine Linux Standard ISO image file should be selected[1]. Click on “OK” to save the changes[2].
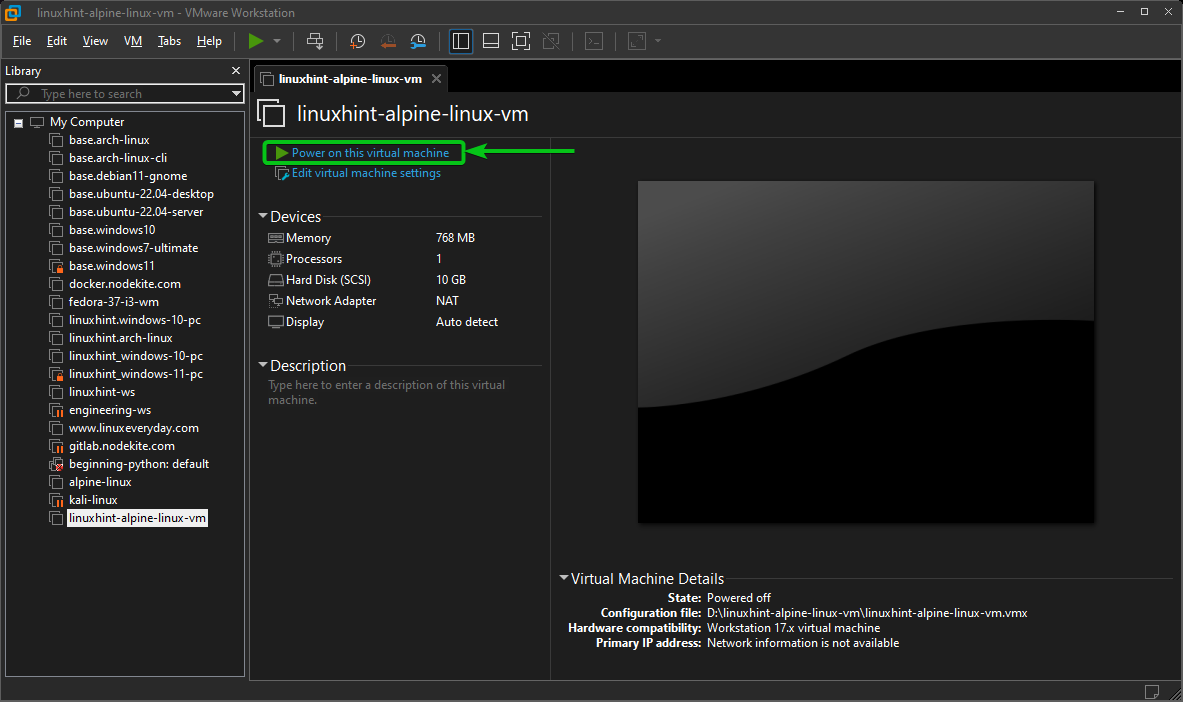
Booting the Alpine Linux VMware Workstation Pro Virtual Machine
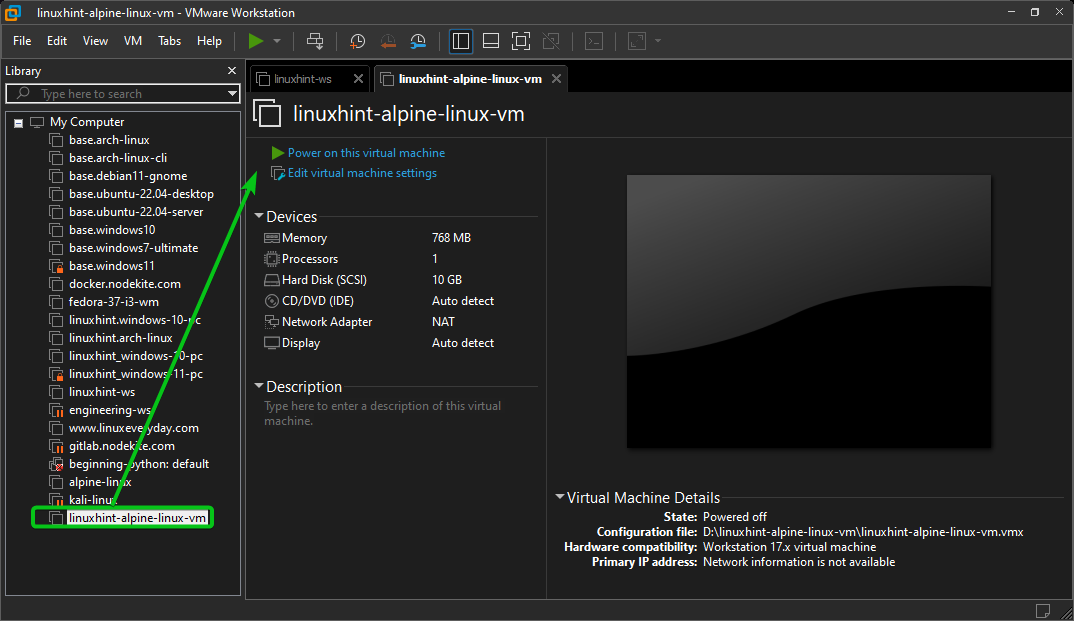
To boot the Alpine Linux VMware Workstation Pro virtual machine, open it on VMware Workstation Pro and click on “Power on this virtual machine”.

The Alpine Linux virtual machine should start and boot from the Alpine Linux ISO image.

Default Login Username of Alpine Linux Installer Image
The default login username of the Alpine Linux Standard ISO image is root. The login user does not have any password set. So, just type in the login username and press <Enter> and you should be logged in to the Alpine Linux operating system that is booted from the ISO image.
Installing Alpine Linux on the VMware Workstation Pro Virtual Machine
To install Alpine Linux on the VMware Workstation Pro virtual machine, run the following command:
First, you have to select a keyboard layout for Alpine Linux. The supported/available keyboard layouts are listed. Just type in your desired keyboard layout code from the list and press <Enter>.

Type in a keyboard layout variant from the list and press <Enter>.

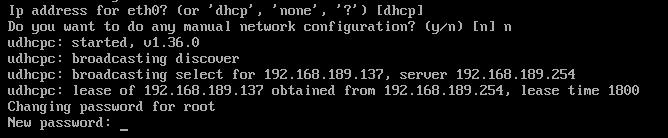
Type in a hostname for Alpine Linux and press <Enter>.

To configure the network, press <Enter> to select the default network interface, eth0.

To configure the network via DHCP (which is mostly what you may want to do on a virtual machine to test things out), press <Enter>.

To configure the network automatically (without requiring any manual configuration), press y and press <Enter>.
![]()
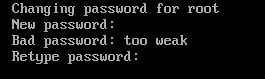
Type in your desired root password and press <Enter>.
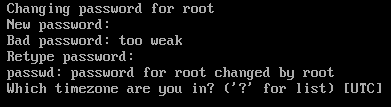
Type in your root password again and press <Enter>.
Now, you have to select a time zone. The default time zone is UTC. If the default time zone is not right for you, press “?” (question mark) and press <Enter> to see a list of available/supported time zones.
A list of available time zones should be listed. The ones that end with or have sub-time zones.
Type in a time zone and press <Enter>.

If the selected time zone has other sub-time zones, type in “?” and press <Enter> to see a list of the available sub-time zones.
![]()
The sub-time zones should be listed.
Type in your desired sub-time zone and press <Enter>.

If you need a proxy to access the internet, type in the proxy URL here and press <Enter>.
For most people, the default option (no proxy) is good enough. So, leave the default option and press <Enter>.

Now, you have to select an NTP client for Alpine Linux.
The default one at the time of this writing is chrony. If you don’t have a preference, the default one is okay. So, just press <Enter>.
![]()
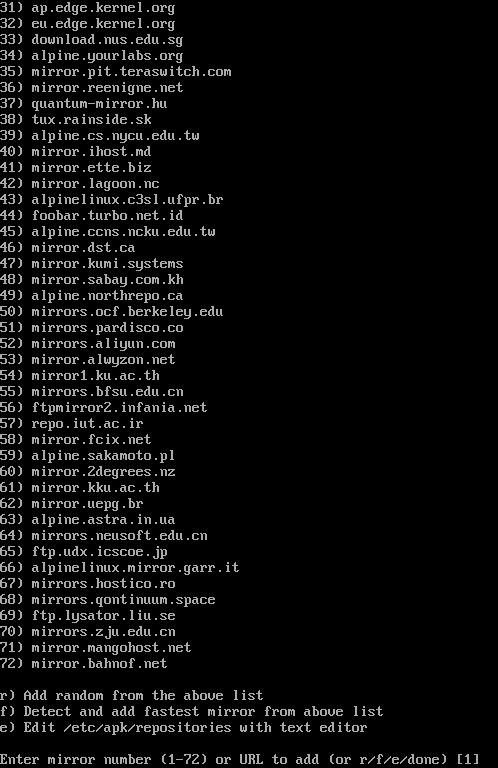
The available Alpine Linux package repository mirrors should be listed. Press <Space> to see more of them.
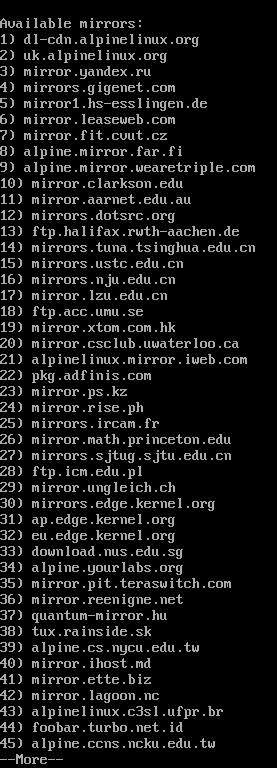
To use a random repository from the list, press “r” and press <Enter>.
To detect the fastest Alpine Linux package repository mirror from the list and use it, press “f” and press <Enter>.
If you want to use the default Alpine Linux package repository mirror, just press <Enter>.
If you want to create another login user on Alpine Linux, type in the login user name and press <Enter>.
If you want to use the root user only instead, just press <Enter> to select the default.

If you decided to create a new user, you have to give additional information to the Alpine Linux installer.
Type in the full name of the new login user and press <Enter>.
![]()
Type in the login password of the new user and press <Enter>.

Type in the login password of the new user again and press <Enter>.

Press <Enter>.

Press <Enter> to select the default SSH server (openssh).

The default Alpine Linux VMware Workstation Pro virtual machine disk should have the device name “sda”. Since you want to install Alpine Linux on the disk, type in “sda” and press <Enter>.

Type in “sys” and press <Enter>.

Alpine Linux is initializing the disk. It takes a few seconds to complete.

To erase the disk and install Alpine Linux on the disk, press “y” and press <Enter>.

Alpine Linux is being installed on the disk. It takes a while to complete.

At this point, Alpine Linux should be installed on the virtual machine.
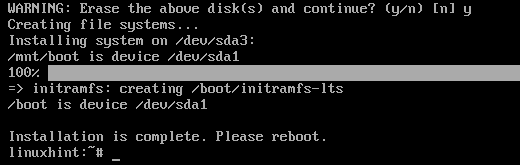
Now, power off the virtual machine with the following command:
Removing the CD/DVD Device from the Alpine VMware Workstation Virtual Machine
The CD/DVD device is not necessary on the Alpine Linux virtual machine once Alpine Linux is installed on the virtual machine. You can remove it from the virtual machine.
First, open the Alpine Linux virtual machine on the VMware Workstation Pro app and click on “Edit virtual machine settings”.
Select the CD/DVD (IDE) hardware and click on “Remove”.
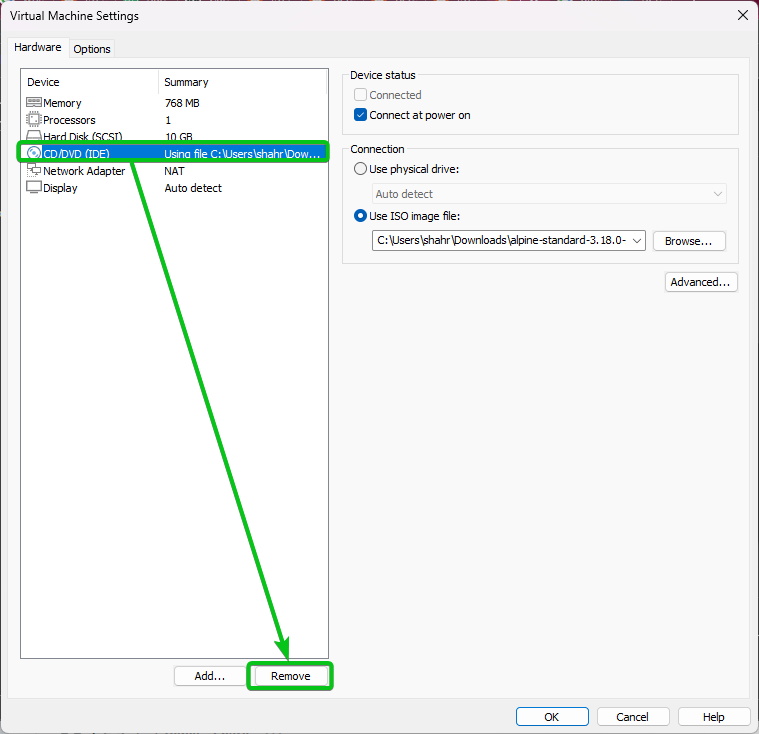
Click on “OK” to save the changes.
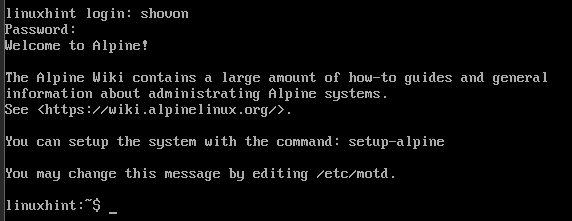
First Look at Alpine Linux Running on VMware Workstation Pro Virtual Machine
To start the Alpine Linux virtual machine, open it on the VMware Workstation Pro app and click on “Power on this virtual machine”.
The virtual machine should be powered on and Alpine Linux should boot from the disk.

Shortly, you will see the Alpine Linux login prompt.
To login to Alpine Linux, type in the login username and press <Enter>.

Type in the login password and press <Enter>.
![]()
You should be logged in to Alpine Linux.
Login into Apline Linux as Root
Loging in to Alpine Linux as root user is required to configure the Alpine package repositories, install new packages, setup sudo, and other administrative tasks.
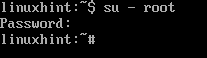
While you’re logged in to Alpine Linux as non-root user, you can login to Alpine Linux as root user with the following command:
Type in the root password and press <Enter>.
![]()
You should be logged in to Alpine Linux as root user.
Enabling the Community Package Repository on Alpine Linux
The Alpine Linux community package repository has a lot of packages that you may need. So, it’s a good idea to enable it.
First, log in to Alpine Linux as root user.
To enable the Alpine Linux community package repository, open the /etc/apk/repositories file with the “Vi” text editor as follows:
![]()
Use the arrow keys of your keyboard to navigate to the first character (#) of the third line (ending with the word community) and press “x” to remove the comment character #.

Once the # is removed from the third line, the /etc/apk/repositories file should look as follows.
To save the changes, type in “:wq!” and press <Enter>.

Updating the Alpine Linux Package Repository Cache
To update the Alpine Linux package repository cache, login as the root user and run the following command.
The Alpine Linux package repository cache should be updated.

Enabling Sudo in Alpine Linux
Sudo allows the non-root user to run the commands with superuser (root) privileges. On the other Linux distributions like Ubuntu/Debian, Fedora/RHEL, etc., sudo is enabled by default. But it’s not the case for Alpine Linux.
In this section, we will show you how to enable sudo in Alpine Linux so that you can run the commands with superuser privileges as an ordinary user.
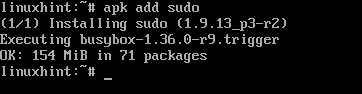
First, login as the root user and install sudo with the following command:
Sudo should be installed.
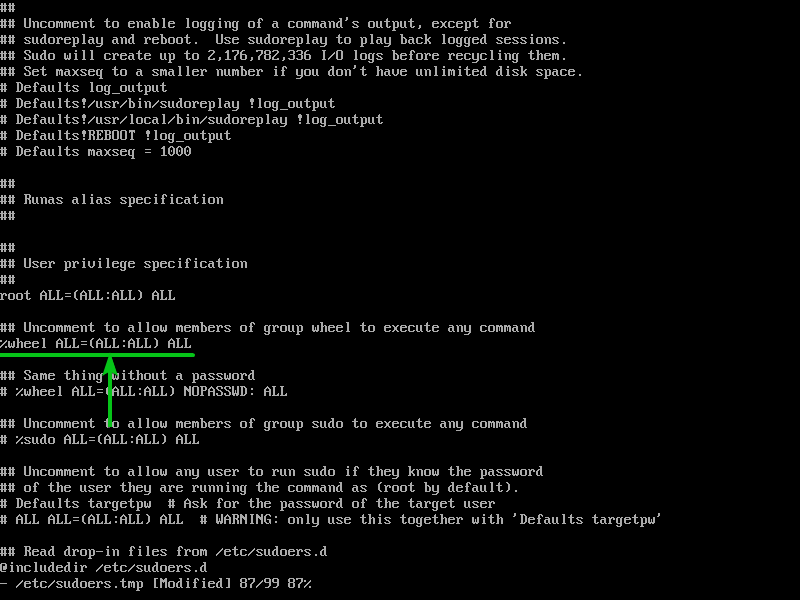
Open the sudo configuration file for editing with the following command:
Use the arrow keys to scroll all the way down to the marked line and uncomment (remove the # symbol) the line as we did previously.
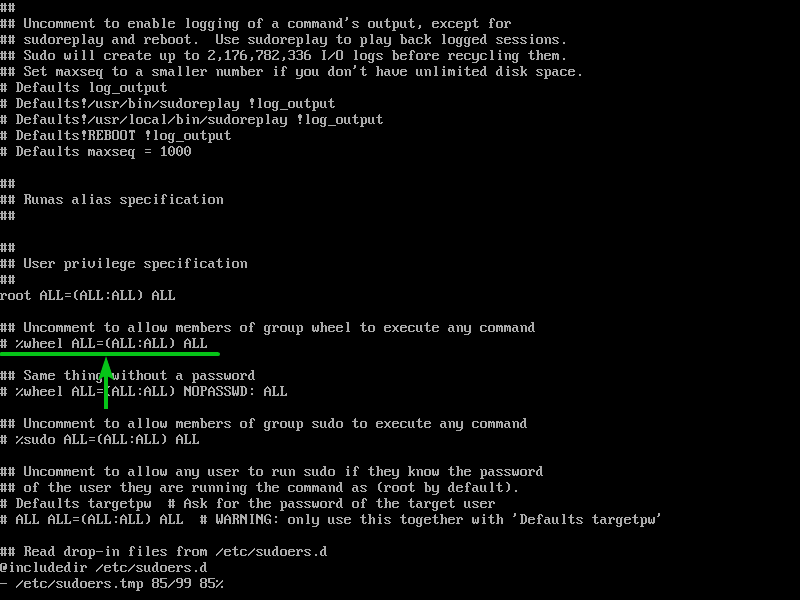
Once the line is uncommented, it should look as follows.
Now, type in “:wq!” and press <Enter> to save the file.
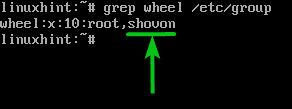
Your login user (non-root ordinary user) should be added to the wheel group automatically as you can see in the following screenshot:
Now, exit out of the root user shell and test whether sudo is working. As you can see, sudo is prompting for a password. Type in the password of your choice.

The command should run without any issues. It means that sudo is working just fine.

Installing the VMware Tools and VMware Video Drivers on Alpine Linux Virtual Machine
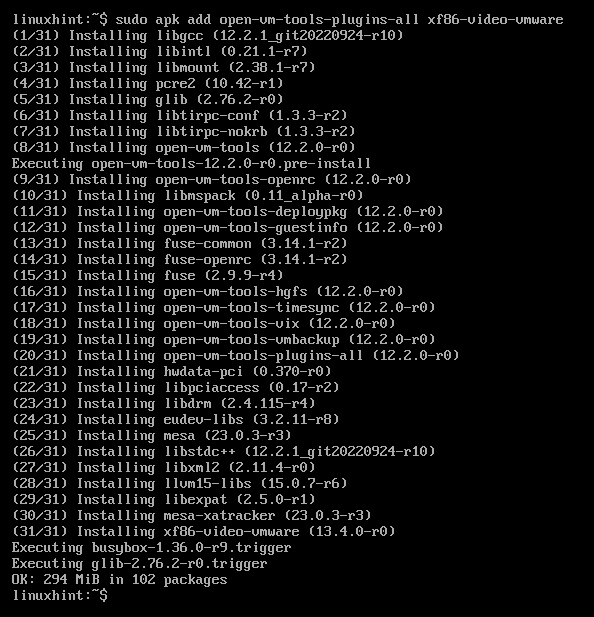
To install the VMware Tools and VMware video drivers on Alpine Linux, run the following command:
$ sudo apk add open-vm-tools-plugins-all xf86-video-vmware
VMware Tools and VMware video drivers are being installed on Alpine Linux. It takes a while to complete.

VMware Tools and VMware video drivers should be installed.
Adding the Open-vm-tools Service to the System Startup of Alpine Linux
Alpine Linux uses OpenRC to manage the system services and startup.
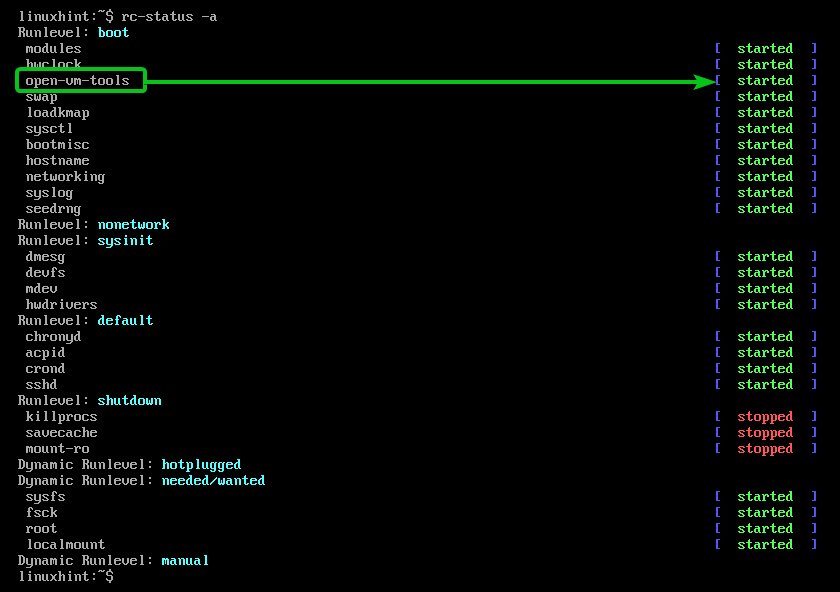
To check the enabled system startup services on Alpine Linux, run the following command:
As you can see, the VMware Tools service is not available in the system startup services of Alpine Linux.

To add the VMware Tools service open-vm-tools to the system startup of Alpine Linux, run the following command:
$ sudo rc-update add open-vm-tools boot
The VMware Tools service open-vm-tools should be added to the system startup of Alpine Linux

For the changes to take effect, reboot the Alpine Linux virtual machine as follows:
Once your Alpine Linux virtual machine boots, login to it and you should see that the VMware Tools service open-vm-tools should be running.
Conclusion
We showed you how to download the Alpine Linux ISO image, create a VMware Workstation 17 Pro virtual machine, and install Alpine Linux on the VMware Workstation 17 Pro virtual machine. We also showed you how to enable the community package repository on Alpine Linux. We showed you how to enable sudo on Alpine Linux as well. Finally, we showed you how to install the VMware Tools on Alpine Linux and add the VMware Tools service to the system startup of Alpine Linux.