When compressing files using the “zip” command, it compresses all the files into one archive and includes all the details related to those files, such as the path and date. This post focuses on the Linux “zip” command. We will introduce ZIP, why you need it, how to use it, and give numerous instances of using it. Let’s dig in!
Contents
- 1 What Is ZIP and Why Use It
- 2 How to Use the Linux Zip Command
- 3 1. Create a Zip File
- 4 2. Zip Specific Files
- 5 3. List the Contents of a Zip Archive
- 6 4. Delete the Zip Archive Contents
- 7 5. Add Files to a Zip Archive
- 8 6. Move the Files to the Zip Archive
- 9 7. Check the Details of the Zip Archive
- 10 8. Hide the ZIP Standard Output
- 11 9. Extracting a Zip Archive
- 12 10. Zip File Encryption
- 13 11. ZIP Compression Level
- 14 Conclusion
What Is ZIP and Why Use It
ZIP is an archive file format that is used to compress the directories and files. Moreover, you can use ZIP to add, delete, or update any zip archive. Besides, ZIP supports encryption to secure the files and has commands to list the contents of an existing zip archive.
You need ZIP to help save on disk space and network bandwidth. By compressing the files and directories, you shrink their size. ZIP works by removing unnecessary data from a file to reduce the bites. However, the original data is left intact even after encoding.
ZIP offers numerous advantages which include the following:
- It helps with encryption when sending files via the internet.
- ZIP helps in minimizing the space by shrinking the files and removing the unneeded data.
- ZIP allows different compression levels to help with balancing compression speed and ratio.
- By shrinking the files, ZIP helps to save the network bandwidth and increase the transfer speed.
How to Use the Linux Zip Command
When you want to compress your files using ZIP, the first step is to verify that the zip utility is installed on your system. Not all systems come with ZIP installed. So, run the following command:
You will get a similar output as the one in the following:

1. Create a Zip File
When you want to work with a zip file, the first step is to create it. For that, we use the following syntax:
$ zip <options> <name_of_zip_file> <source files>
In our case, we have different files that we want to ZIP in one archive.

We run our “zip” command as shown in the following. We named our archive file as “zipped-file”. When we run the “zip” command, we get an output that shows all the files that have been zipped.
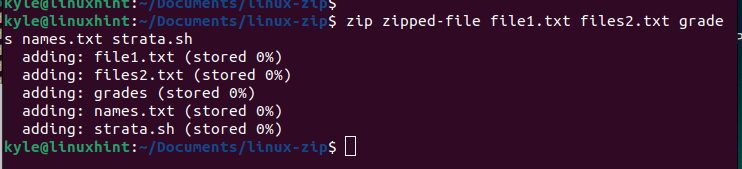
The zip archive is created in the current directory.
2. Zip Specific Files
Suppose you only wanted to zip specific files. Let’s say you want to zip all text files in the current directory quickly. You can specify the file extension instead of manually typing all the text files. See how we implemented that in the following image:

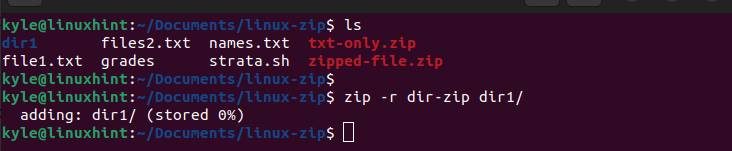
We still get an output that shows all the files that are added to the zip archive. Similarly, if we want to create a zip file and add a directory instead of files, we follow the same format only that we add the “-r” flag in the command. Take a look at the following example. We have the “dir1”, and we created the dir-zip archive:
3. List the Contents of a Zip Archive
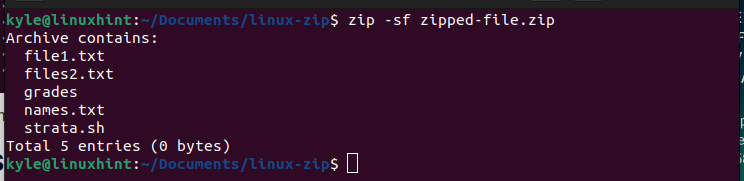
After creating your zip archive, there is room to list the different archived files and directories. You need to add the “-sf” option in your command and then add the archive file name to list its contents.
Here’s the syntax to use and an example where we list the contents of the “zipped-file.zip”.
4. Delete the Zip Archive Contents
When you use the “-sf” option, you can decide to delete some files from the zip archive. Maybe you found that the archive has a file that no longer needs to remain there. You can delete it using the “-d” flag with the following syntax:
$ zip -d zip-archive file-to-delete
Let’s say that our target zip archive is “zipped-file.zip” which contains the following files:
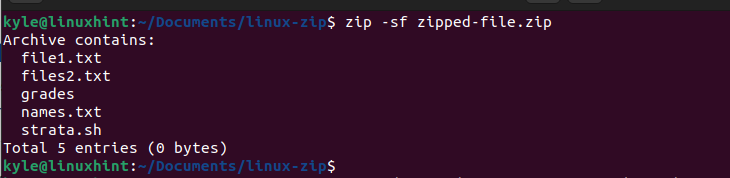
If we want to delete the “grades” and “strata.sh” files, we run our command as follows:

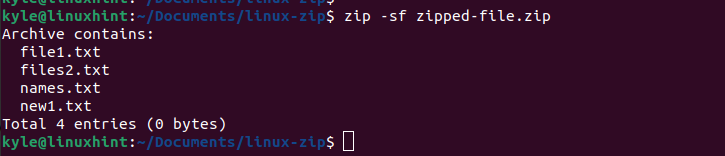
Once it runs, we get an output confirming that the target files have been deleted. If we list the contents of the archive file, we confirm that we successfully managed to delete the target files.

That’s how you delete the zip archive contents.
5. Add Files to a Zip Archive
Sometimes, you might have your zip archive created but you need to add more files to it. Instead of extracting all the files and creating a new archive, you can use the “-u” option to add the mentioned file or directory to the existing zip archive.
Use the following syntax:
$ zip -u zip-archive file_to_add
In the following example, we start by quickly creating a new file using the “touch” command:

Next, we list the archive’s contents to confirm the contained files.

Further, we add the created file to our zip archive using the “-u” option.

Lastly, we list the archive’s contents to verify that we managed to add the new file to the existing zip archive file.
6. Move the Files to the Zip Archive
When you create a Zip archive, you will notice that the files that are used to create it remain in the current directory even after the zip archive is created. Sometimes, you may want to move those files to the archive without leaving them in the current directory. That way, you end up with a clean working space. For that, you must use the “-m” flag when creating the zip file. Let’s give an example.
Suppose we have the following working directory:

If we move all the text files to a zip archive and leave no copy, we run our command as follows:

If we use the “ls” command, we can confirm that the “-m” flag helps create the archive by moving them to it.

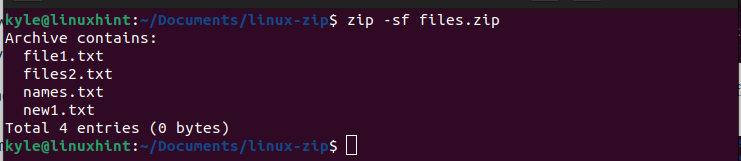
Our zip archive is created, and the following image lists all its contents to confirm that we managed to move all the text files as per our command.
7. Check the Details of the Zip Archive
With the “-v” option, getting the details of a given file in your zip archive is possible. Maybe you want to know more about a given file or all those files that contain a given syntax.
Here’s the syntax that you must use for that:
$ zip -v zip-arcive target_file
The following example demonstrates how you can get the details of all text files in the “files.zip”.

Here, we opted to check the details of all bash files. But if you have a specific file, you can add its name and you will get an output that shows its details.
8. Hide the ZIP Standard Output
Some zip operations produce an extensive standard output that may not always be enticing. When you don’t want this output to display on your terminal, adding the “-q” option will quiet the operation, allowing you to execute your commands comfortably.
The following example performs the “zip” command. You will notice that no output is displayed on the terminal since we added the “-q” option:
![]()
Suppose we failed to add the “-v” option. We get an output which shows that we are adding the “new2.txt” to the “files.zip”.
9. Extracting a Zip Archive
Any archived file must be extracted at some point. You can extract the zip archives using the “unzip” command.
The following example extracts the “files1.zip” in the current directory:
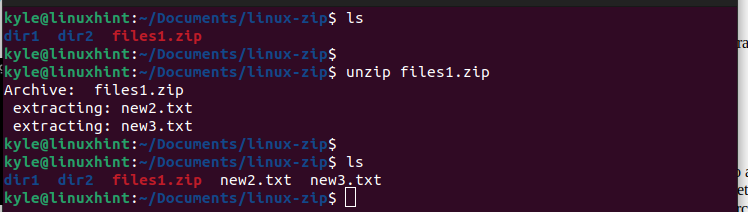
Once the extraction completes, listing the available files also displays the contents of the extracted zip archive.
10. Zip File Encryption
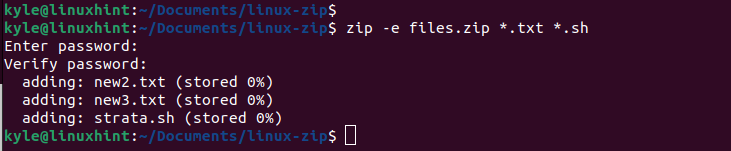
When you want to protect your zip archive from unauthorized extraction, you can add a password. That way, when someone wants to extract its contents, they will get prompted to enter and verify the password. Only when they get the password right can they manage to extract the archive.
Here’s an example of encrypting a zip file. We are prompted to type the password that we wish to use to extract the files and end the command by creating the archive:
Suppose we try to extract its contents with the earlier command. Watch how we must first enter the password before our command is executed.

Again, the password must be the correct one. Otherwise, it raises an error and the extraction fails as demonstrated in the following:

11. ZIP Compression Level
It’s possible to control the compression levels of your archive. Note that as you increase the level, the compression takes longer. For instance, the fastest compression works with a level of -1, while the highest is -9.
For instance, let’s set the compression levels to -1 when creating a zip archive for two directories. For that, we have our example command as follows:
$ zip -1 compressed.zip dir1 dir2

The zip file is created using the compression level of -1.
Conclusion
The Linux “zip” command is used when you want to create a ZIP archive. The command offers different options to utilize when creating your archive file to achieve different results. Throughout this post, we covered the different commands and instances where you can apply the “zip” commands to create and work with a zip archive. Hopefully, the examples that are covered here give you room to understand and get comfortable in working with zip archives.