
In WordPress, featured images, also known as post thumbnails, play a crucial role in enhancing the visual appeal of your content. They are representative images that are associated with your posts or pages and are often displayed in different parts of your website, such as blog archives, category pages, and social media shares. Adding featured images to your WordPress posts is a straightforward process, and in this guide, we’ll walk you through the steps to do it effectively.
Contents
Step-by-Step Guide to Add Featured Images in WordPress
Here’s how you can add featured images to your WordPress posts or pages:
Step 1: Edit or Create a New Post/Page
Log in to your WordPress admin dashboard and navigate to the “Posts” or “Pages” section, depending on where you want to add the featured image. If you’re editing an existing post/page, find the specific one you want to work on and click on the “Edit” link below its title. To create a new post/page, click on “Add New” under the respective section.
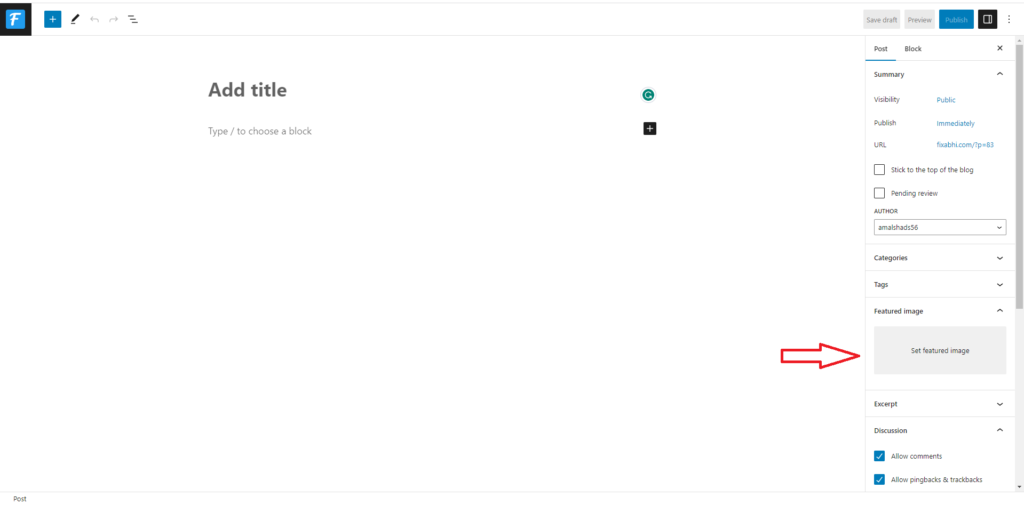
Step 2: Locate the Featured Image Box
Once you’re in the post/page editor, look for the “Featured Image” box on the right-hand side of the screen. In most WordPress themes, this box is prominently displayed near the top of the editor.
Step 3: Click on “Set Featured Image”
Inside the “Featured Image” box, you’ll see a link or button labeled “Set Featured Image.” Click on it to open the media library, where you can upload or select the image you want to use as the featured image.
Step 4: Upload or Select the Image
In the media library, you have two options to add the featured image:
- Upload New Image: If the image you want to use is not already in your media library, click on the “Upload Files” tab, then click “Select Files” to choose the image from your computer. Once the image is uploaded, select it, and click the “Set Featured Image” button.
- Select Image from Media Library: If the image you want is already in your media library, go to the “Media Library” tab, find the image, and click on it. Then, click the “Set Featured Image” button.
Step 5: Confirm and Save
After selecting the image, you’ll see a confirmation message that the featured image has been set. Click “Save” or “Update” to save your post/page with the newly added featured image.
Tips for Choosing Featured Images
Choosing the right featured image can significantly impact the overall attractiveness and engagement of your content. Here are some tips to help you select compelling featured images:
- Relevance: Ensure the featured image is relevant to the content of your post/page. It should provide a visual representation of the topic or message you’re conveying.
- High Quality: Use high-quality images that are clear and visually appealing. Blurry or pixelated images can detract from the user experience.
- Consistency: Consider maintaining a consistent style for your featured images to create a cohesive and branded look for your website.
- Size and Aspect Ratio: Check your theme’s recommended dimensions for featured images to ensure they display correctly without distortion.
- Alt Text: Always add descriptive alt text to your featured images for better accessibility and SEO.
Conclusion
Adding featured images to your WordPress posts or pages is a simple yet effective way to enhance the visual appeal of your content. These images serve as representative thumbnails and can significantly impact how your content is presented on your website and across various platforms. By following the step-by-step guide provided, you can easily add compelling featured images to your WordPress website and make your content more engaging and visually appealing.
Remember to choose relevant and high-quality images while considering the aspect ratio and accessibility guidelines. With attractive featured images, you can create a more captivating and user-friendly browsing experience for your audience.