
Knowing and understanding what processes consume different system resources is part of your task as a system administrator. Luckily, the Linux kernel allows you to allocate and manage the resources using the Control Groups (cgroups) feature, but you must know how to configure it.
This post guides on configuring the Linux cgroups. We will define it and understand its benefits. Moreover, we will see how you can configure the Linux cgroups. Let’s begin!
What Are Cgroups in Linux
The Linux kernel offers cgroups as a feature to allow the management of system resources to different processes. Thanks to cgroups, limiting the amount of system resources with a process or groups of processes can use to eliminate monopolization and ensures that a fair resource allocation is possible. Cgroups help play the following roles:
1. Resource Allocation
The primary purpose of cgroups is resource allocation. You can quickly allocate the resources such as memory, network bandwidth, CPU, etc., to any process or group of processes. The idea is to enhance your system’s performance by ensuring that no process monopolizes the system resources. You will have a stable system performance by fairly distributing the resources.
2. Prioritization
Imagine a situation where you have high-priority tasks or processes. Such a case requires you to prioritize your system resources for such tasks to ensure that they meet the expectations, especially where a heavy load is involved. For instance, if you have a latency-sensitive process or work that requires heavy CPU usage, you can prioritize and assign more resources using cgroups.
3. Resource Isolation
By letting you create the resource boundaries, cgroups allow you to isolate the resources and enforce limits. That way, you can prevent the interferences between applications, especially when different applications or users utilize the same system.
4. Support for Containerization
When working with containerization options like Docker, where you must set the containers to run in isolated environments, cgroups lets you create lightweight environments. You get to securely and efficiently allocate the resources in the isolated host.
5. Resource Monitoring
You can get statistics on different resources that are assigned to processes on your system using cgroup. The statistics that you gather are ideal for analyzing your system performance. That way, you can identify the resource bottlenecks which lets you plan on the resource distribution. These insights are ideal for understanding how the applications perform to guide how you can optimize them.
How to Configure the Linux Cgroups
The increasing popularity of containerization paves the way for more usage of Linux cgroups to help with the resource management and monitoring. So far, we defined the cgroups and seen its benefits.
Now, let’s see how we can configure it. We are working with Ubuntu 22.04, but this guide works with other Linux distros. We divide the process into two parts: installation and configuration.
Part 1: Installation
Let’s start by installing the cgroups on our system with the following steps:
Step 1: Install the Cgroups Tools
Start by updating the apt repository to pave the way for the installation.
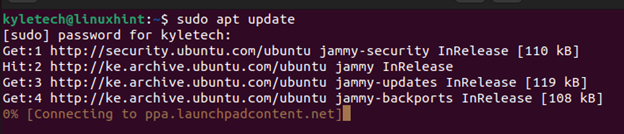
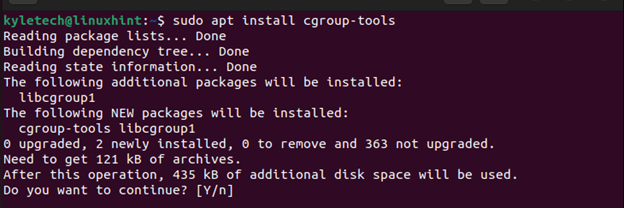
Next, run the following installation command to install the cgroup-tools:
sudo apt install cgroup-tools
You can verify that the cgroup is installed by checking it with the dpkg command as shown in the following:

We can see that the installation is successful.
Step 2: Enable the Cgroup Support
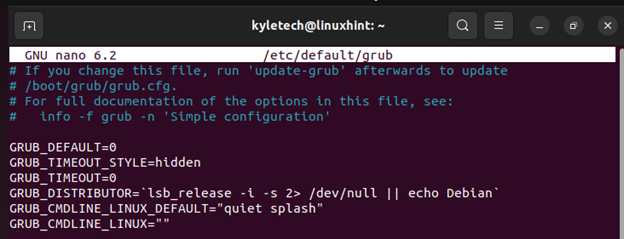
After installing the cgroup, you must enable the cgroup support in your system’s GRUB. For that, use a text editor and open the GRUB config file. We are using nano in this case.
sudo nano /etc/default/grub

Once it opens, find the following line:
GRUB_CMDLINE_LINUX_DEFAULT=”quiet splash”
Amend it to include the “cgroup_enable=memory”.
GRUB_CMDLINE_LINUX_DEFAULT=”quiet splash cgroup_enable=memory”
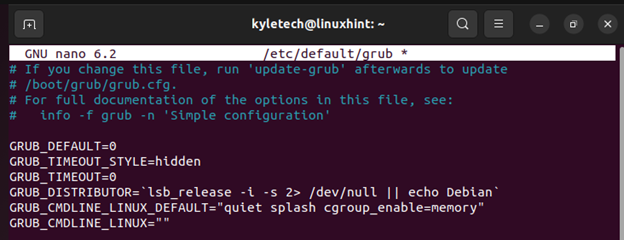
Save the file and exit.
Step 3: Update GRUB
After amending the GRUB configuration, you must update it for the changes to take effect. Still, you must reboot your system to effect the changes completely.
Use the following commands:
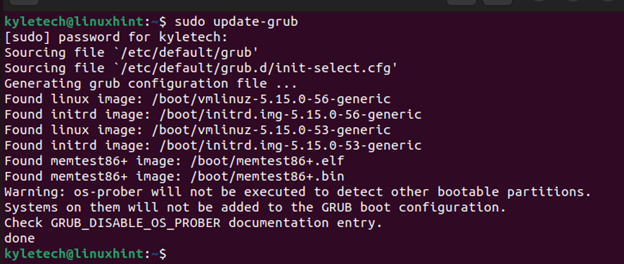
Lastly, restart your system.
Step 4: Create a Mount Point
Once the system reboots, create a directory to use as your mount point for the cgroup filesystem. Let’s create our directory as /sys/fs/cgroup as follows:
sudo mkdir /sys/fs/cgroup

With the mount point created, mount the cgroup filesystem with the controller of your choice. Some controllers that you can use include memory, CPU, bikio, freezer, devices, etc. Let’s use the memory for this example.
Here’s the syntax that you should use:
sudo mount -t cgroup -o <controller> cgroup /sys/fs/cgroup
Replace the <controller> with the target one that you wish to create to use in the cgroup filesystem.

We have ours already mounted. In your case, you will get an output that the mount is successful.
Verify that the cgroup mount exists and is correctly mounted by running the following command using the “grep” command:

Suppose you followed all the steps. You will get an output that is similar to the one in the previous output which confirms that your cgroup mount exists as you created it.
Part 2: Configuration
We installed the cgroup tools on our Linux system and created a cgroup mount. With that in place, the last thing is to dig in on how to configure the Linux cgroups. Let’s have an example to help you understand how that works out. Read on!
How you create and configure the cgroups depend on your requirements. Besides, you must first understand which controller will you use in creating the cgroup hierarchies. Once you create the cgroup, configuring it involves limiting its access to your system resources. Let’s break it down into two steps.
Step 1: Create the Cgroup Hierarchies
Once you mount the cgroup filesystem, you must create cgroup hierarchies depending on your requirements. For that, we use the following syntax:
sudo mkdir /sys/fs/cgroup/<controller>/<cgroup_name>
Suppose we want to create a cgroup named “linuxhint” in our memory controller. We proceed as follows:
sudo mkdir /sys/fs/cgroup/memory/linuxhint

Now that we have the cgroup created, let’s go ahead and configure it by defining what parameters to assign it as part of system resource management.
Step 2: Assign the Parameters
Each controller comes with different parameters that you specify depending on the system resource that you want to allocate. So, when configuring a cgroup, you should know what parameters of the selected controller you will use.
Use the following syntax in the configuration:
echo <value> > /sys/fs/cgroup/<controller>/<cgroup-name>/<controller-parameter>
Here’s an example of configuring the memory cgroup that we created earlier named “linuxhint” to assign it with a memory limit of 1GB. For that, we use the “memory.limit_in_bytes” parameter. You can search for other memory parameters that you can configure.
We execute our command as follows:
echo 1G > /sys/fs/cgroup/memory/linuxhint/memory.limit_in_bytes

You can specify any parameter that aligns with your requirements. Follow the process that we detailed previously to modify any controller in your system, create cgroups for it, and then configure it. You are free to create more cgroups and configure them. It’s recommended to name the cgroups to align with the name of the controller that you want to focus on for easy remembering.
Let’s have another example where we create a cgroup for the CPU controller. Begin by creating a cgroup hierarchy as follows:
sudo mkdir /sys/fs/cgroup/cpu/linux-cpu

Next, assign the parameter values to allocate the CPU resources based on your need. For instance, let’s work with the cpu.cfs_period_us that enables you to specify the microsecond duration that a cgroup’s access to resources should be allocated. Let’s set it to 1000 microseconds in this case.

That’s how you create and configure the Linux cgroups. The steps may differ slightly depending on the Linux distro that you are using. Nonetheless, this post presents the general steps that you should follow.
Conclusion
This post focused on Linux cgroups. We began by understanding what the Linux cgroups means and the benefits it offers to system administrators. Next, we learned the steps to follow to install cgroups on Ubuntu 22.04 if it is not yet installed. Furthermore, we presented the steps to configure the Linux cgroups, from creating a mount point, to creating the cgroup, to configuring the parameters. Hopefully, you learned how to configure the Linux cgroups. Try it and be keen on what parameters you modify to avoid interfering with your system’s performance.