
In this article, we will show you how to partition the disks using the Debian 12 installer’s partitioning program while installing Debian 12 on your computer.
NOTE: Kali Linux also uses the Debian installer. So, the methods that are shown in this article also work on Kali Linux and other operating systems that use the Debian installer.
Contents
- 1 Topic of Contents:
- 2 Partition Modes of Debian 12
- 3 Using the Guided Partitioning for Debian 12 Installation
- 4 Manually Partition the Disk for Debian 12 Installation
- 5 Deleting an Existing Partition from the Disk
- 6 Creating a New Partition Table on the Disk
- 7 Creating a New Partition on the Disk
- 8 Resizing the Partitions of a Disk
- 9 Creating the Required Partitions for Debian 12 Installation
- 10 Saving the Partition Table Changes to the Disk
- 11 Conclusion
Topic of Contents:
- Partition Modes of Debian 12
- Using the Guided Partitioning for Debian 12 Installation
- Manually Partition the Disk for Debian 12 Installation
- Deleting an Existing Partition from the Disk
- Creating a New Partition Table on the Disk
- Creating a New Partition on the Disk
- Resizing the Partitions of a Disk
- Creating the Required Partitions for Debian 12 Installation
- Saving the Partition Table Changes to the Disk
- Conclusion
Partition Modes of Debian 12
While installing Debian 12 on your computer, you have to partition the disks of your computer.
The disk partitioning program of the Debian 12 installer supports the following partitioning methods:
Guided – use entire disk: Select this option if you want to install Debian 12 on an entire disk.
Guided – use entire disk and set up LVM: Select this option if you want to install Debian 12 on an entire disk and manage the partitions via LVM (Logical Volume Manager).
Guided – use entire disk and set up encrypted LVM: Select this option if you want to install Debian 12 on an entire disk, manage the partitions via LVM (Logical Volume Manager), and encrypt the partitions.
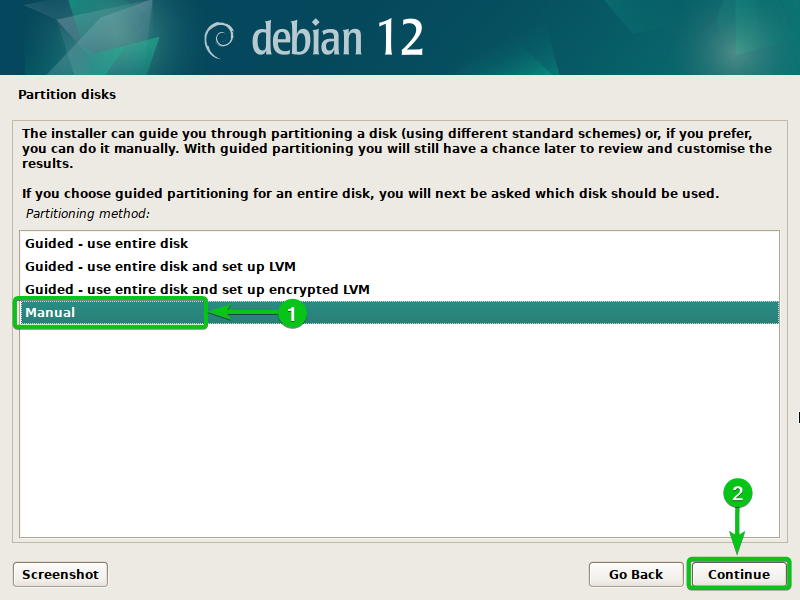
Manual: Select this option if you want to do manual partitioning.

Using the Guided Partitioning for Debian 12 Installation
Installing Debian 12 on an entire disk is very easy. Just select the type of the guided partitioning method that you want to use[1] and click on “Continue”[2].

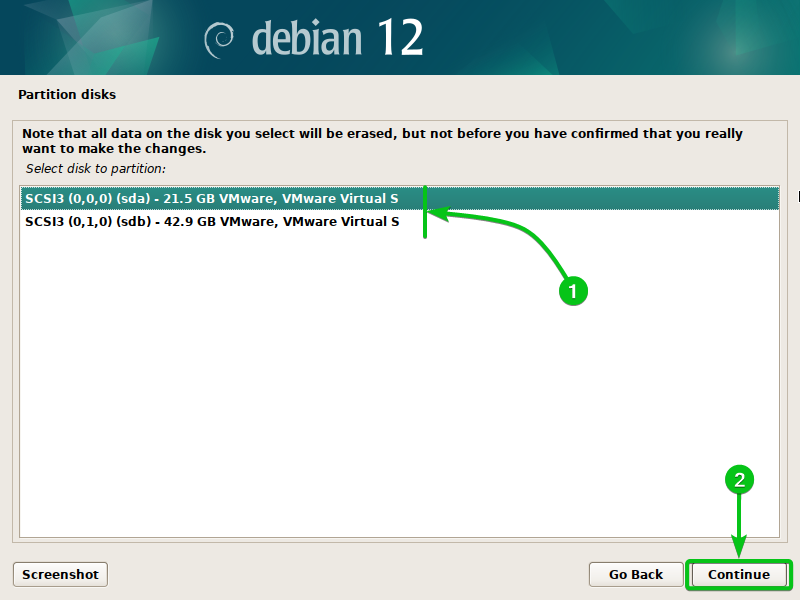
All the disks that are installed on your computer should be listed. Select the disk that you want to use[1] and click on “Continue”[2].
You will see the following options. Select one that meets your requirements[1] and click on “Continue”[2].
All files in one partition (recommended for new users): If you select this option, the Debian 12 system files, the user data, and everything will be installed in a single partition. So, all the disk space of the disk (where you’re installing Debian 12) will be available for system files, user data, third-party apps, and so on. If you are new to Debian 12 or Linux, this option is the best for you.
Separate /home partition: If you select this option, the system files and the user data will be stored in different partitions. If you want to isolate the user data from the system files, this option is the best for you.
Separate /home, /var, and /tmp partitions: If you select this option, the system files, user data, variable data/caches, and temporary files will be stored in separate partitions. This will give you the maximum data isolation. If you’re an advanced Debian/Linux user, you can select this option.

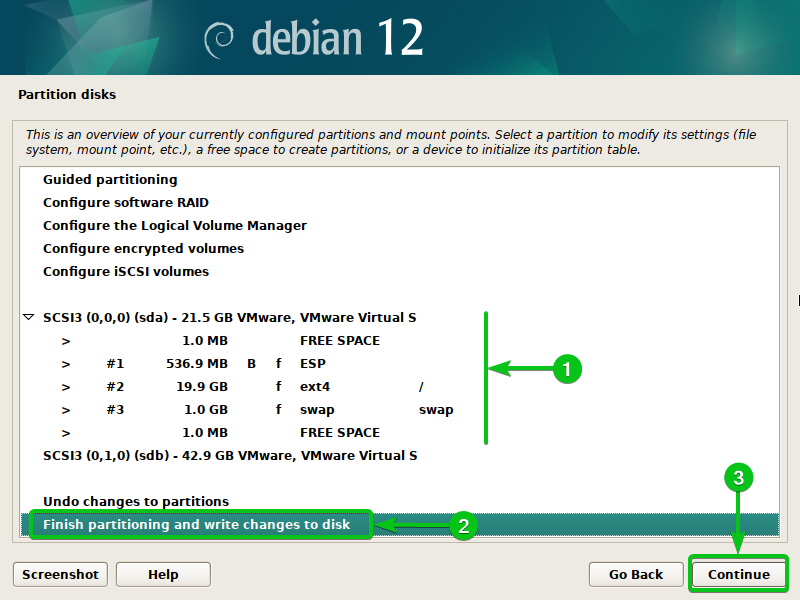
Depending on the guided partitioning option that you selected in the earlier section, you will see an overview of the partition layout of the disk (which you selected to install Debian 12)[1].
To save the changes to the partition table of the disk, select “Finish partitioning and write changes to disk”[1] and click on “Continue”[2].
Select “Yes”[1] and click on “Continue”[2].
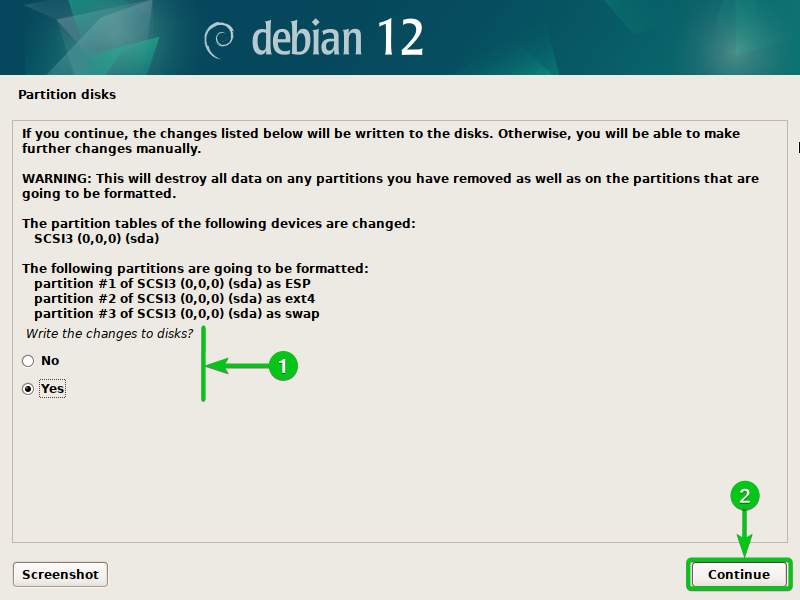
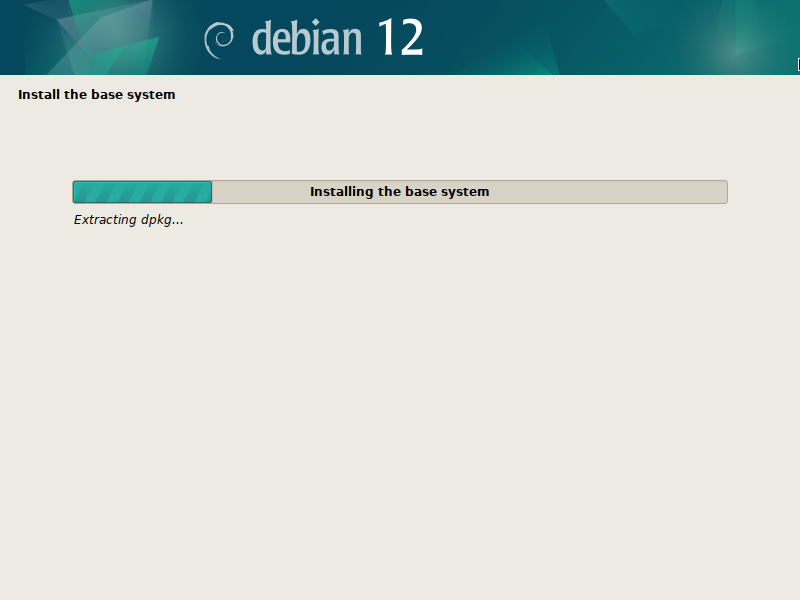
The changes should be saved to the partition table of the disk and the Debian 12 installation should continue.
Manually Partition the Disk for Debian 12 Installation
To manually partition the disk from the partitioning program of the Debian 12 installer, select “Manual”[1] and click on “Continue”[2].
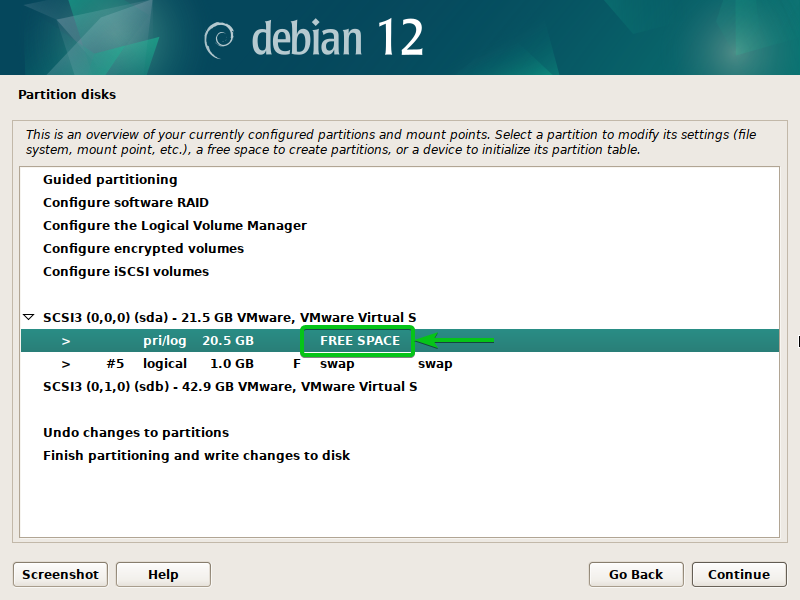
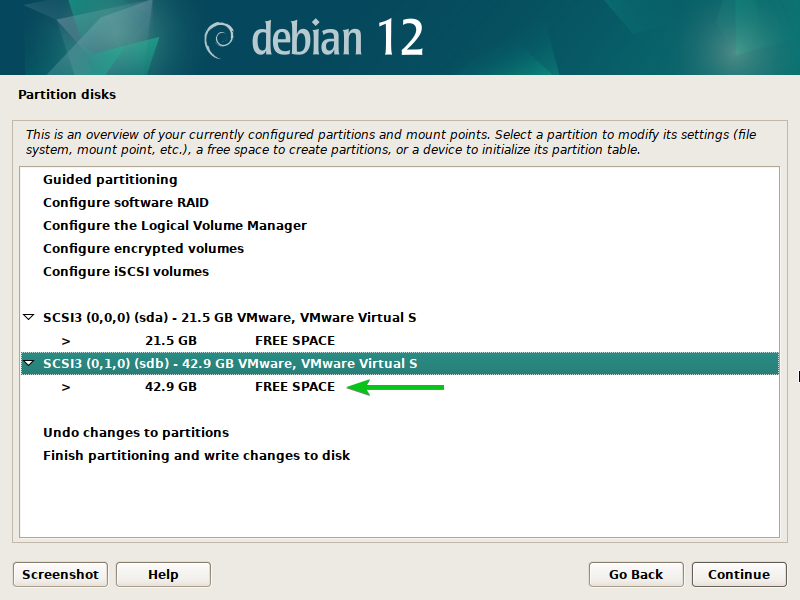
All the installed disks[1,3] and the available partitions[2] should be listed.
NOTE: In this article, we will show you the ordinary disk partition (MBR/GPT) only. If you want to manage the disks using LVM, read this article. If you want to configure a RAID array, read this article. If you want to install Debian 12 on encrypted disk, read this article.

Deleting an Existing Partition from the Disk
If you have an existing partition table on the disk and some partitions and you want to install Debian 12 on that disk, you will want to delete some partitions to make room for Debian 12.
To delete a partition, double-click (LMB) on the partition that you want to delete.

Double-click on “Delete the partition”.

The partition should be removed from the partition table of the disk. The disk space that is reserved for the partition is now labeled as FREE SPACE and it can be used to create new partitions.
Creating a New Partition Table on the Disk
If you don’t have any import partitions on the disk, you may consider creating a new partition table; this removes all the existing partitions from the disk.
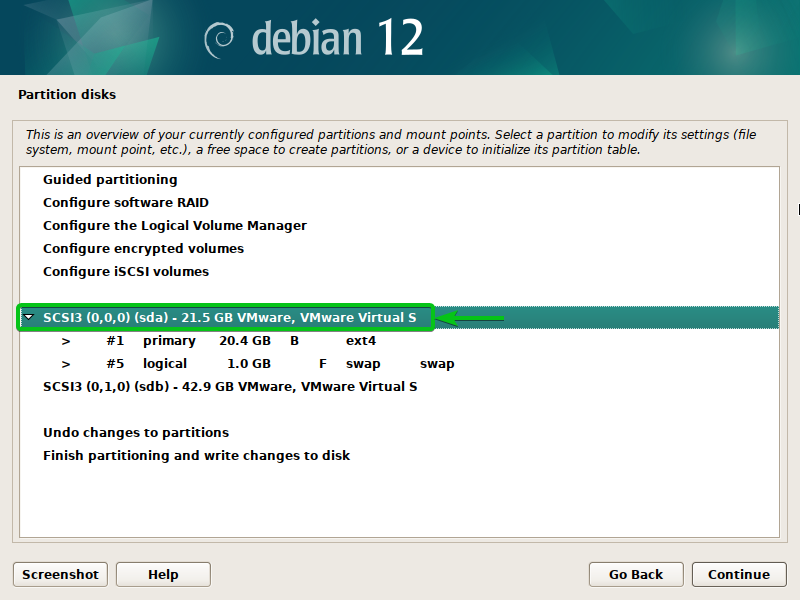
To create a new partition table on a disk, double-click (LMB) on the disk.
Select”Yes”[1] and click on “Continue”[2].

A new partition table should be created on the disk. You will be able to create new partitions on the FREE SPACE of the disk.
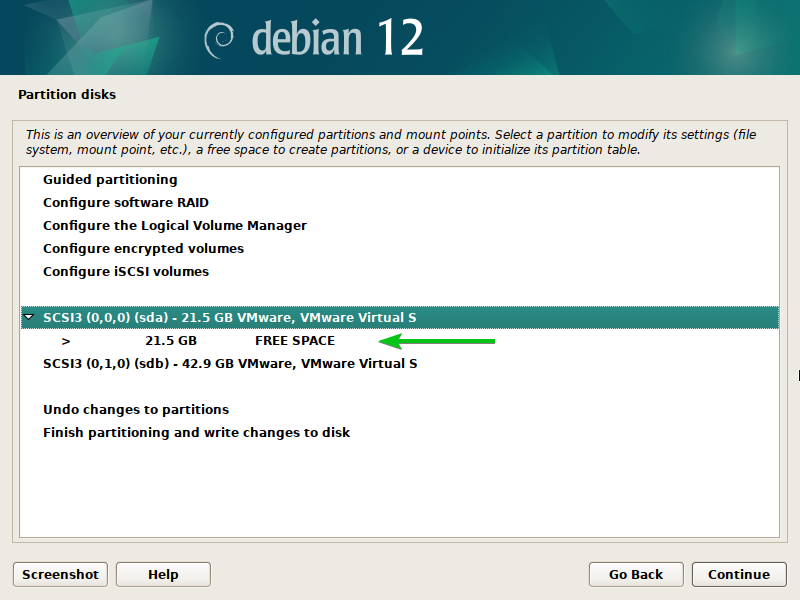
We create a new partition table for our other disk as well.
Creating a New Partition on the Disk
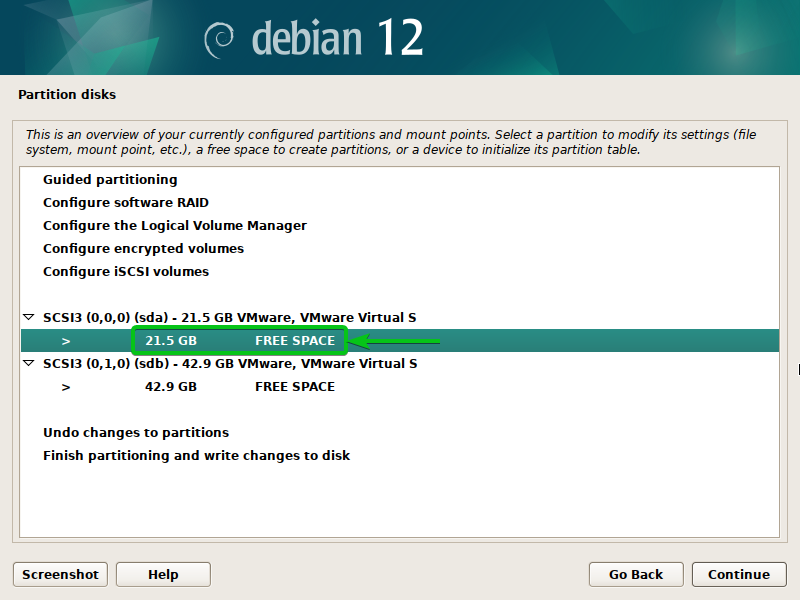
To create a new partition on the disk, double-click (LMB) on the FREE SPACE.
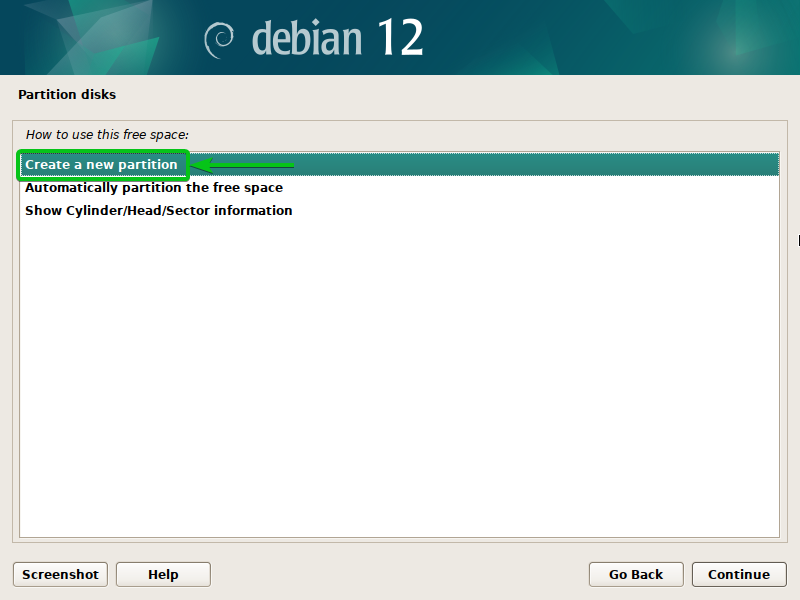
Double-click (LMB) on “Create a new partition”.
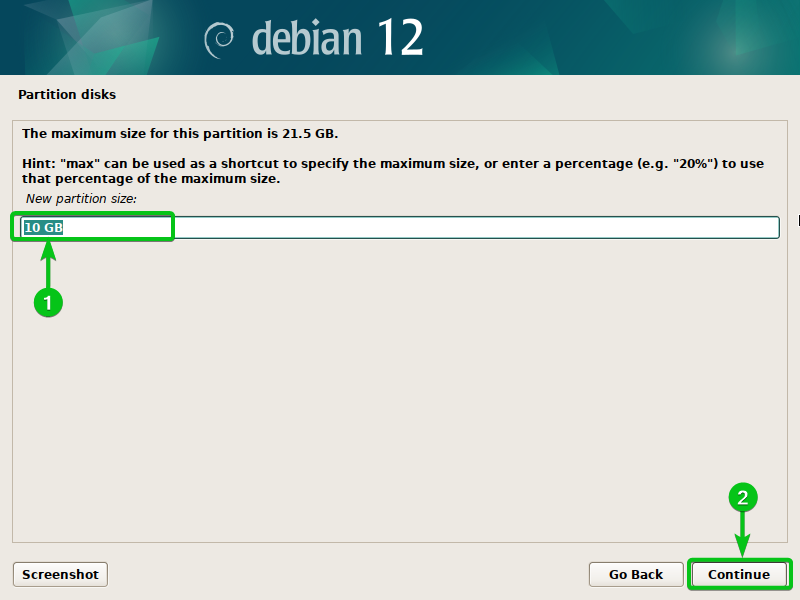
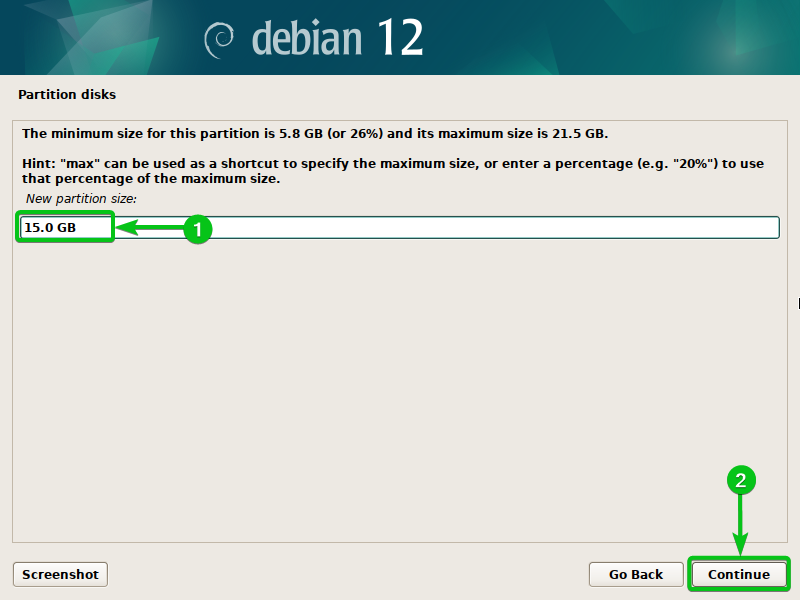
Type in the size of the new partition.
For example, if you want to create a 10 GB partition, type in “10 GB” in the “New partition size” section[1] and click on “Continue”[2].
If you want to create a 500 MB partition, type in “500 MB” in the “New partition size” section[1] and click on “Continue”[2].
If you want to create a partition that is 20% of the total size of the disk (let’s say), type in “20%” in the “New partition size” section[1] and click on “Continue”[2].
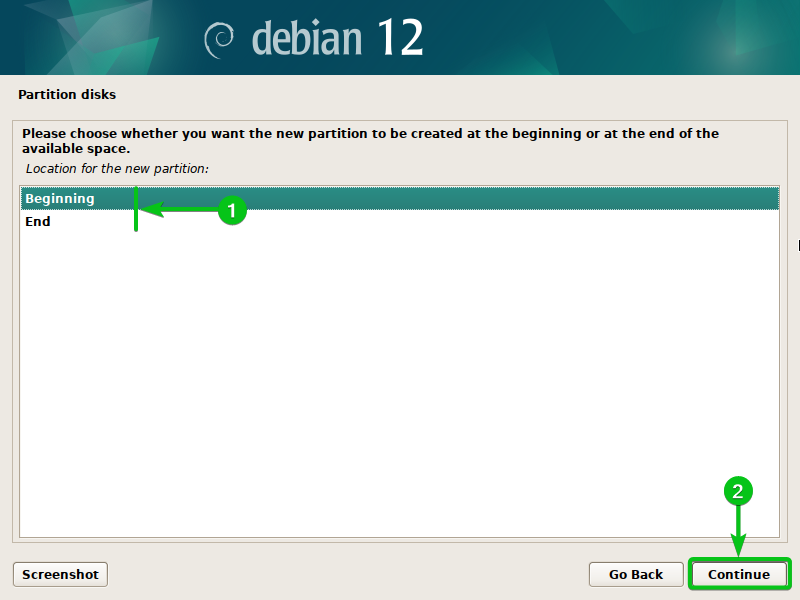
You can create the partitions at the beginning or end of the partition table. If you create the partitions at the end of the partition table, you can create more partitions before them. If you create the partitions at the beginning of the partition table, you can create more partitions after them. This is a means of keeping the partitions of a partition table in a certain order.
If you want to create the partition at the beginning of the partition table, select “Beginning”[1] and click on “Continue”[2].
If you want to create the partition at the end of the partition table, select “End”[1] and click on “Continue”[2].
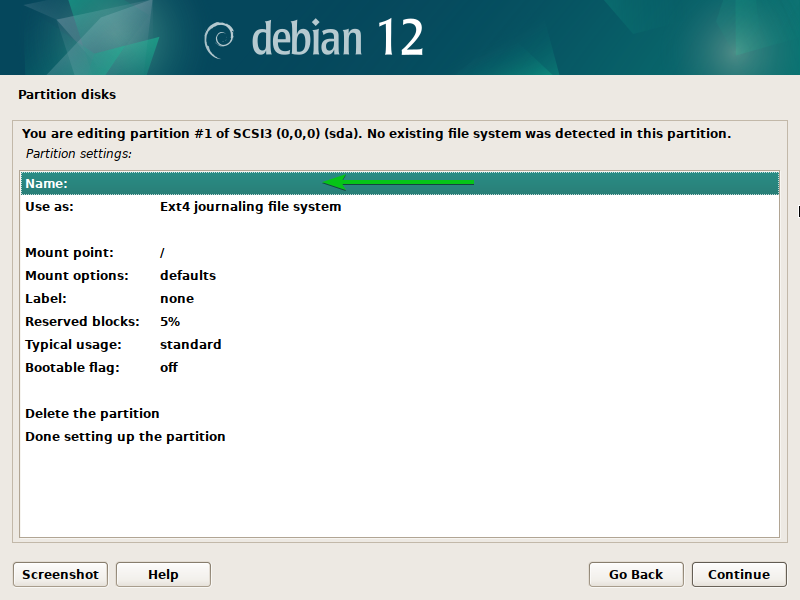
You will see a lot of options that you can tweak for the new partition. We will explain all of these options one by one.
First, to set a name for the partition so that you can easily identify it and keep the partitions organized, double-click (LMB) on the “Name” option.
The partition should be named.
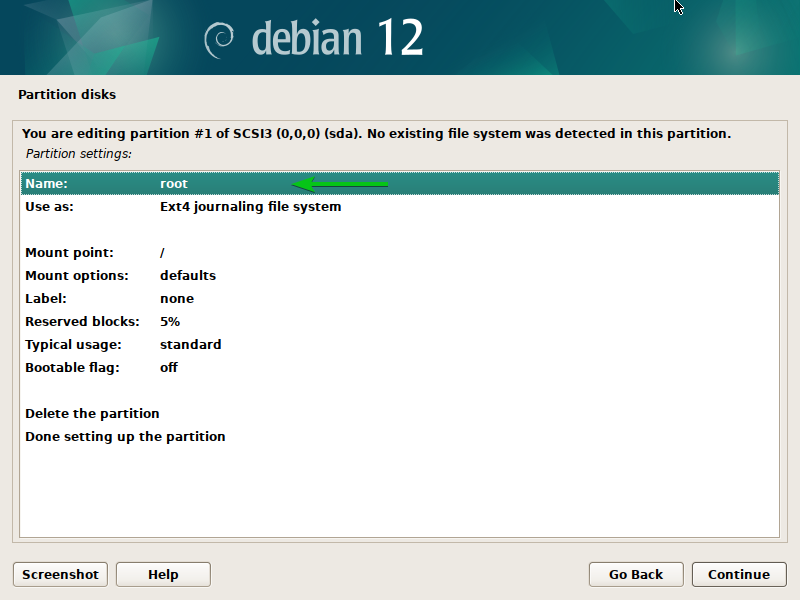
To change the filesystem of the partition, double-click (LMB) on the “Use as” option.
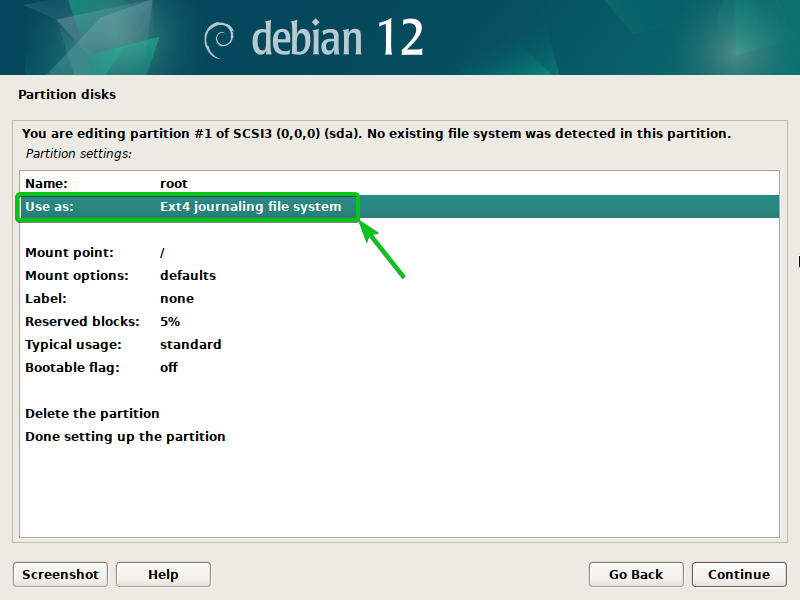
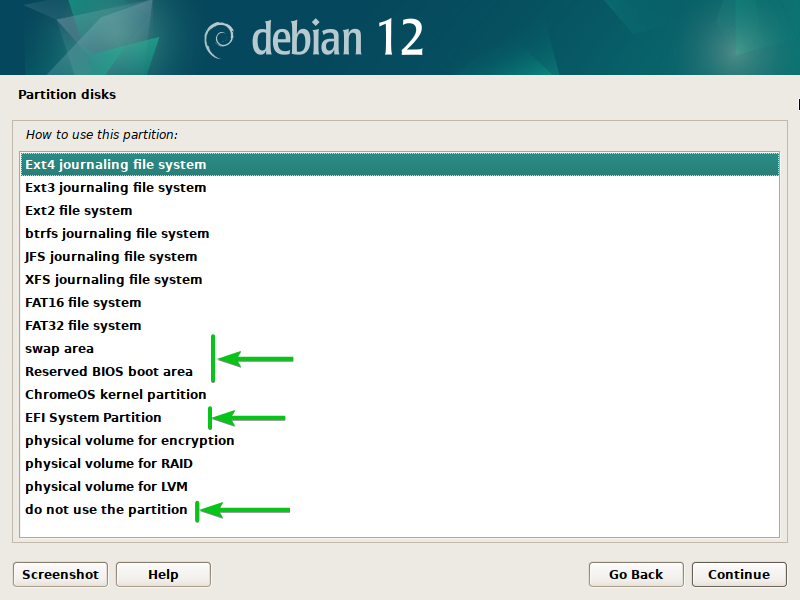
You will see the different types of filesystems that you can use for the partition.
If you want to use the partition for something other than storing the files, you can select one of these special options:
swap area: Select this option If you want to use this partition for storing the SWAP data.
Reserved BIOS boot area: Select this option if you want to use this partition for installing the Debian 12 BIOS bootloader (for the older generation motherboards without UEFI support).
EFI System Partition: Select this option if you want to use this partition for installing the Debian 12 UEFI bootloader (for the new generation motherboards).
Do not use the partition: If you don’t want to use this partition for Debian 12 installation and instead just leave it be, select this option.
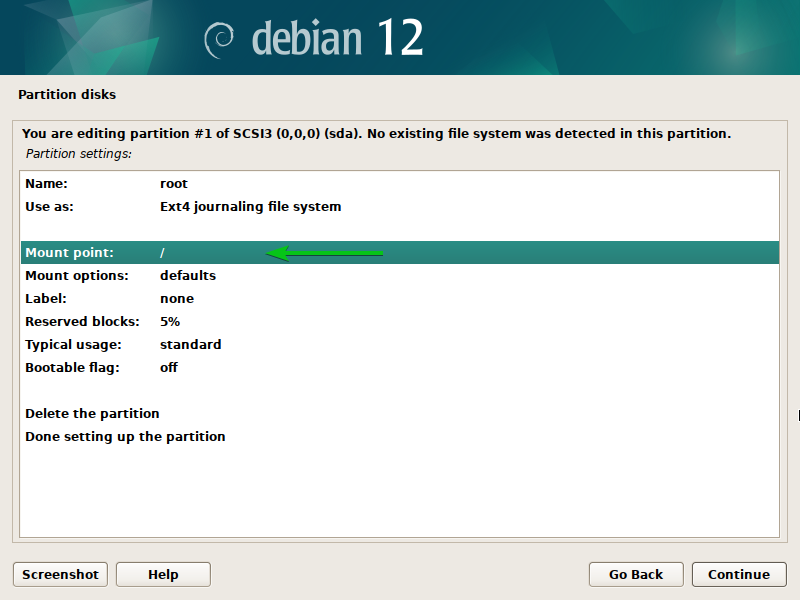
To change the path where this partition will be mounted, double-click (LMB) on the “Mount point” option.
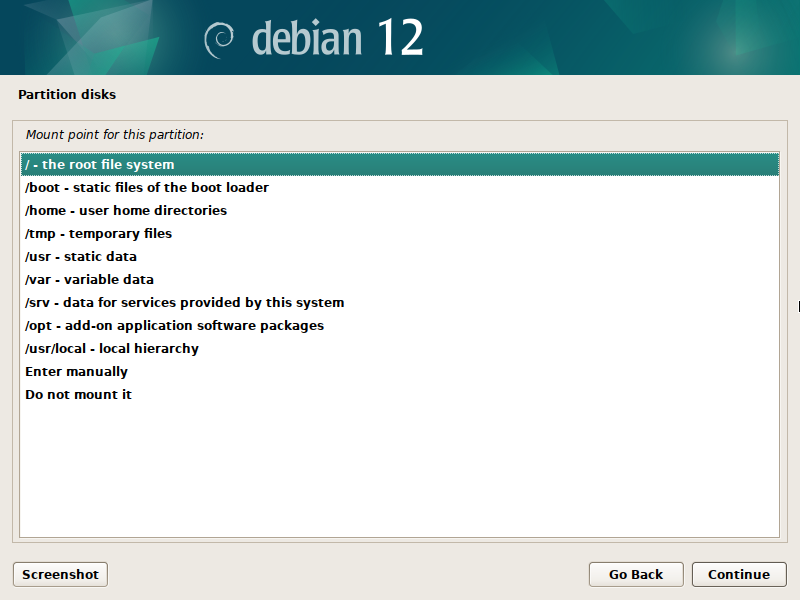
You will see the different predefined mount points. You can select a mount point from the list.
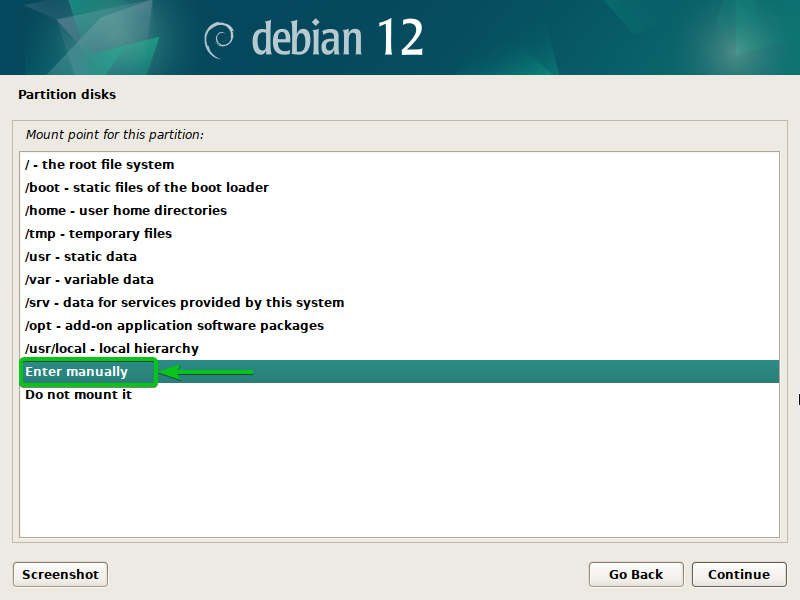
If you want to mount the partition in a custom path, double-click (LMB) on “Enter manually”.
Type in your desired mount point in the “Mount point” for this partition section[1] and click on “Continue”[2].

Different filesystems have different mount options. The default mount options are okay for most people. But if you want to tweak the filesystem mount options to get a better overall filesystem performance or application-specific performance improvements, double-click (LMB) on “Mount options”.
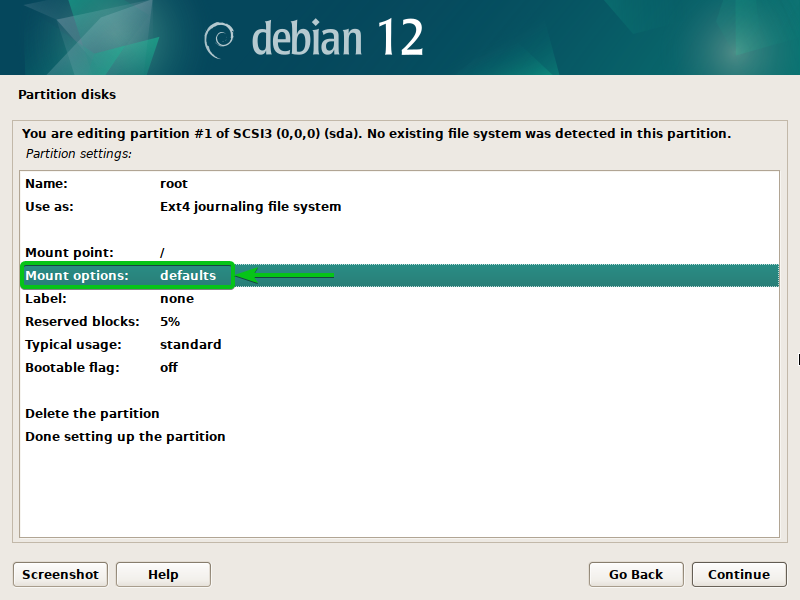
You will see many mount options depending on the filesystem that you selected[1]. Enable/Disable them as required. For more information on each of the mount options, check the manual of the filesystem that you’re trying to format the partition as.
Once you’re done, click on “Continue”[2].

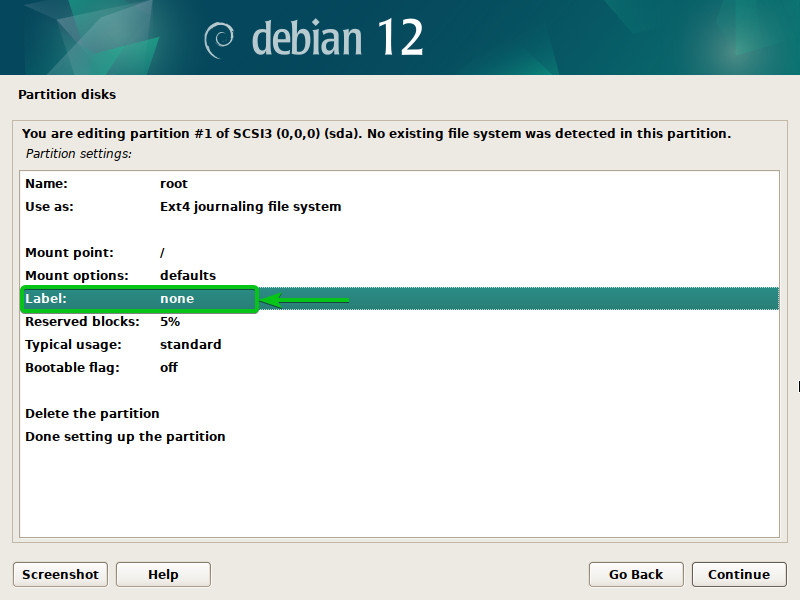
The “Label” is another way of referring to a partition of a disk in Debian/Linux. It’s a good idea to set an appropriate label for the partition.
To change the label of the partition, double-click (LMB) on “Label”.
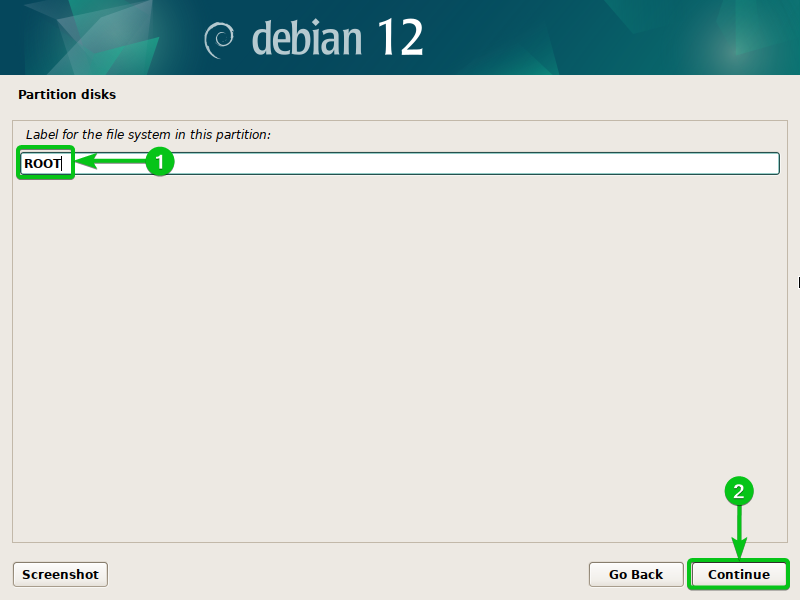
Type in the label for the partition[1] and click on “Continue”[2].
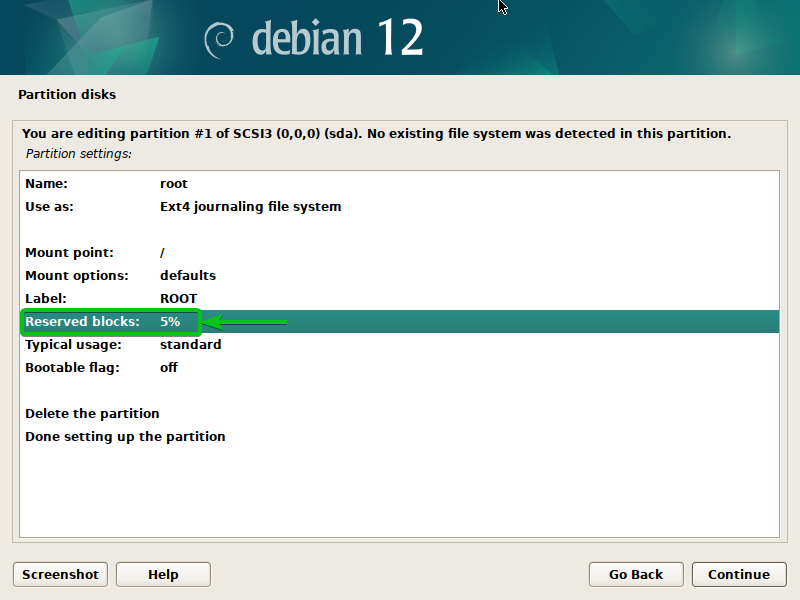
The reserved blocks of a filesystem are a portion of disk space that’s set aside for the superuser (root) of Debian/Linux to ensure the system stability even when the filesystem is filled up with data. If the filesystem is allowed to be filled with data, it will crash and the essential Debian/Linux services will become unresponsive. The reserved blocks of a filesystem prevent those problems.
The default reserved blocks percentage (5%) is enough for most people. If you have any application-specific requirements, you can double-click (LMB) on the “Reserved blocks” option and adjust the reserved blocks percentage for the filesystem.
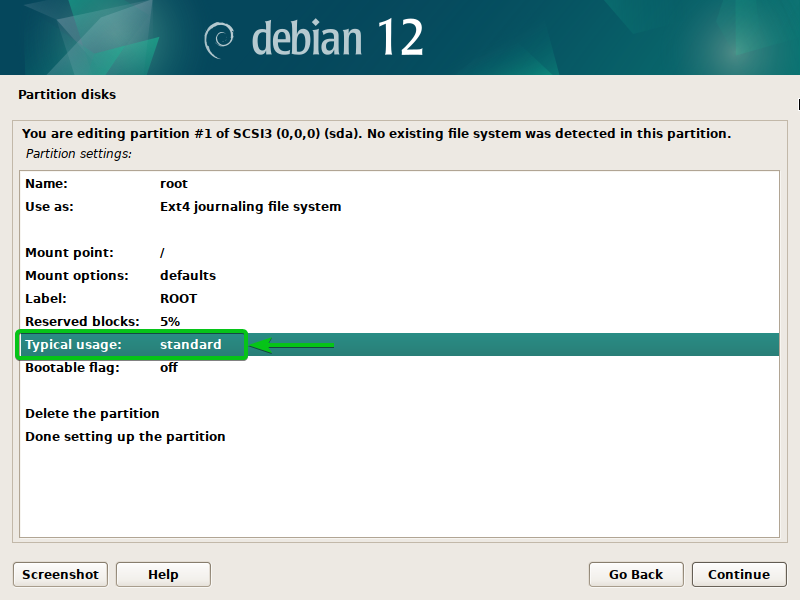
The default “Typical usage” of the filesystem is set to “standard”. This is good enough for most use cases.
To change it, double-click (LMB) on the “Typical usage” option.
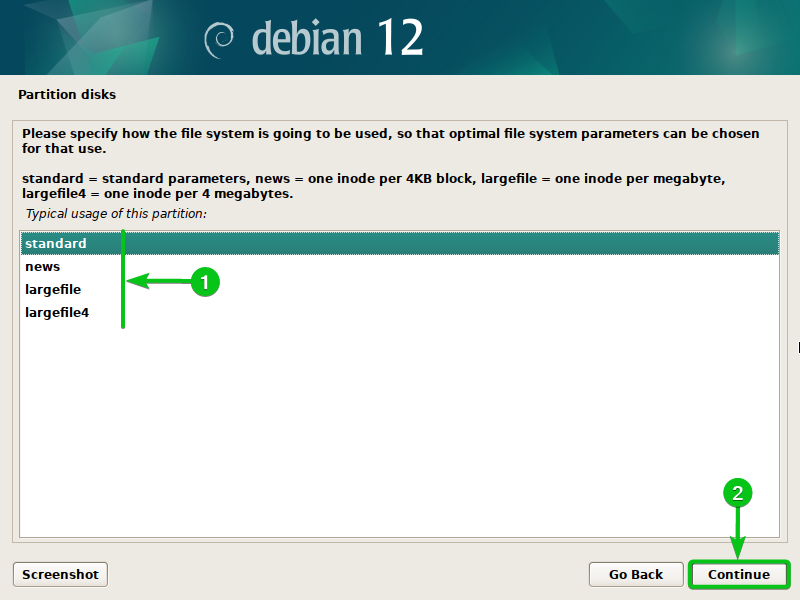
You will see the following options[1]:
standard: This option applies the standard filesystem parameters to the filesystem.
news: This option configures the filesystem to allocate 1 inode per 4KB data block. This option enables the data journaling for the filesystem. Data journaling maintains the filesystem consistency and recoverability in the event of a crash or power loss.
largefile: If you plan to store only the large files on this partition, the largefile will give you a better performance as it allocates 1 inode per 1MB data block. This reduces the number of inodes that the filesystem needs to keep track of, improving the filesystem performance significantly.
largefile4: If you plan to store only the very large files on this partition, largefile4 will give you the best performance as it allocates 1 inode per 4MB data block. This reduces the number of inodes that the filesystem needs to keep track of, improving the filesystem performance significantly.
Once you’re done with a selection, click on “Continue”[2].
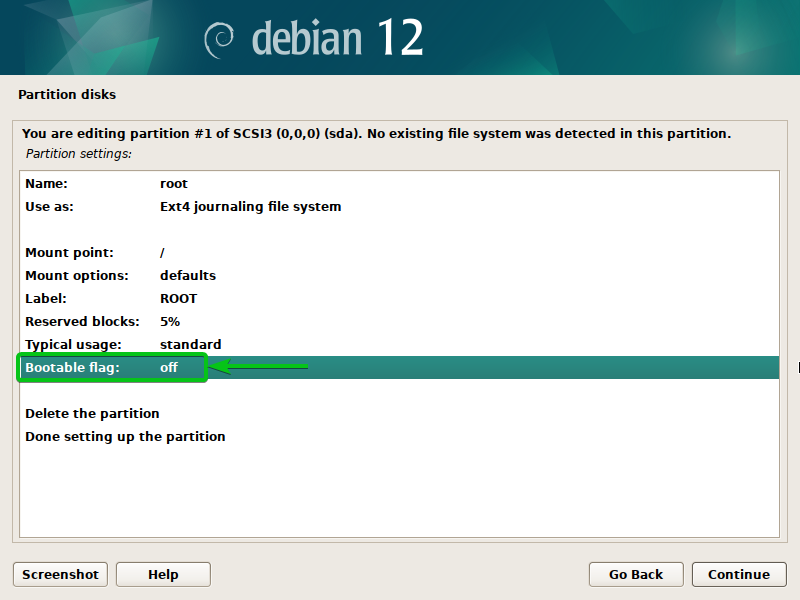
If you’re using an older motherboard that supports the BIOS-based bootloaders only, you will want to toggle the Bootable flag on if you’re planning to install a bootloader on this partition and boot from it.
To toggle the Bootable flag of this partition, just double-click (LMB) on it.
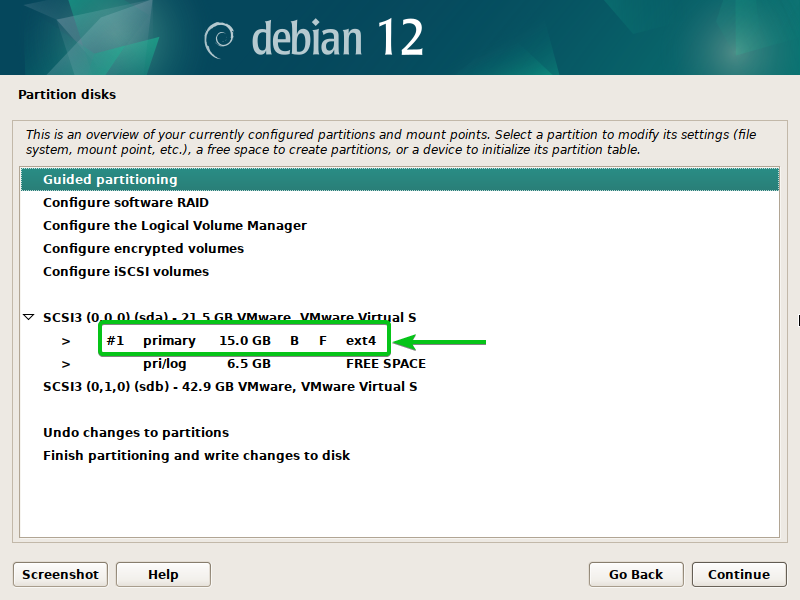
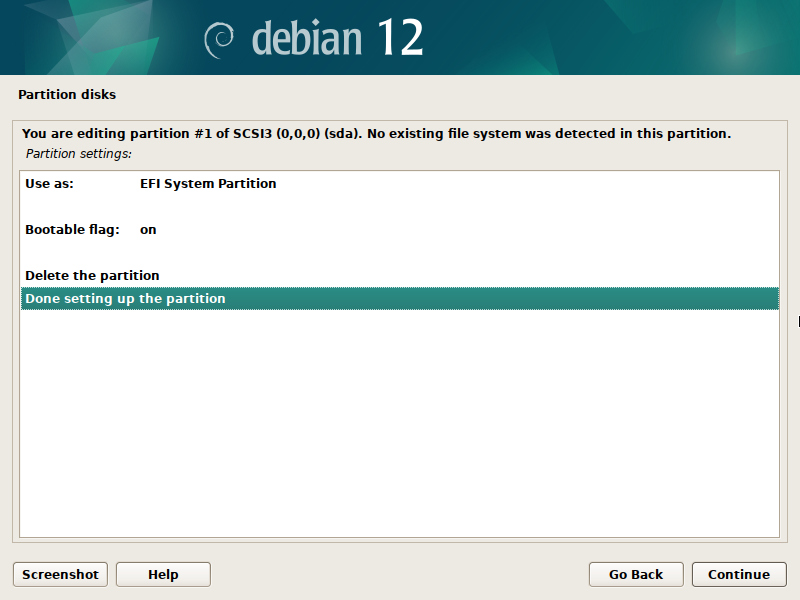
Once you’re done adjusting the filesystem and filesystem options for the partition, double-click (LMB) on the “Done setting up the partition” option to create the partition.
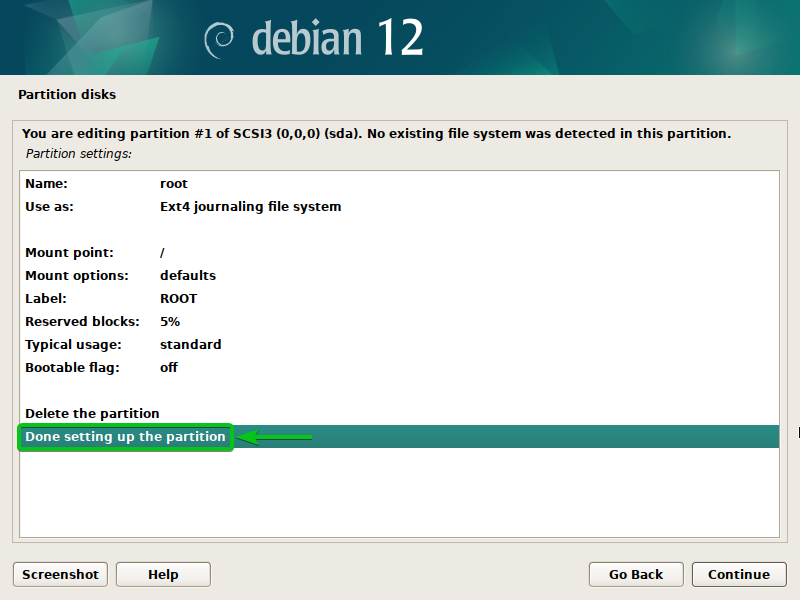
The partition should be created.
Resizing the Partitions of a Disk
You can make a partition smaller or larger than its original size.
NOTE: Making a partition smaller than its original size comes with the risk of data corruption. If you try to make a partition smaller than the size of the files/data that it contains, you may lose an important data. If you haven’t filled up the partition with files/data, you can successfully make a partition smaller without losing the data.
NOTE: If you want to make a partition larger than its original size, you must have the FREE SPACE below that partition. Making a partition larger than its original size is risk-free unlike when you make it smaller.
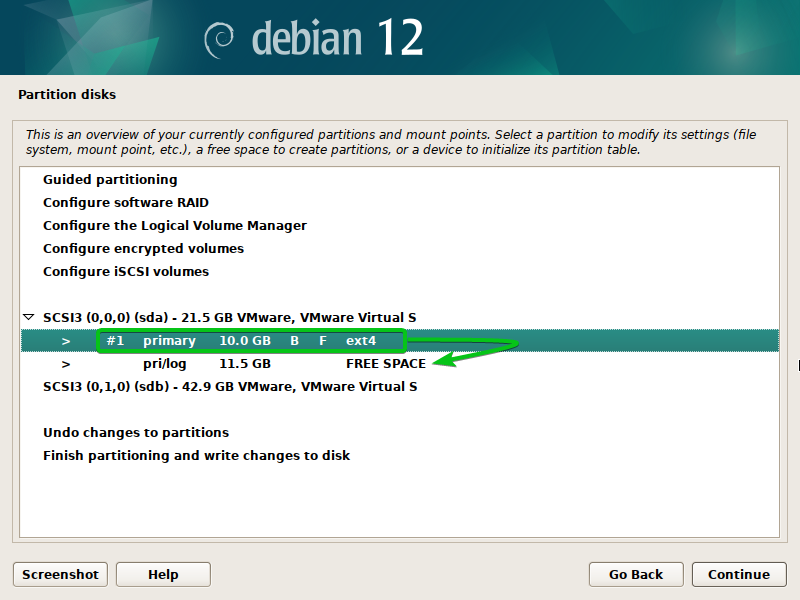
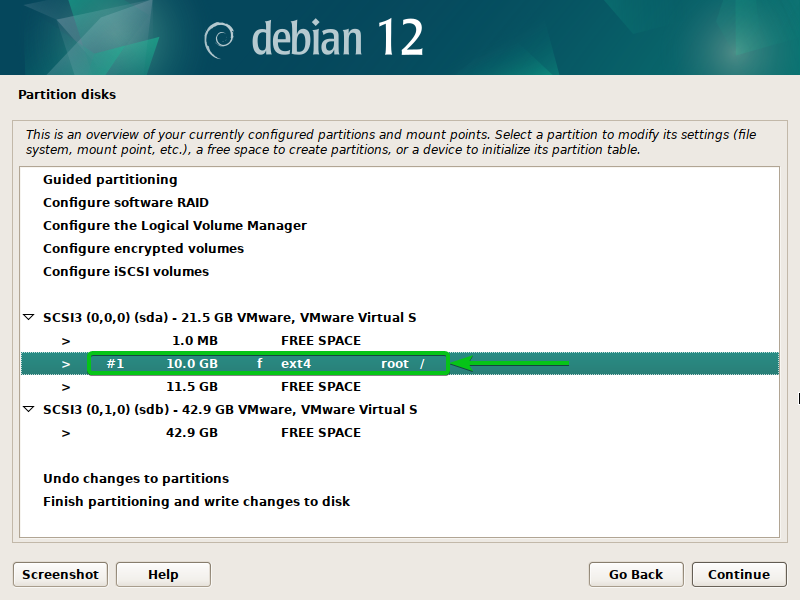
To resize a partition, double-click (LMB) on it.
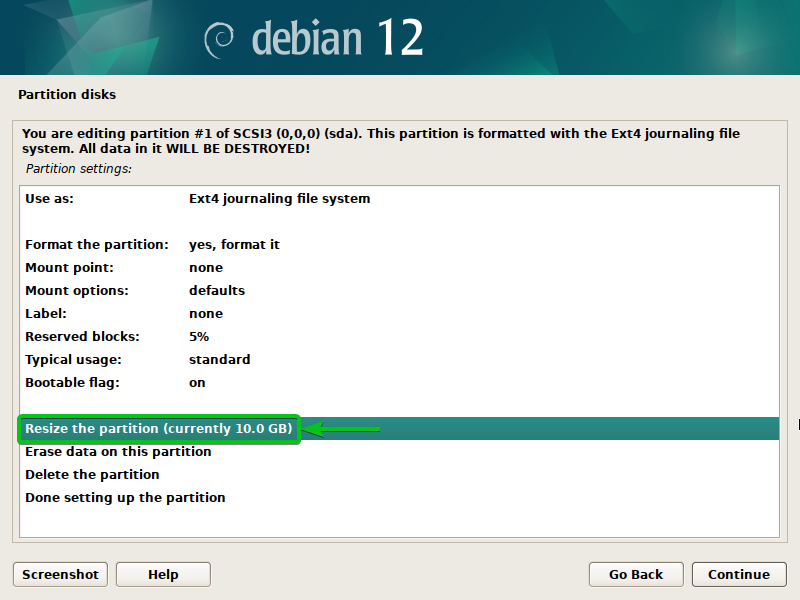
Double-click on the “Resize the partition” option.
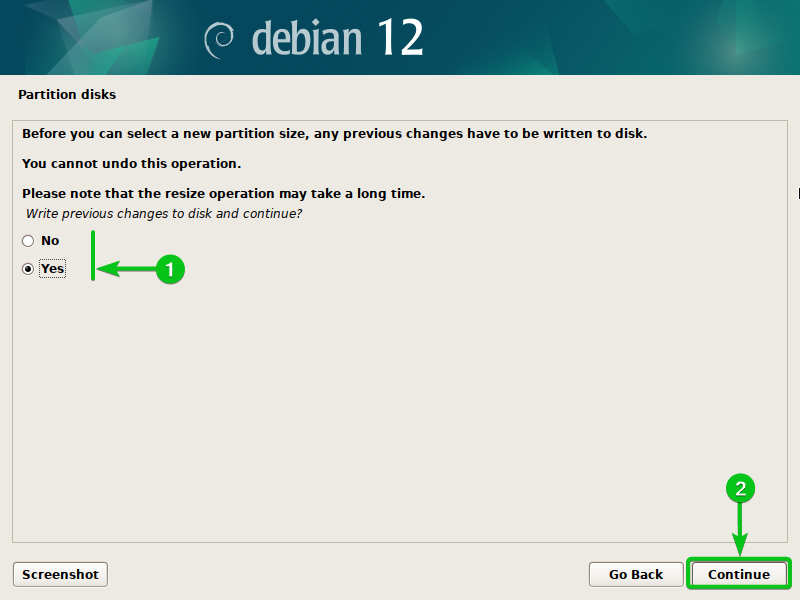
For a partition to be resized, you must save the changes to the partition table. So, make sure that you did not delete any important partitions before performing the resize operation as it will be difficult to get back the lost data once the partition table is updated.
To confirm the resize operation, select “Yes”[1] and click on “Continue”[2].
Type in a new size for the partition[1] and click on “Continue”[2].
The partition should be resized.
Creating the Required Partitions for Debian 12 Installation
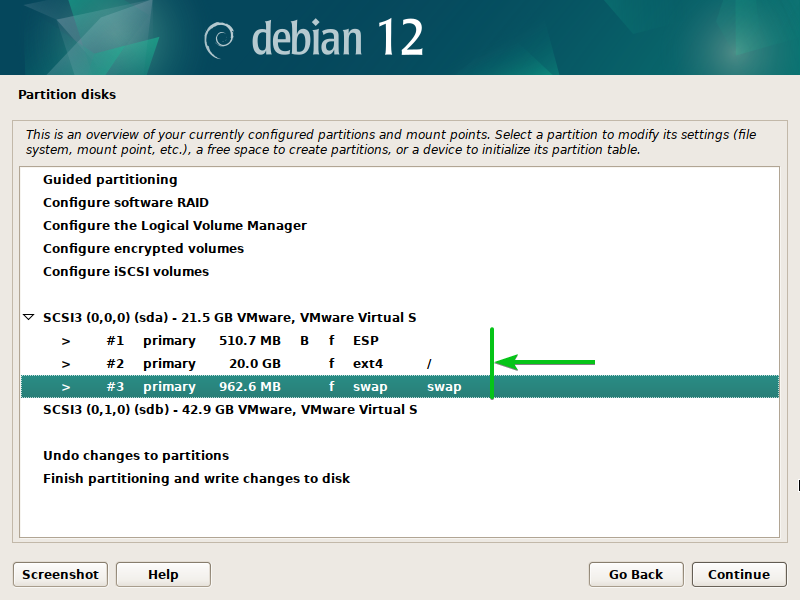
To install Debian 12 on your computer if you’re using a UEFI-supported motherboard, you need a UEFI boot partition, a root (/) partition, and an optional swap partition.
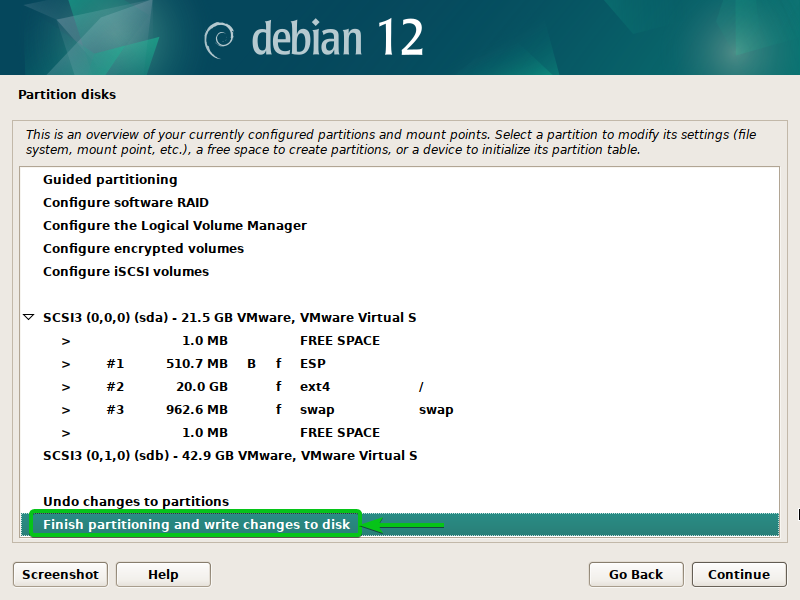
The minimal partition layout for a Debian 12 installation on a UEFI-based system is shown in the following:
The partition options for the UEFI boot partition are shown in the following:
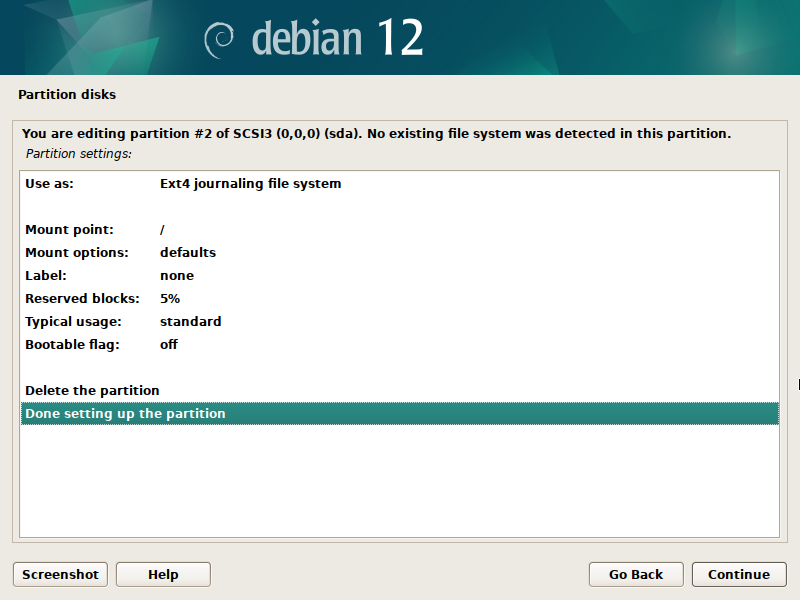
The partition options for the root (/) partition are shown in the following:
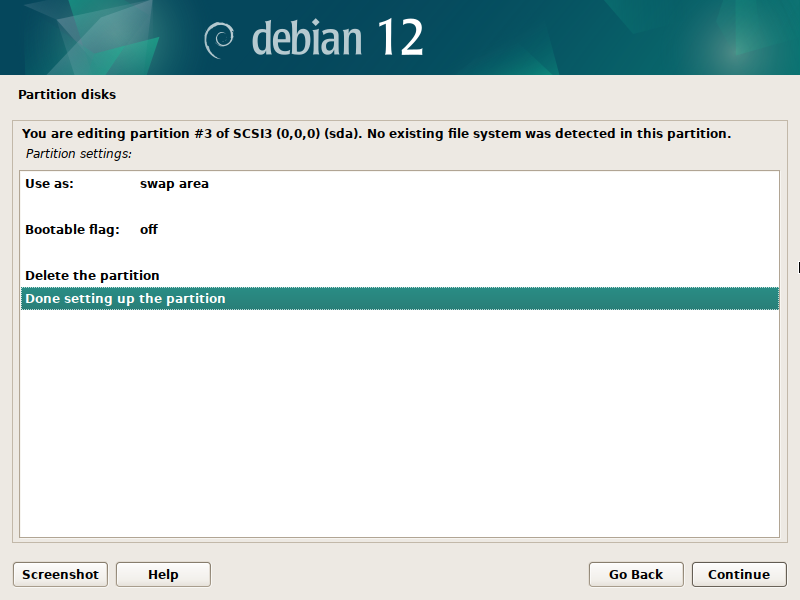
The partition options for the optional swap partition are shown in the following:
To install Debian 12 on your computer if you’re using an older BIOS-based motherboard, you need a BIOS boot partition, a root (/) partition, and an optional swap partition.
The minimal partition layout for a Debian 12 installation on a BIOS-based system is shown in the following:

The partition options for the BIOS boot partition are shown in the following:

The partition options for the root (/) partition are shown in the following:

The partition options for the optional swap partition are shown in the following:

Saving the Partition Table Changes to the Disk
Once you’re done with disk partitioning for your Debian 12 installation, you have to save the partition table on the disk to continue your Debian 12 installation.
To save the partition table on the disk, double-click (LMB) on “Finish partitioning and write changes to disk”.
Select “Yes”[1] and click on “Continue”[2].
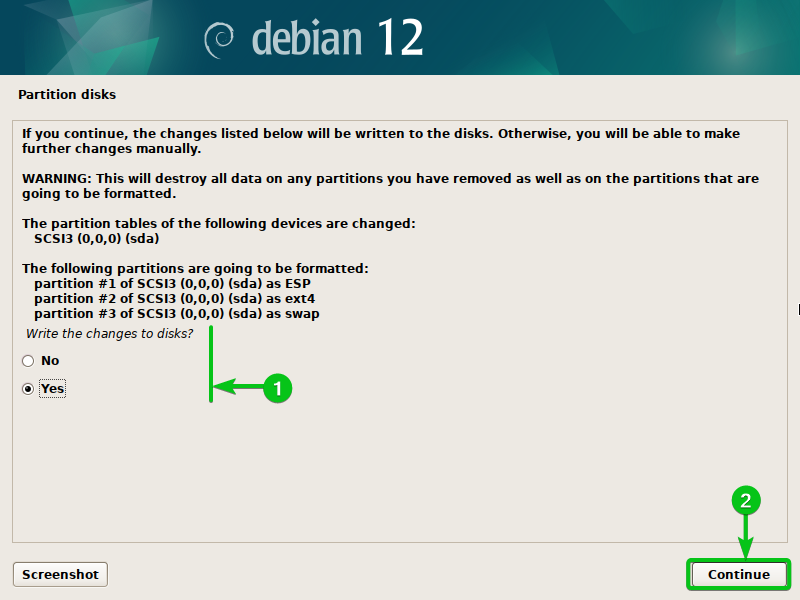
The partition table should be saved to the disk and the Debian 12 installation should continue.

Conclusion
We showed you how to use the Debian 12 installer’s partitioning tool to partition the disks for the Debian 12 installation. We also showed you how to do the guided partitioning as well as the manual partitioning for your Debian 12 installation.