
Sometimes, spending too much time on Facebook is quite irritating and users want a short break to relax their minds and do other activities. For that purpose, the users can temporarily deactivate their Facebook account.
This write-up will illustrate the instructions to temporarily deactivate Facebook.
How to Temporarily Deactivate Facebook on Android?
Deactivating the Facebook account temporarily is not difficult, you just have to perform a few steps. Keep in mind that your Facebook account removes your profile, name, and maybe the posts but you are still visible in your friend’s list. For a practical illustration of deactivating the Facebook account, the following steps are carried out.
Step 1: Open Facebook Account Settings
Open your Facebook account, tap on the “3 lines” icon, and press the “Settings” option under the “Settings & privacy” drop-down to open it:

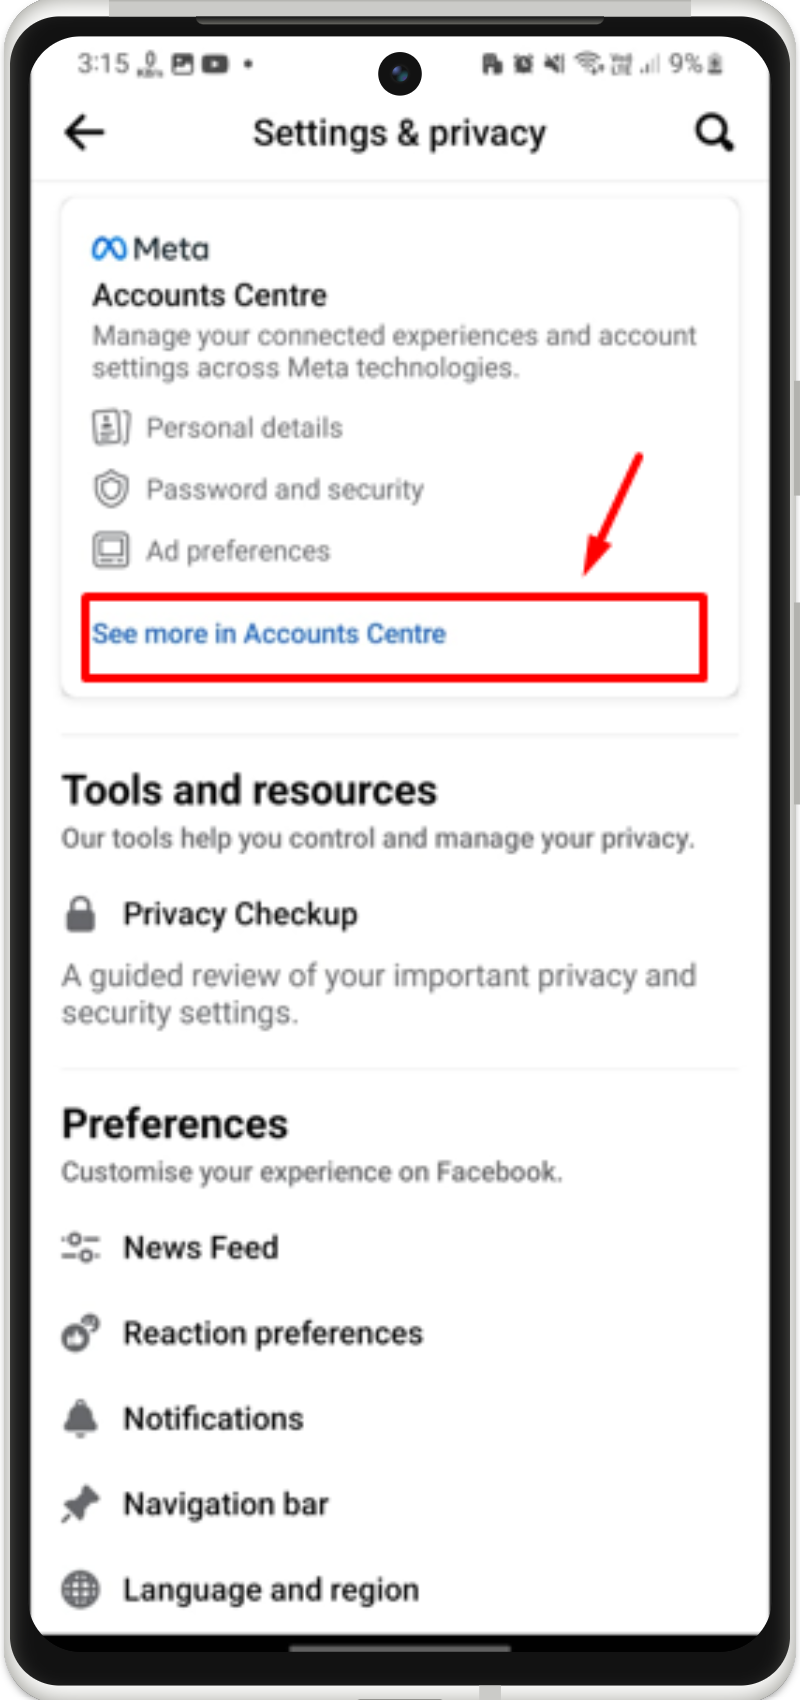
Step 2: Open Advance Center
Under the “Settings & privacy”, tap on the “See more in Accounts Center” option to explore more settings options:
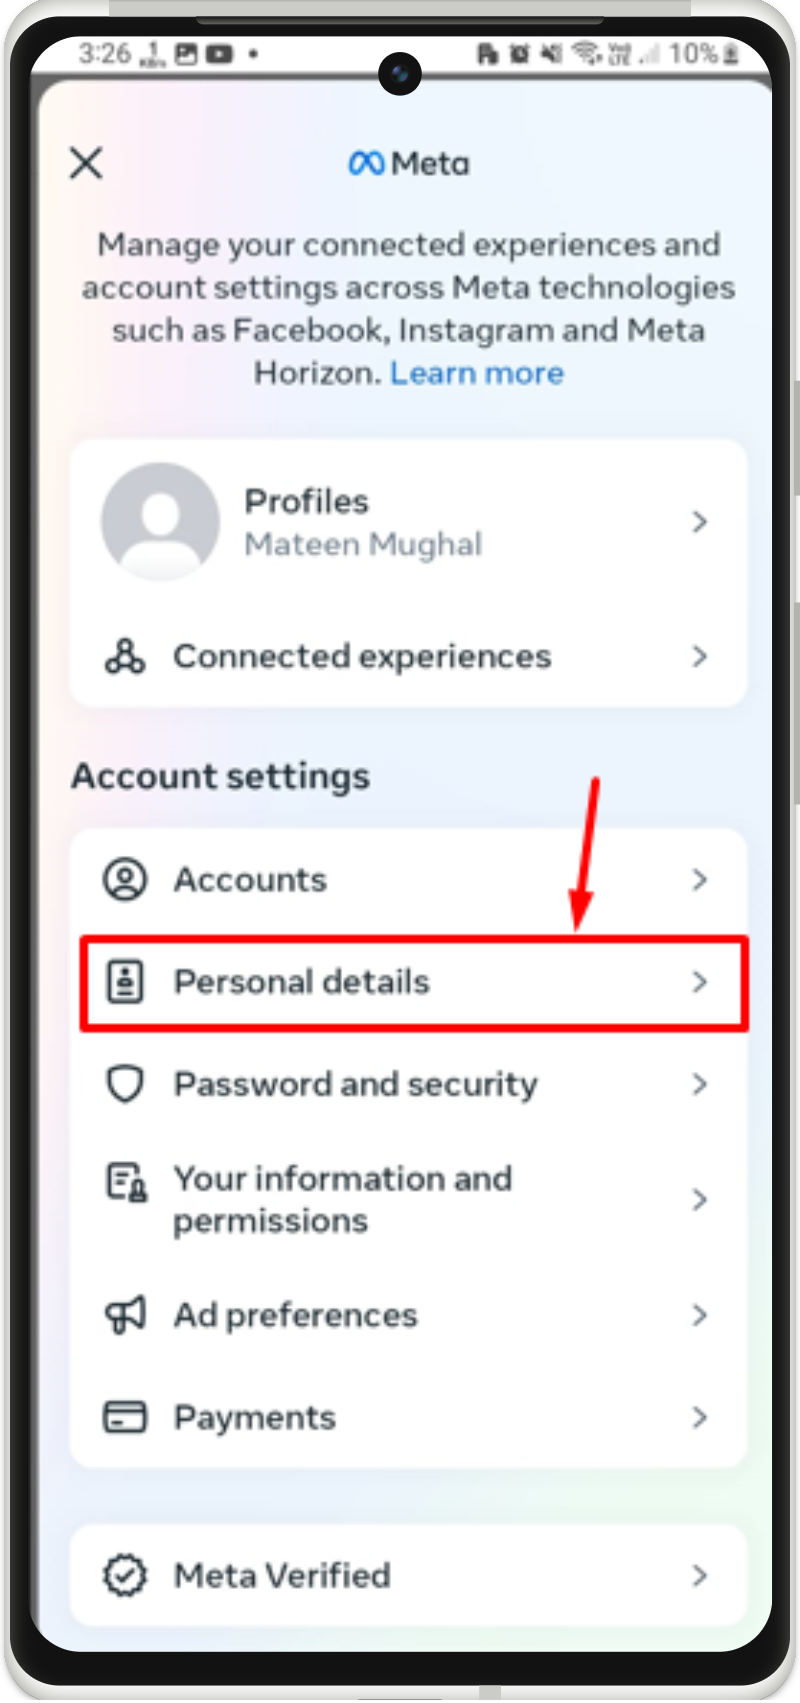
Step 3: Go to Personal Details
After that, go to the “Personal Details” to open the Account:
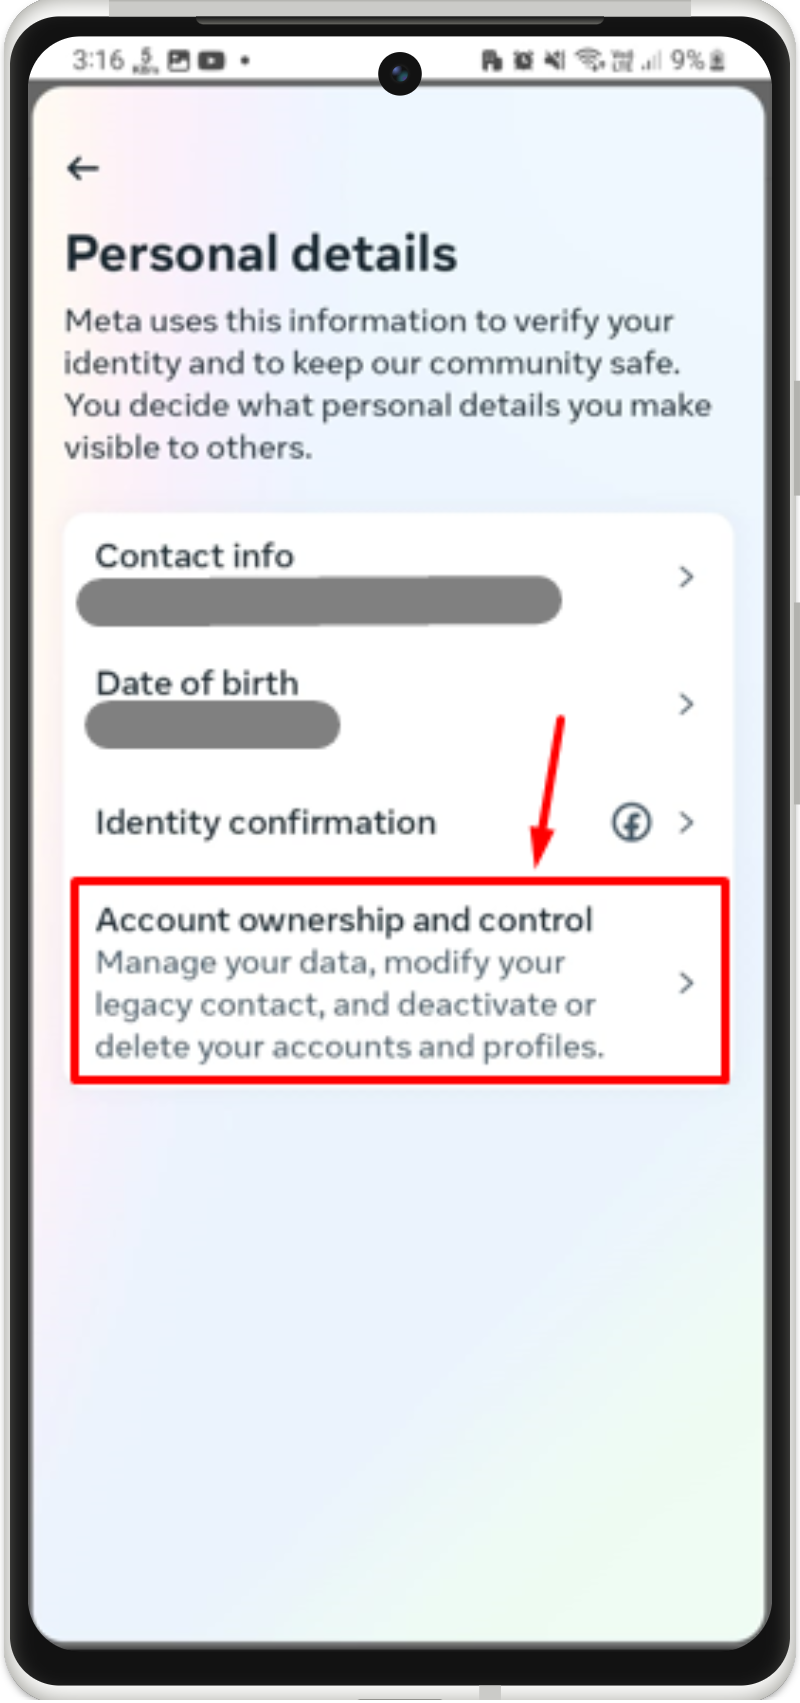
Step 4: Access Account Ownership and Control
Next, tap and open the “Access account ownership and control” option:
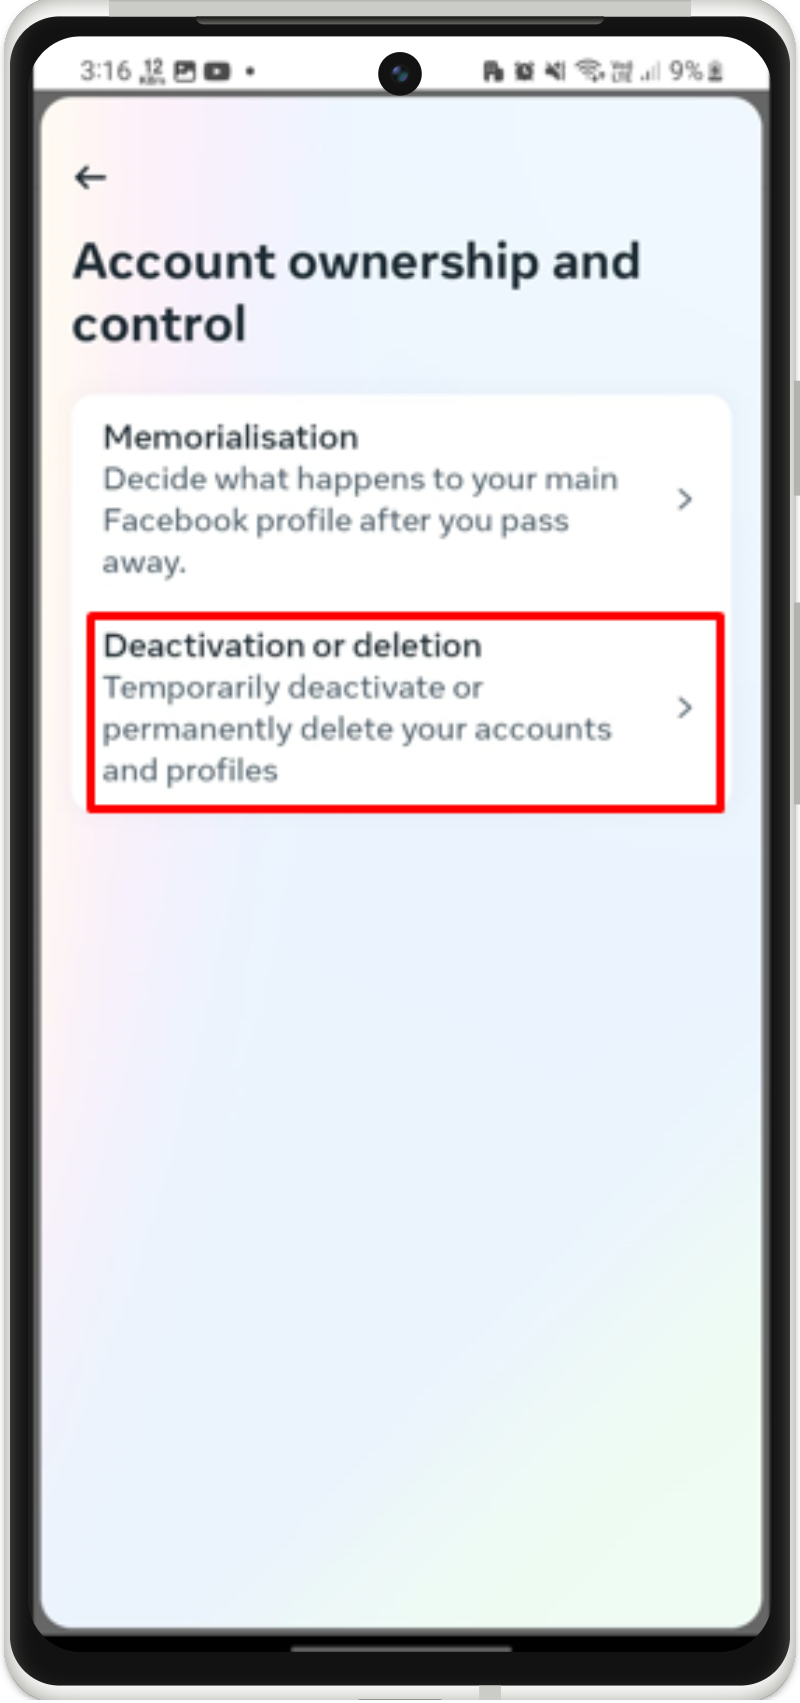
Step 5: Select Deactivation or Deletion
Select the “Deactivation or deletion” option to continue:
Step 6: Select Account
Select and tap the account to which you want to disable temporarily:

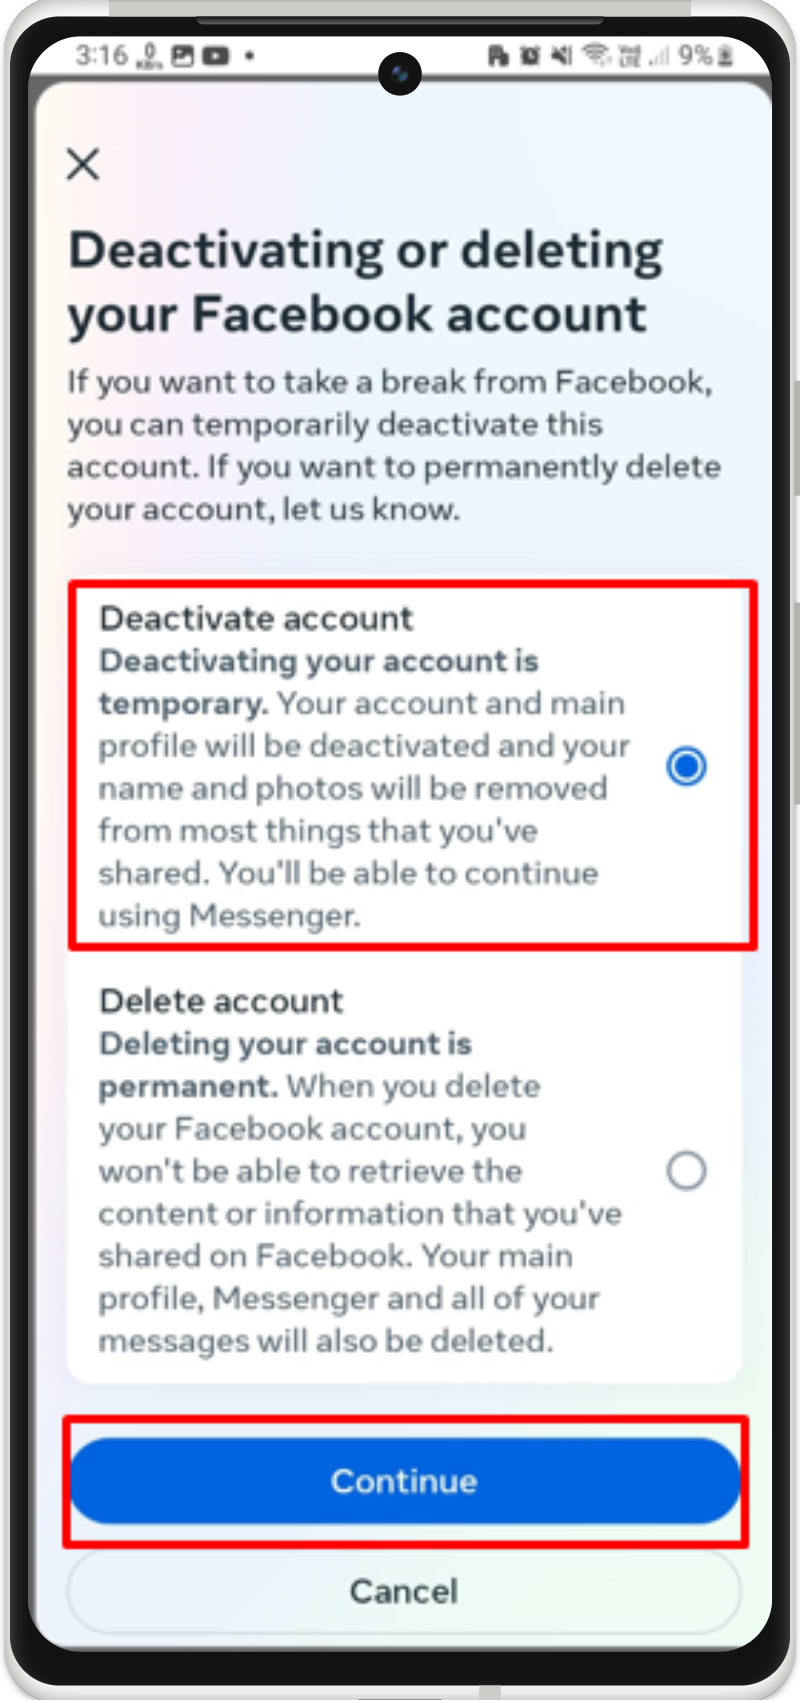
From the next interface, select the temporarily deactivate account option and tap “Continue”:
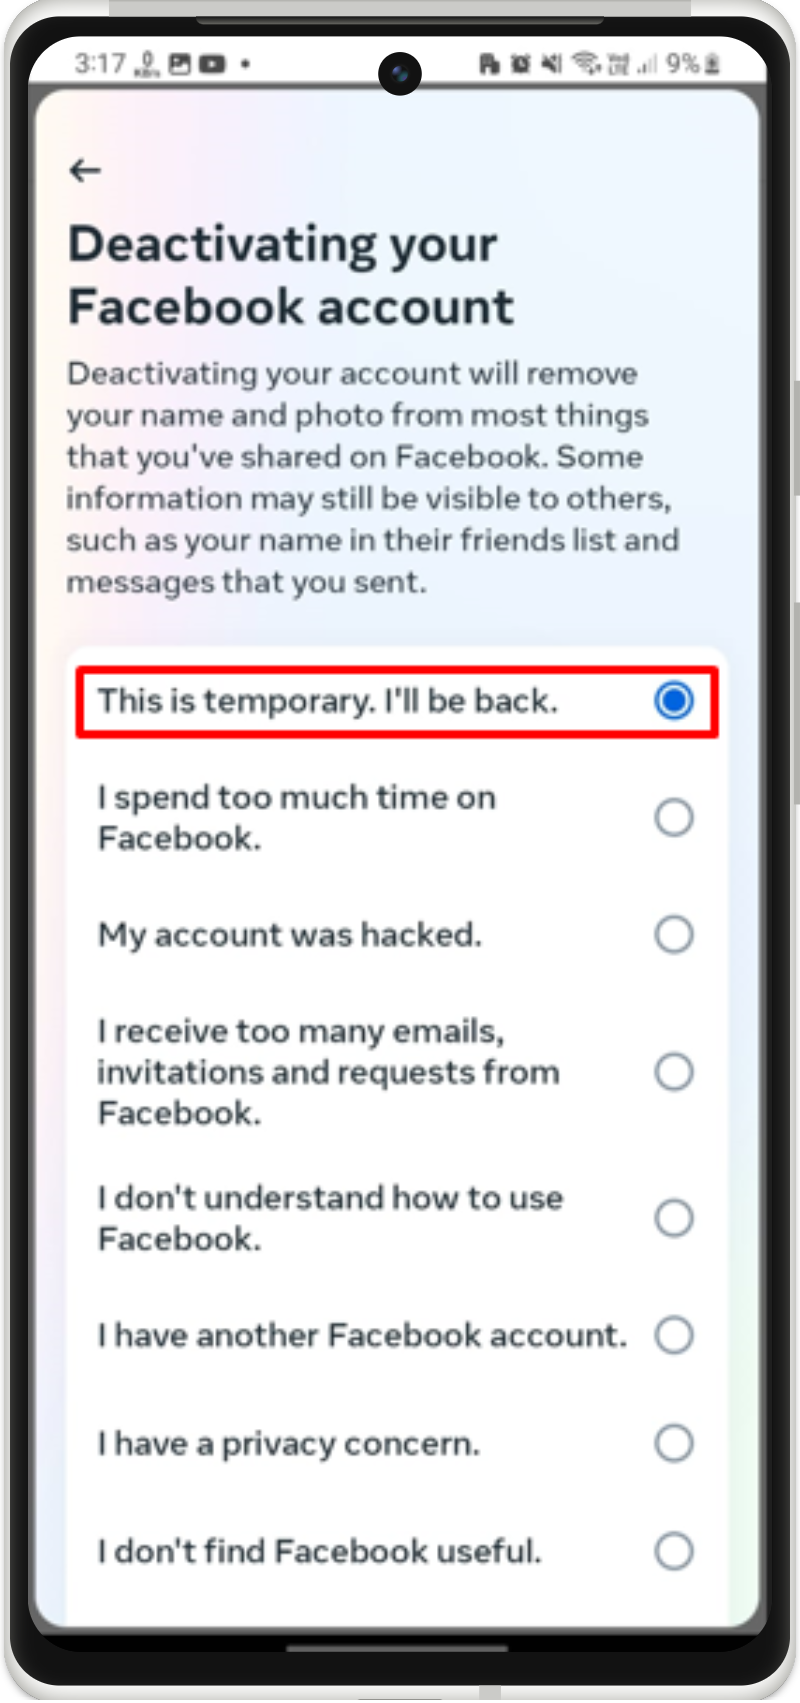
Step 7: Select Reason
You will be asked to choose the reason for deactivating the Facebook account:
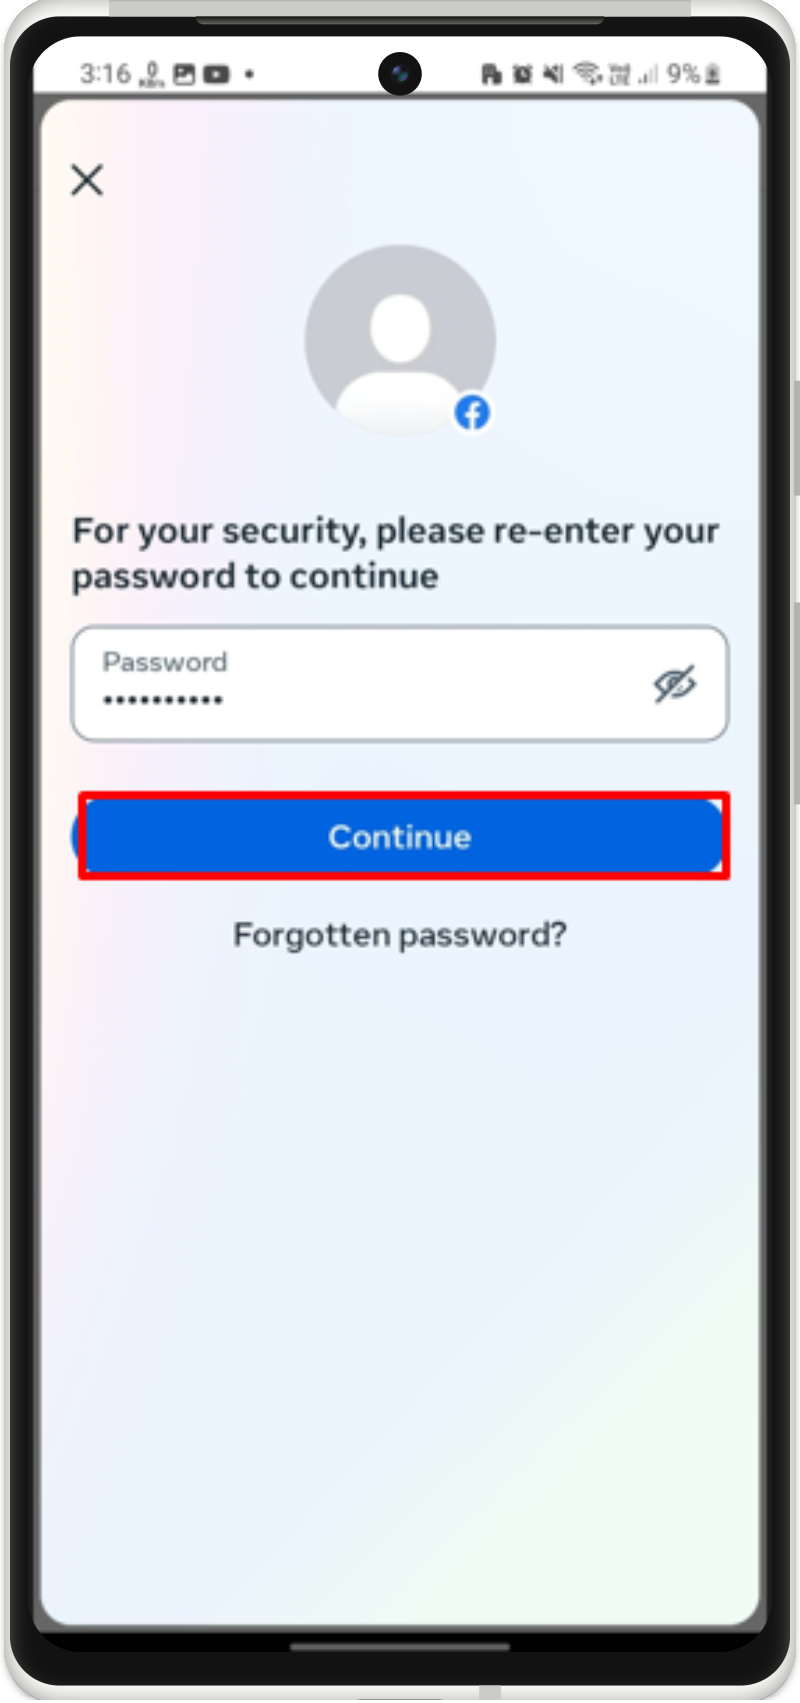
Step 8: Enter Password
Enter the Facebook account password to continue the deletion process:
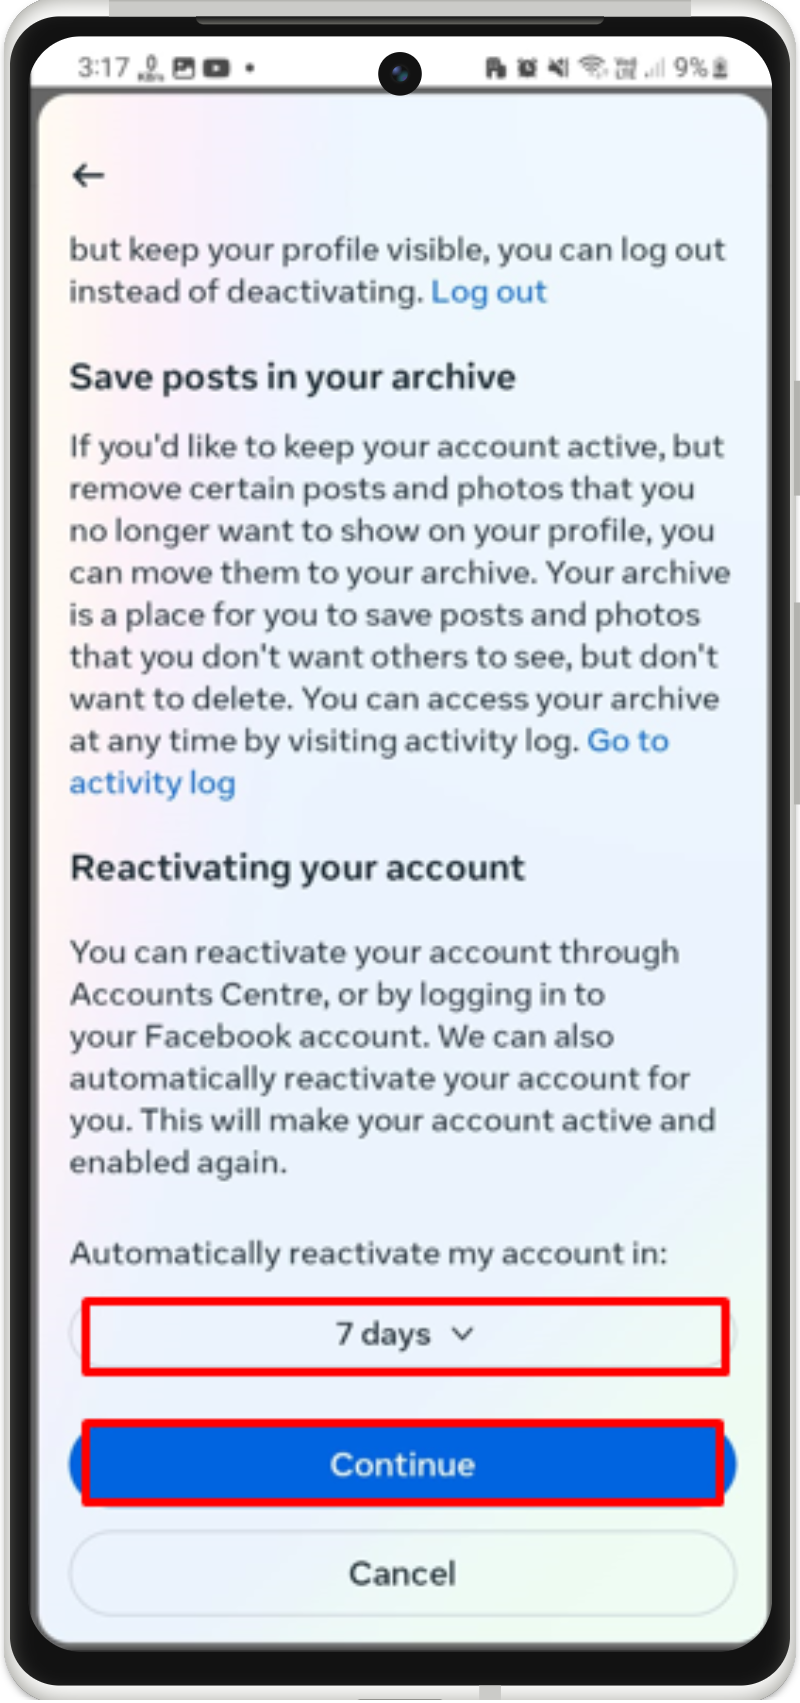
Step 9: Specify Time Frame
Afterward, select the number of days, you want to deactivate your Facebook account and press the “Continue” button:
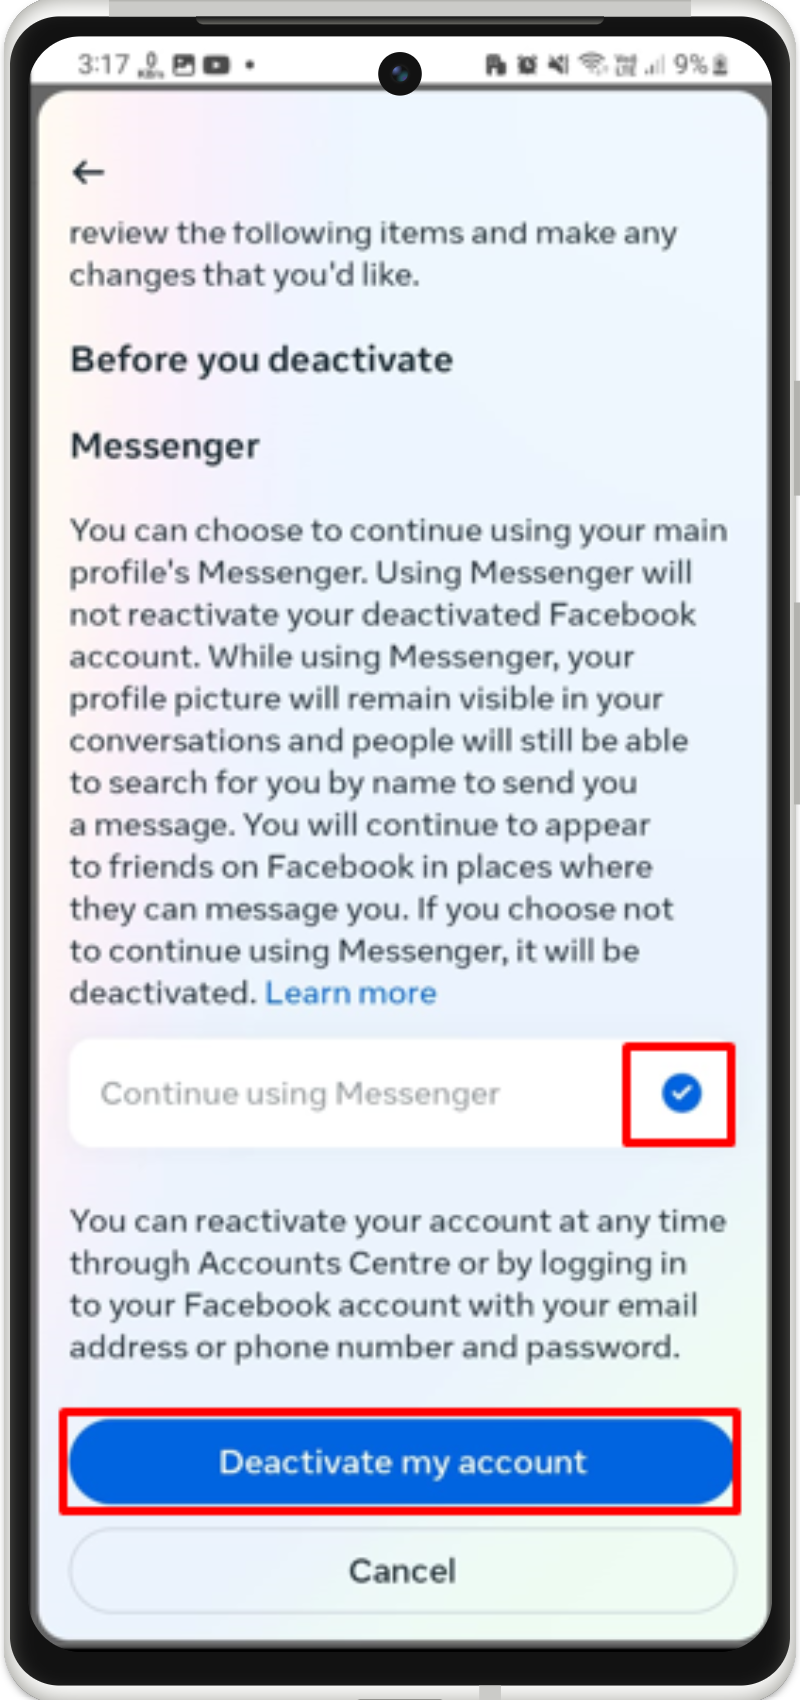
Step 10: Deactivate Facebook Account
Lastly, select the messenger option if you still want to use your messenger after deactivating and select “Deactivate my account”:
Upon doing so, the Facebook account will be deactivated.
Conclusion
To temporarily deactivate your Facebook account, open the account settings and deactivate the account under the “Personal Details > Account ownership and control” settings. In this blog, we have provided a detailed implementation of deactivating the Facebook account on Android.